As pointed out in this thread, our friend @b15azn has rigid collars available to help with the slop as the subframe slides around-
http://www.sr20-forum.com/tdmimports-kuos-garage/62964-new-here-so-gentle.html
Here is what the rigid collars do-
http://www.sr20-forum.com/851592-post18.html
And this is how much space each stud in our subframe has; All of which allows shifting and slop, especially when cornering
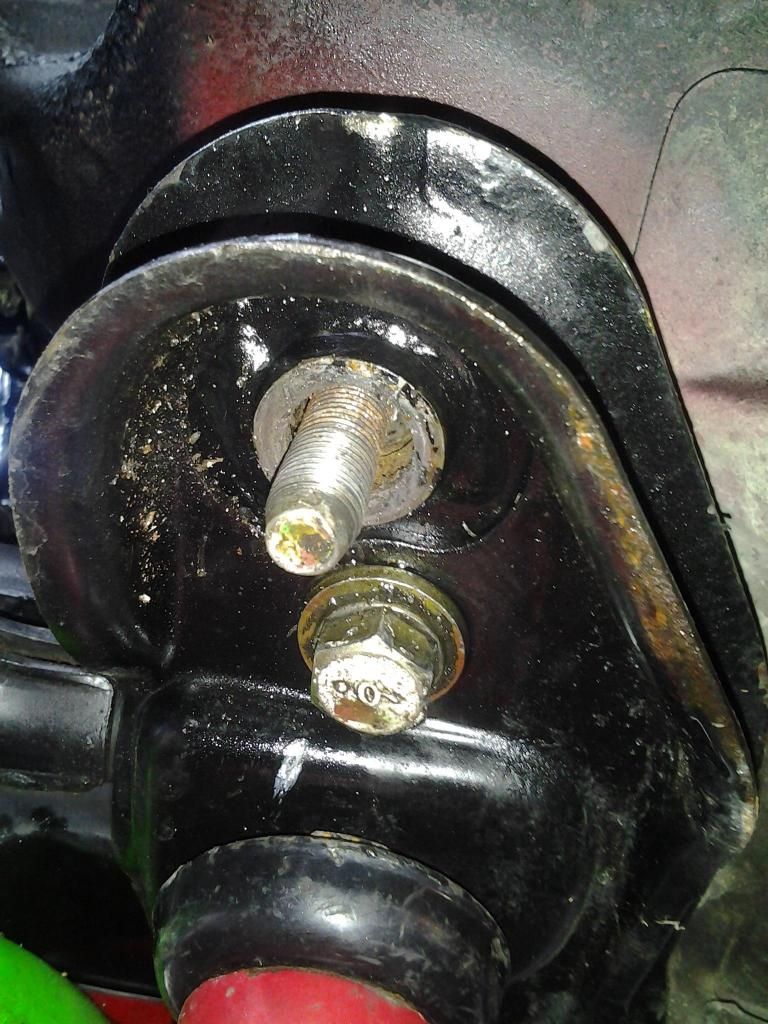
I'll be installing these on my 1992 NX2000

Here is what you get(sorry I didn't take a picture of the the ones I recieved)

4 total collars = 2 labeled S37 + 2 labeled S30
The S37 has a wider body than the S30 and they are tapered to help with installation.
Tools needed:
17mm Socket and corresponding ratchet/breaker bar
17mm Wrench
Jack
Jack stands
Whatever tools you need to remove your wheels
Installation:
1) Raise the front of the car and put it securely on jack stands(make sure to clear the subframe completely)
2) Remove both front wheels (It helps out A LOT, I found out the hard way:ugh
Once you have them off, you'll see this
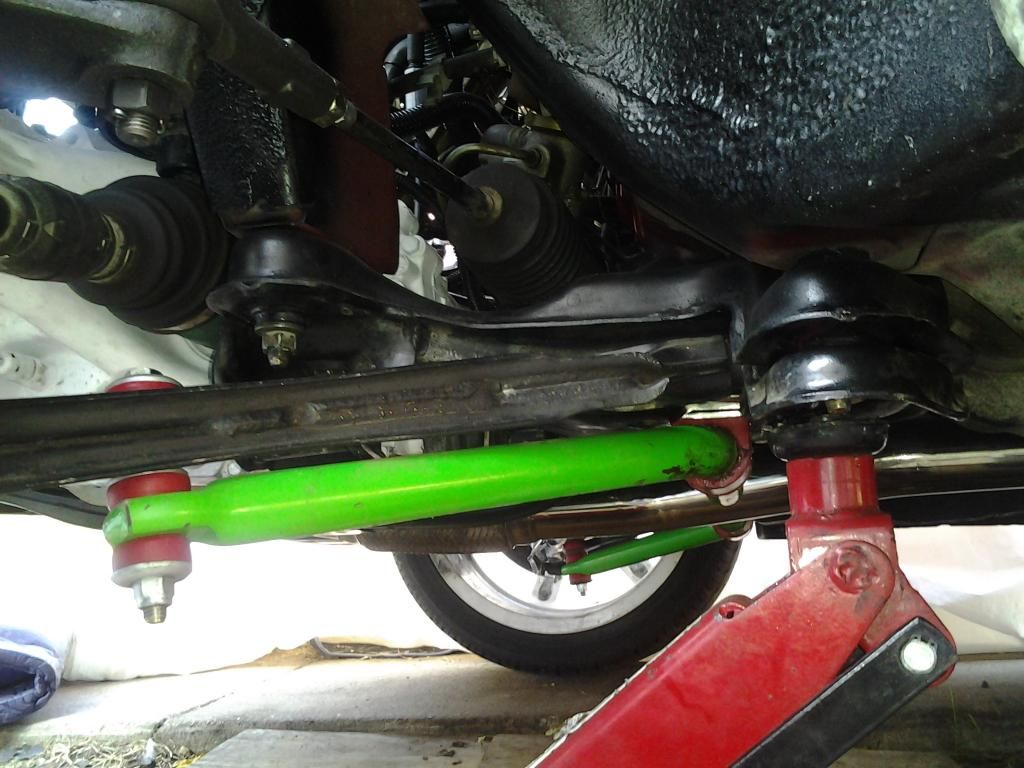
3) Use your jack to slightly raise the subframe to get the pressure off of the nuts holding it to the body studs otherwise it'll be very hard to loosen them.
4) For the rear of the subframe you need to remove the outer most nut on both driver and passenger sides. This is where you use your 17mm socket and ratchet or breaker bar
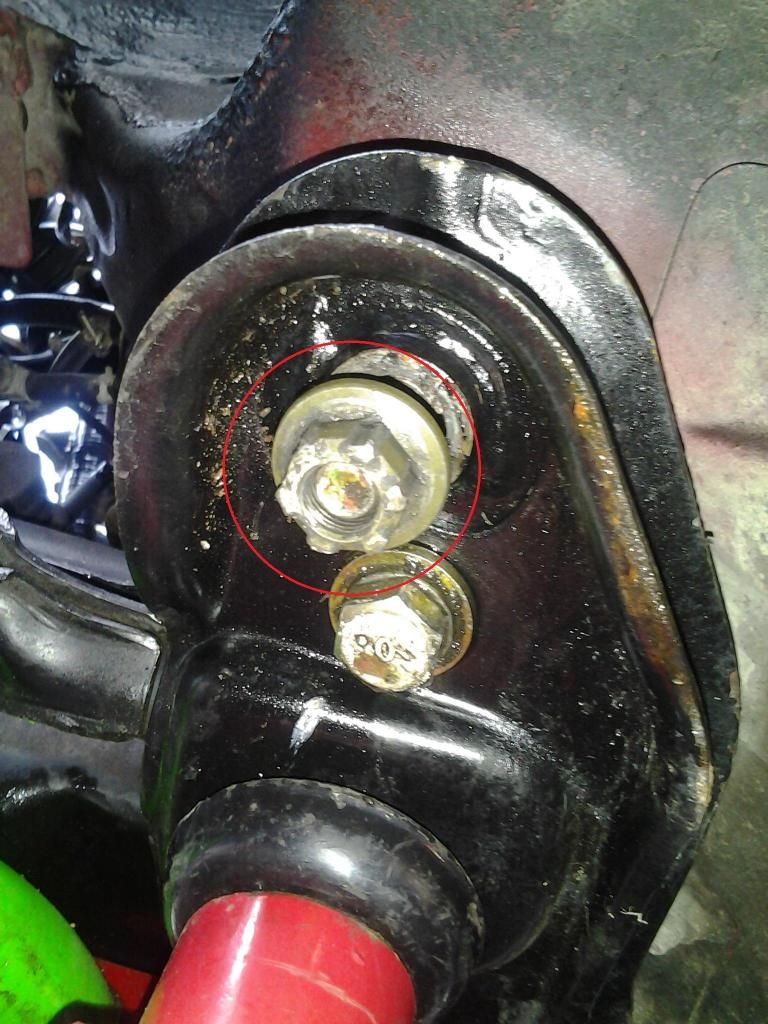
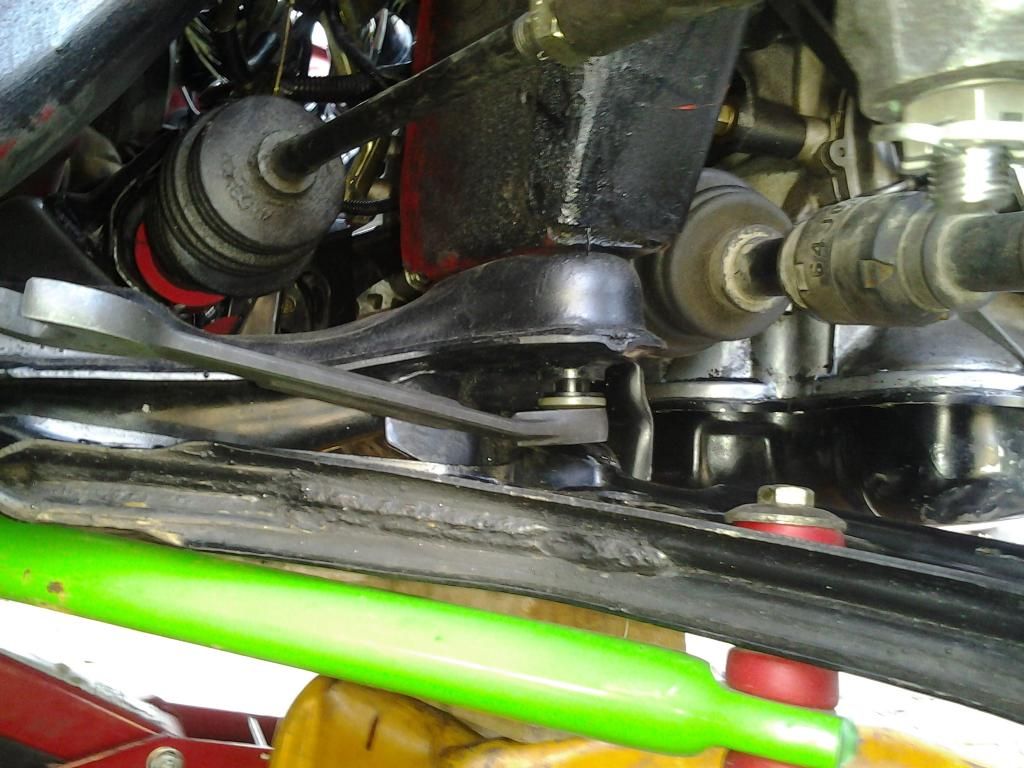
5) For the front of the subframe the nut you have to remove is directly above the control arm. This is where you use your 17mm wrench if you dont want to remove your control arms
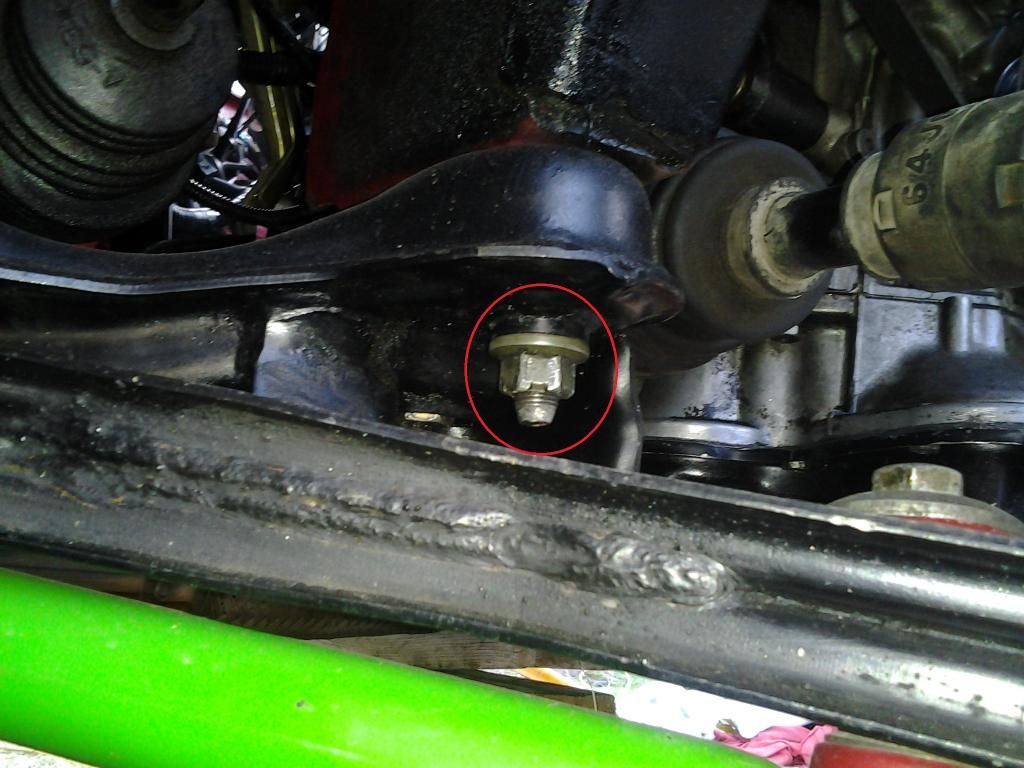
**Don't worry about the subframe falling, there is a big bolt(above the control arm/hiden by the front control arm bushing) holding it in place as well as your jack... You are using your jack right **
**
6) With all four nuts removed you are now ready to insert the rigid collars.
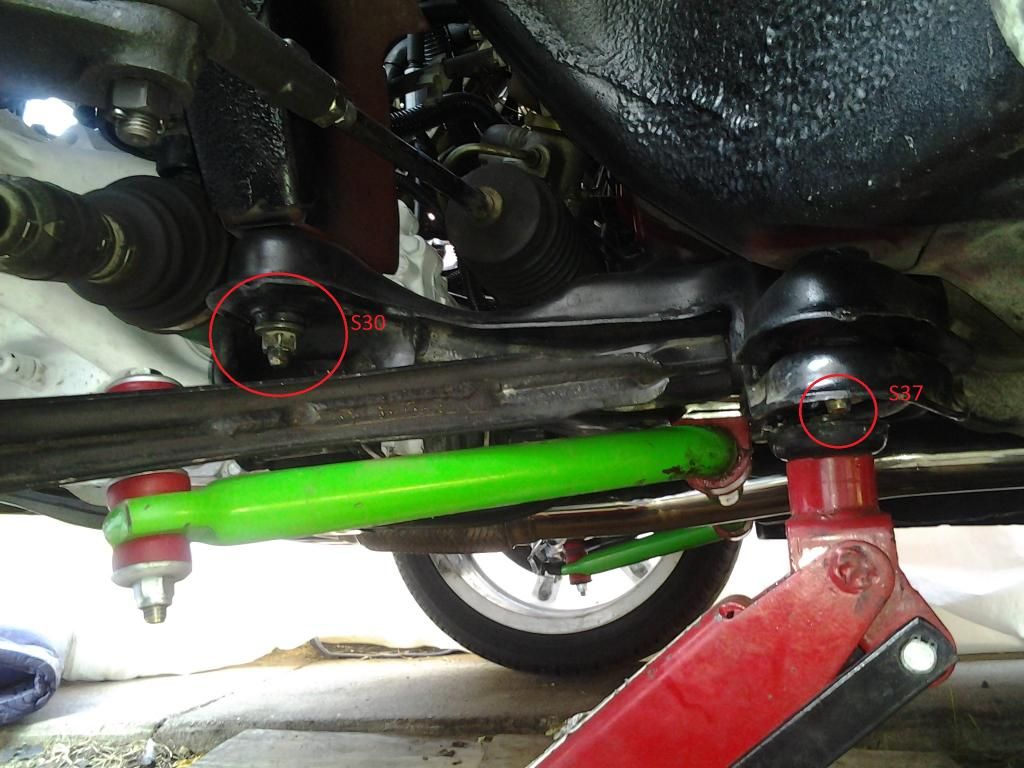
The larger S37 labeled collars go in the rear
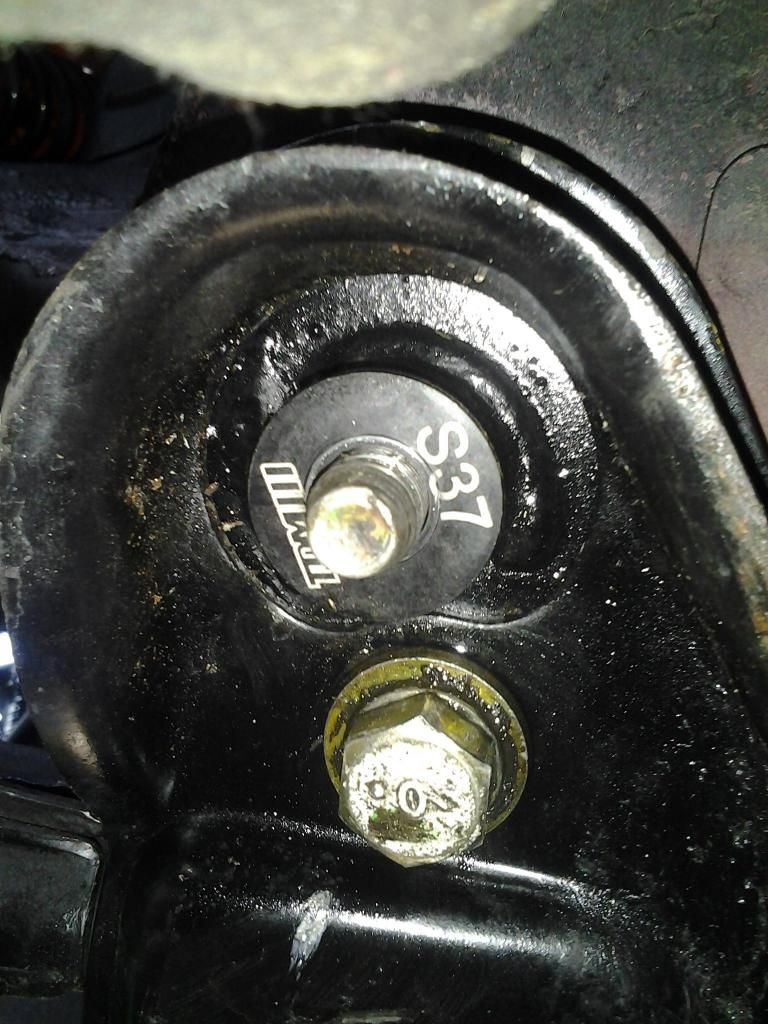
The S30 labeled collars go in the front
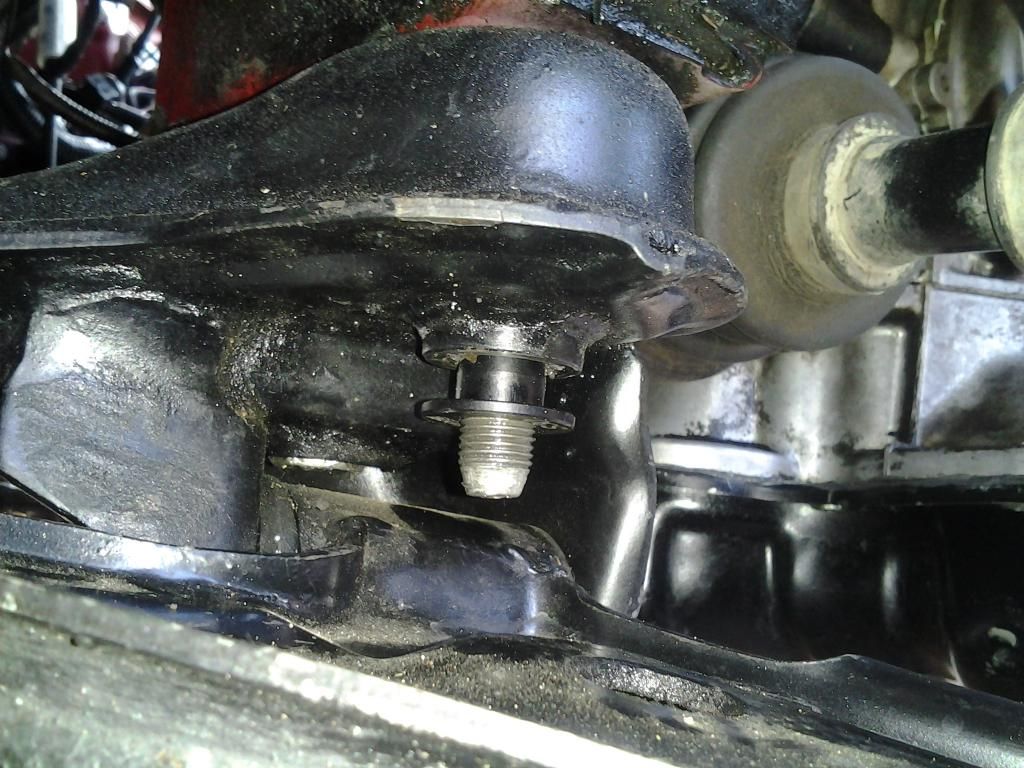
7) Insert each collar into its respective place(label facing down), and push them in as far as you can by hand. Then replace each respective nut, only hand tightening each
8) Now slowly tighten each nut with your tools. I did this in an 'x' pattern.
Rear driver, front passenger, rear passenger, front driver
Congratulations! You're done with this installation! Now put your wheels back on, and go enjoy some tighter cornering and a more solid feeling vehicle
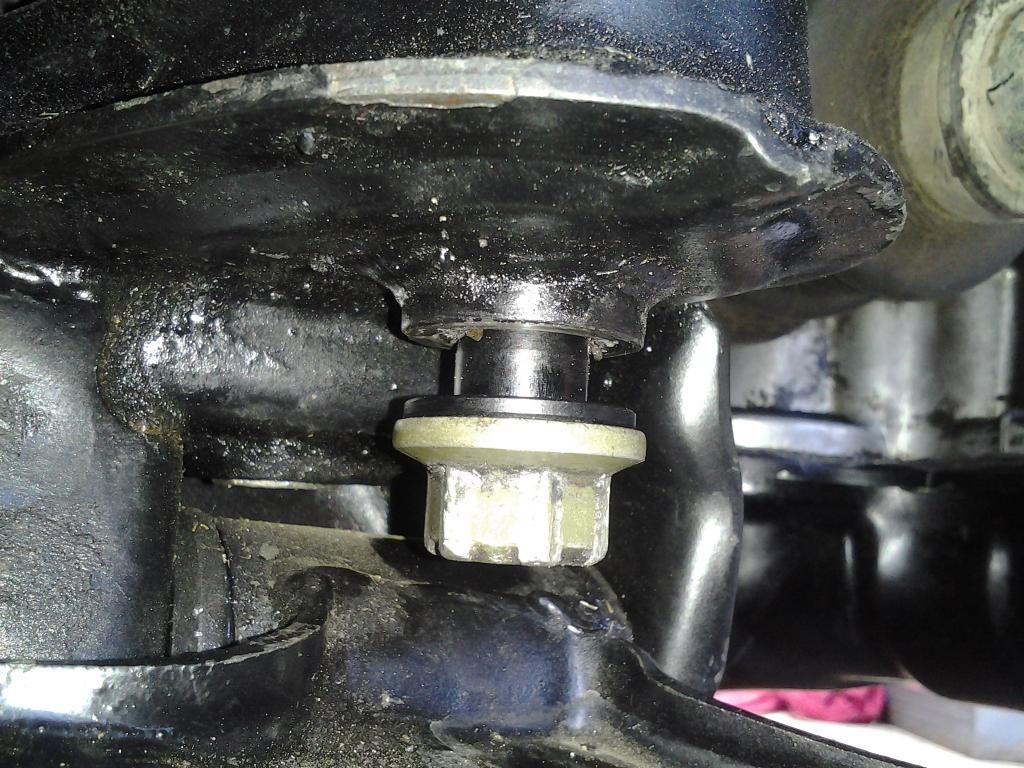
Here have some random installation pics
(of apparently only the front :o )
http://www.sr20-forum.com/tdmimports-kuos-garage/62964-new-here-so-gentle.html
Here is what the rigid collars do-
http://www.sr20-forum.com/851592-post18.html
And this is how much space each stud in our subframe has; All of which allows shifting and slop, especially when cornering

I'll be installing these on my 1992 NX2000

Here is what you get(sorry I didn't take a picture of the the ones I recieved)

4 total collars = 2 labeled S37 + 2 labeled S30
The S37 has a wider body than the S30 and they are tapered to help with installation.
Tools needed:
17mm Socket and corresponding ratchet/breaker bar
17mm Wrench
Jack
Jack stands
Whatever tools you need to remove your wheels
Installation:
1) Raise the front of the car and put it securely on jack stands(make sure to clear the subframe completely)
2) Remove both front wheels (It helps out A LOT, I found out the hard way:ugh

Once you have them off, you'll see this

3) Use your jack to slightly raise the subframe to get the pressure off of the nuts holding it to the body studs otherwise it'll be very hard to loosen them.
4) For the rear of the subframe you need to remove the outer most nut on both driver and passenger sides. This is where you use your 17mm socket and ratchet or breaker bar

5) For the front of the subframe the nut you have to remove is directly above the control arm. This is where you use your 17mm wrench if you dont want to remove your control arms

**Don't worry about the subframe falling, there is a big bolt(above the control arm/hiden by the front control arm bushing) holding it in place as well as your jack... You are using your jack right
 **
**6) With all four nuts removed you are now ready to insert the rigid collars.

The larger S37 labeled collars go in the rear

The S30 labeled collars go in the front

7) Insert each collar into its respective place(label facing down), and push them in as far as you can by hand. Then replace each respective nut, only hand tightening each
8) Now slowly tighten each nut with your tools. I did this in an 'x' pattern.
Rear driver, front passenger, rear passenger, front driver
Congratulations! You're done with this installation! Now put your wheels back on, and go enjoy some tighter cornering and a more solid feeling vehicle

Here have some random installation pics

(of apparently only the front :o )


Last edited by Sentraga
on 2012-11-20
at 14-26-13.


 finally confirm will work on b13/b14.


 Back to top
