Overview
I've been dodging Prothane Motor Mounts because of the extra vibrations, but was kinda forced to get a rear mount for when I went with a DET.
After driving for a while with no front mount vibrations were really bad, wheel hop was terrible too. I then got a dogbone motor mount with a stock rubber mount. There was a great improvement in vibrations and wheel hop was reduced quiet a bit too.
At the bottom of the post I will give my final thoughts on the motor mounts.

Let the pain begin!
As some of you probably heard my rants, motor mounts pressing and installation is the most annoying and painful thing that I have EVER done to the car. I would rather pull the engine three times and install it back before I have to press in and align the motor mounts again. I'm sorry if I come across as pretty apathetic and sarcastic, it's because it was just a painful experience...

Before you begin, make sure to put some jacks under the motor to keep it up so that when you remove the mounts the motor doesn't sink down. Another thing to keep in mind is it's probably best to do one motor mount at a time (unless your doing front and rear mounts). For rear you will have to drop the cross member, while front you can get away without touching the cross member.
I wasn't planning to make a How to on this, but after I over viewed the pictures I figured I might as well. Removal and installation should be pretty straight forward for all 4 mounts, take the mount off, remove the old mount, press in the new one and install them back in.
NOTE: It may make your mount pressing in life easier if you take out the metal center tube. Also putting oil on the new insert and on the inside of the mount should help it get pushed in easier.
Passenger Motor Mount
Remove the Coolant reservoir and and remove the plastic holder. Also you will need to move the wire bunch that is coming from the alternator.

Remove the bolts that are holding the motor mounts to the engine and the bolt that hols the inner side of the mount to the frame then take it out.

Once you remove the passenger mount, you will need to remove anything that will basically get in the way of the new mounts:


I will have to say that removing the old mount is probably the hardest for the passenger side one because you have metal that goes around the rubber mount, then another piece of metal going around the first metal. So bending it is twice as hard. You will need to to use a screw driver and a hammer a lot to be able to bend the metal inwards. Once you have about half of the metal bent inwards the mount can be hammered out.

Old mount out new ones ready to go in.

This mount is probably one of the easiest mounts to press in because it comes in two pieces. now there are slits on the sides of the mounts, those are there for clearance of the bolt/bracket.


One major problem that I had is the mount pushing the bolt to the side, thus it would not thread into the engine and it was nearly impossible to stick socket over the bolts.

Since this is still a form of rubber, it's cut-able


Installed:

Driver Side Motor/Transmission Mount
This mount is located under the battery tray, thus you will need to remove the battery and tray, then you will have to remove the motor mount plate and battery tray holder. Make sure the transmission is jacked up so that it doesn't fall when you remove the mount. There are 3 bolts on the transmission it self, 1 bolt that holds the mount and 2 bolts that hold the mount plate.

Once you remove the mount you will have to remove the old mount similarly to the passenger side one.


Ready to be pressed in:

It will take a lot of time and patience to press them in, screw drives and vice grips are a must!

Getting ready to bolt it up:

All done:

Rear Motor Mount
You will need to drop the cross member, make sure to unbolt the front and rear mounts before you do though! Once again make sure you have support under the engine, if your engine and transmission weight about 500lbs, I can't imagine what would be left of you if they fall!


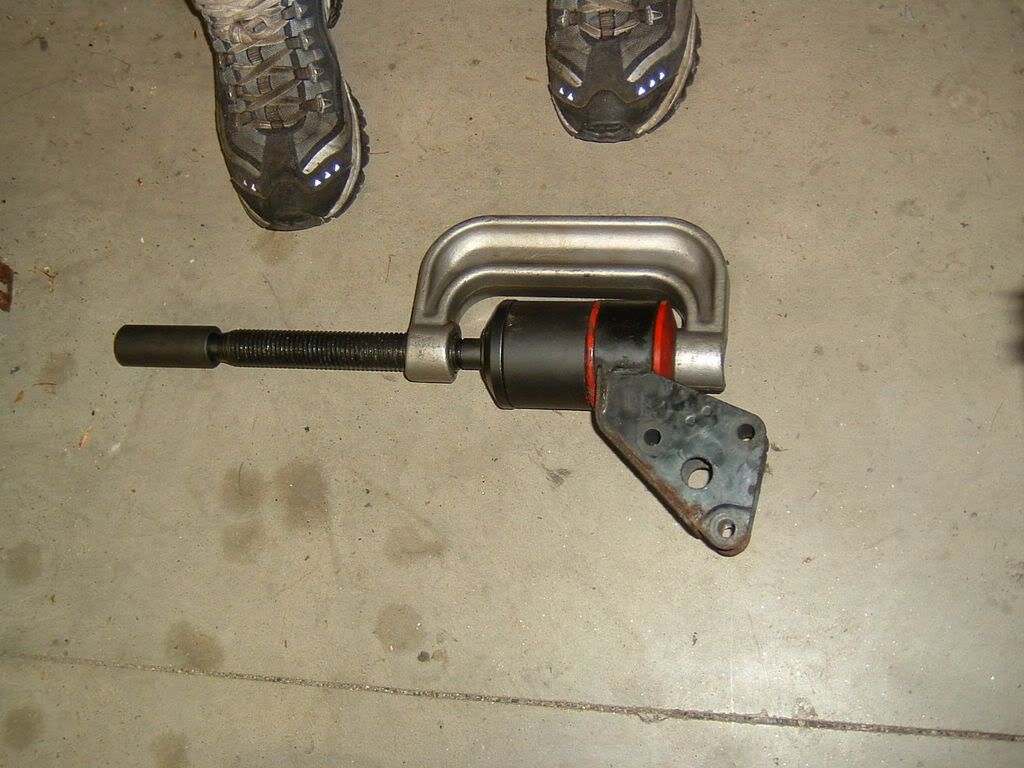
Pressing in:


Have fun laying under the car and bolting this one back up, it took me about 2 hours so be prepared.
Front Motor Mount
This one should be pretty easy overall, but the difficult level will depend on what your experience with other mounts.
Unbolt the front motor mount from the engine, and remove it completely. Now depending on what motor mount you have or will be installing the procedure may be a bit different. In my case (DET) I couldn't use the stock mount because it wouldn't clear the turbo, so I had to get a dogbone mount. This one is Custom Steel one from Gspec.com. Now with this dogbone mount I had to remove the metal U plate that held the original dogbone motor mount.

You should be used to this by now, but get rid of the old rubber mounts, and then press in the new ones.

Then bolt it back up:


Conclusion
Here is my conclusion for having all 4 motor mounts installed.
Vibrations - Some vibrations were reduced even more, but some were also added. Overall it's way worse then stock motor mounts, but way better then having one solid mount with 3 stock ones.
Engine Movement - 0. The engine seems like it's part of the frame and doesn't want to move at all!
Wheel Hop - I now understand why this mod is so important. My wheel hop went from spin city in from 5k rpm in first and second gear, to having traction until redline in second gear and almost to redline in first!!! This is also with my slick style tires (they are that bald). I'm truly amazed and suddenly all the pain and suffering is forgotten!


")