Welcome to the SR20 Community Forum - The Dash.
Register
SR20 forum logo

Thread: How To: Prothane Motor Mounts

+ Reply To Thread
Posts: 61-70 of 103
2009-02-21 23:07:35
#61
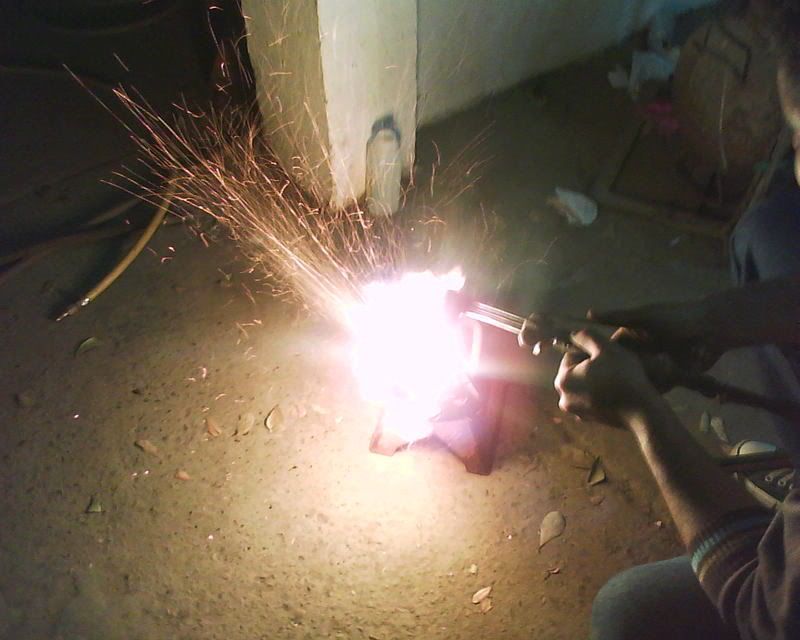
A huge pain in the ass this was. First I did the press thing and almost killed myself, stratched that idea. Took a saw gun to the thing, cut it in two pieces while minding the surroundings. Then I took a chisel gun to the bitch and it popped right out.

I grinded down the lips a tad to help me insert them back into the mounts (they were snug as hell) and bolted it all up.

I am extremely impressed with the amount of improvement it made in the whole car. It feels like the whole front end was tightened up. Better steering response, almost ZERO wheel hop. Feels amazing. Totally worth every penny and bead of sweat.
2009-02-21 23:22:02
#62
Originally Posted by Vex630
On my 2nd SE-R I just didnt bother with the passenger side mount. Took it to the alignment shop I go to all the time and paid them $20 to take the stock rubber out and press the prothane in.


Dude!!! Long time no see, how's it been? Remember how I thought your car vibrated like crazy, well now my car is just about the same
2009-02-24 11:29:18
#63
deleted
2009-02-24 17:51:13
#64
I don't even care about the rattles. The car handles like a new front end was installed.

It's my daily driven race car. That's how I see it.
2009-02-24 19:03:39
#65
Originally Posted by Vadim
Dude!!! Long time no see, how's it been? Remember how I thought your car vibrated like crazy, well now my car is just about the same


LOLz. Think of it this way..... Everytime you drive another car (your wifes, congrats btw.) its going to be a new experience everytime. When I was driving my girls matrix for the first few times I would say "Is the engine on?"
2009-02-24 19:38:41
#66
Originally Posted by Char
I got my new mounts.. but Im having trouble getting the old one out of the passenger side. I know you said its the hardest, but it doesnt look right compared to yours.


I know its blurry, sorry, but if you look, it looks like the "rings" are part of the mount to me. I hammer and hammer and it doesnt budge.


Dude, for avoid those kind of issues....


Flame Torch!! lol

Thats how i get rid of the old mounts and leave intact the inner ring.
Cuz i dont remember well but u need one inner ring.
2009-02-24 20:11:03
#67
That's more like it Char! Congrats

Originally Posted by Vex630
LOLz. Think of it this way..... Everytime you drive another car (your wifes, congrats btw.) its going to be a new experience everytime. When I was driving my girls matrix for the first few times I would say "Is the engine on?"


Haha very true, but the traction is sooo nice, so it makes it all worth it. Plus the G20 is too slow

Originally Posted by rubenxh0k
Dude, for avoid those kind of issues....


Flame Torch!! lol

Thats how i get rid of the old mounts and leave intact the inner ring.
Cuz i dont remember well but u need one inner ring.


Haha thats one way to handle it, now please note that nothing should be left inside, otherwise you will not be able to press the motor mount in.
2009-02-24 20:21:01
#68
Re-check the tightness off the engine mount bolts every so often. They loosened on my passenger side mount, and broke off one of the "ears" at an autocross.

I upgraded my SE-R's mounts with Energy Suspension stuff before there was such thing as Prothane, so the passenger side was my first Prothane experience.

Something everyone needs is a 12-ton Harbor Freight press or equivalent. Life is better with one of these, and the box fits in the trunk of a B13 with the back seat out.

Press out the rubber guts through brute force, then use a Dremel cutoff wheel to carefully cut into the inner metal ring to weaken it. A chisel or screwdriver should do the rest, so no need to go to town with the Dremel (or Sawzall or plasma cutter). Cutting into the mount is not a good thing, as I've proven they're not entirely durable under stress.

The Prothane isn't a perfect fit, kind of amateurish. They could mold in two symmetrical bolt indentions in each insert half and have it work on either side. Instead, you have to make your own indentions for the bolts, and cutting urethane is a hot mess.

I also shaved the sides of the inserts with a stone bench grinder to make the mount fit the car better. Again, kind of amateurish molding on Prothane's part.

Going from ES to Prothane on the passenger mount alone made a noticable increase in vibration and noise. Probably good for durability.
2009-02-24 20:48:54
#69
I did not have to cut the mounts for the bolt holes. I ground the lips away on one side (except for the 2 piece passenger side mount) with a bench grinder to press them in easier. A bolt holds it in there and I don't see any way of getting the mount in there successfully without a bunch of sweat and work (or u can just grind away one lip like I did).

I used a sawzall to cut the old mount and then chiseled it out and used a air gun chisel to do the rest. A airgun chisel is probably the best way to get the stock ones out. (Just make sure you dont chisel the bracket that u need to re-use) The rest is easy.

I don't know why everyone had so much trouble putting the bolts in around the mount, it was very easy and not more cutting was needed for the bolts.
2009-02-24 20:54:09
#70
Seriously, I need to make time and shoot a video of the method to press these out. Its like buttah, no lie.
+ Reply To Thread
  • [Type to search users.]
  • Quick Reply
    Thread Information
    There are currently ? users browsing this thread. (? members & ? guests)
    StubUserName

    Back to top