I have seen gas struts added to the hoods and even one B13 trunk, bit never saw a write up on how to do it. I looked at the photos of the job I saw done, (sorry don't remember the original person who posted their work) and some rough measurements. Once I had all that done I rolled out to AutoZone and started getting everything I needed to get this done.
Here is a shopping list of what you will need:
2x mighty lift pistons part number C95230
I chose these as they were roughly the right length I needed, appx 11 inches closed and 18 inches extended, and they came with the ball studs to mount them.
1 package M8-1.25 nuts for the smaller ball studs
1 package M10-1.25 lock nuts for the larger ball studs
Assorted drill bits, and a drill
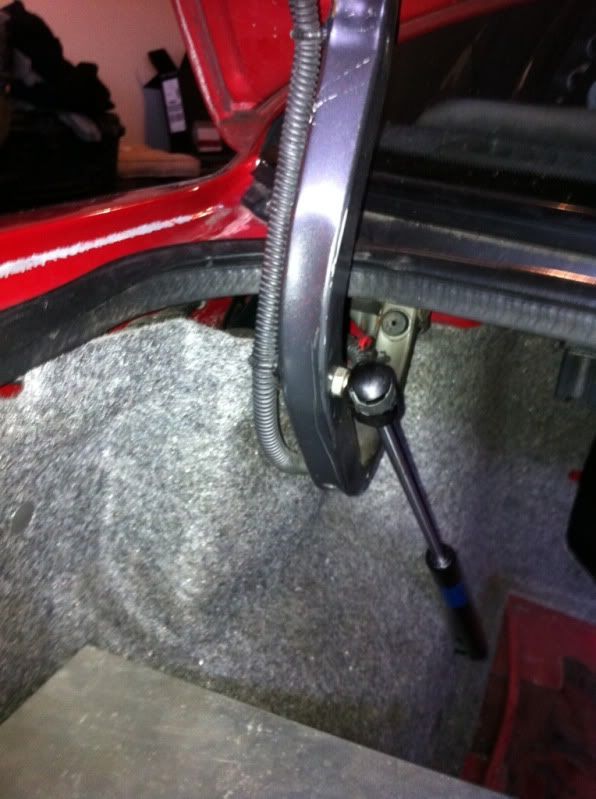
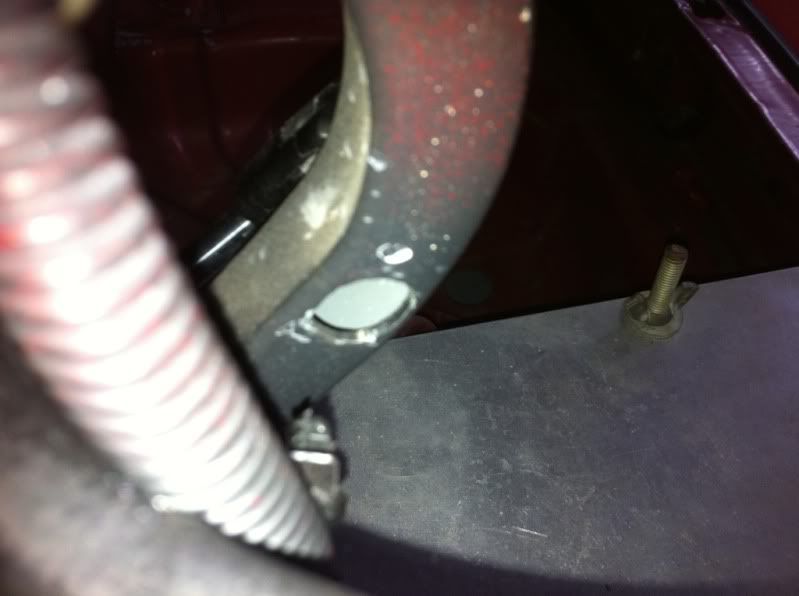
Step 1: As you can see in the photo below, one ball stud is mounted on the support arm of the trunk lid. The spot where I mounted them had a preexisting hole on both sides of the arm where wire ties mount up. The inner side is drilled out to the diameter of the threads of the ball stud. Use the mounting hole for the wire tie as a guide hole. The outer side needs to be drilled out quite a bit larger to accommodate fitting the nut through (2nd photo). I used a 1/2 inch bit, but had to widen it with a carbide bit on my dremel. Getting the nut onto the bolt is quite a pain, I can attest to this as I now have 3 nuts that are lost inside the support arm lol. The best way I found to do it is to thread the but over a zip tie, without closing the tie, and using that to line the nut up with the hole for the ball stud. Then I used my finger to push the nut against the inside of the support arm and threaded the ball stud in that way.


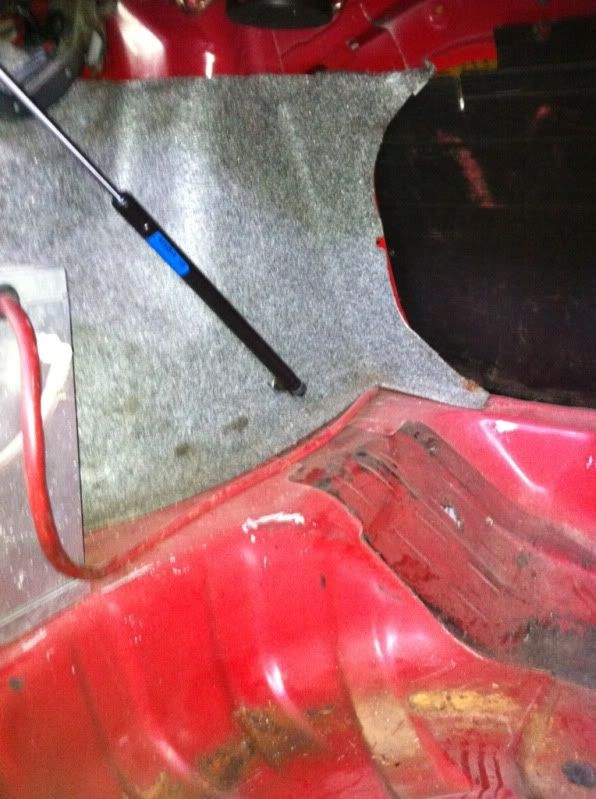
The next part is slightly tricky, and can be a pain to do by yourself, so I suggest having an extra pair of hands. The lower ball stud is mounted appx 8.5-9 inches from the back seat divider, and 2 inches up from the floor of the trunk. When drilling this hole, be careful not to damage anything in your wheel well like struts or brake lines. Thread the ball stud through the hole and use the lock nut to secure it on the under side of the wheel well. Don't worry, it doesn't stick out very far into the wheel well so there is no danger of hurting anything. Once you have the upper and lower studs mounted on both sides attach the pistons to them. Only after that should you take the torsion bars out of the car.

Now you are done and you can stop worrying about the trunk falling on someone, or the annoying rattle or those torsion bars. Additionally their removal makes speaker mounting so much easier.
Now the caveat, I am not a professional mechanic, anyone attempting this does so knowing that they are responsible for the outcome. I can not be held liable for unsatisfactory results or undue damage.
Here is a shopping list of what you will need:
2x mighty lift pistons part number C95230
I chose these as they were roughly the right length I needed, appx 11 inches closed and 18 inches extended, and they came with the ball studs to mount them.
1 package M8-1.25 nuts for the smaller ball studs
1 package M10-1.25 lock nuts for the larger ball studs
Assorted drill bits, and a drill
Step 1: As you can see in the photo below, one ball stud is mounted on the support arm of the trunk lid. The spot where I mounted them had a preexisting hole on both sides of the arm where wire ties mount up. The inner side is drilled out to the diameter of the threads of the ball stud. Use the mounting hole for the wire tie as a guide hole. The outer side needs to be drilled out quite a bit larger to accommodate fitting the nut through (2nd photo). I used a 1/2 inch bit, but had to widen it with a carbide bit on my dremel. Getting the nut onto the bolt is quite a pain, I can attest to this as I now have 3 nuts that are lost inside the support arm lol. The best way I found to do it is to thread the but over a zip tie, without closing the tie, and using that to line the nut up with the hole for the ball stud. Then I used my finger to push the nut against the inside of the support arm and threaded the ball stud in that way.


The next part is slightly tricky, and can be a pain to do by yourself, so I suggest having an extra pair of hands. The lower ball stud is mounted appx 8.5-9 inches from the back seat divider, and 2 inches up from the floor of the trunk. When drilling this hole, be careful not to damage anything in your wheel well like struts or brake lines. Thread the ball stud through the hole and use the lock nut to secure it on the under side of the wheel well. Don't worry, it doesn't stick out very far into the wheel well so there is no danger of hurting anything. Once you have the upper and lower studs mounted on both sides attach the pistons to them. Only after that should you take the torsion bars out of the car.

Now you are done and you can stop worrying about the trunk falling on someone, or the annoying rattle or those torsion bars. Additionally their removal makes speaker mounting so much easier.
Now the caveat, I am not a professional mechanic, anyone attempting this does so knowing that they are responsible for the outcome. I can not be held liable for unsatisfactory results or undue damage.


 Be the first to like this post.


 Back to top
