


When you are working on any part of your fuel system, it’s not a bad idea to have a fire extinguisher handy.
The Nismo Fuel Pressure Regulator install is pretty straightforward. This one is going on a lowport motor. Highports are a little different, but most of it would be the same.
My camera was dead when I started, so the removal part didn’t have any pictures. I mocked up some pictures with the stock FPR on my 200sx.
The first step will be purging your fuel lines. If you don’t do this gas is going to spray all over your engine bay when you remove the stock FPR. Purging the fuel lines is pretty simple. Locate the fuel pump fuse in the panel under your steering wheel (this is a 1998 Sentra SE, yours may be in a different place).

With the car running, pull the fuse. After a few seconds the car will die. At this point the lines should be pretty much drained, but there will always be some leftover.
Disconnect your negative battery terminal. You don’t want anything electrical to have power when you are working with the fuel.
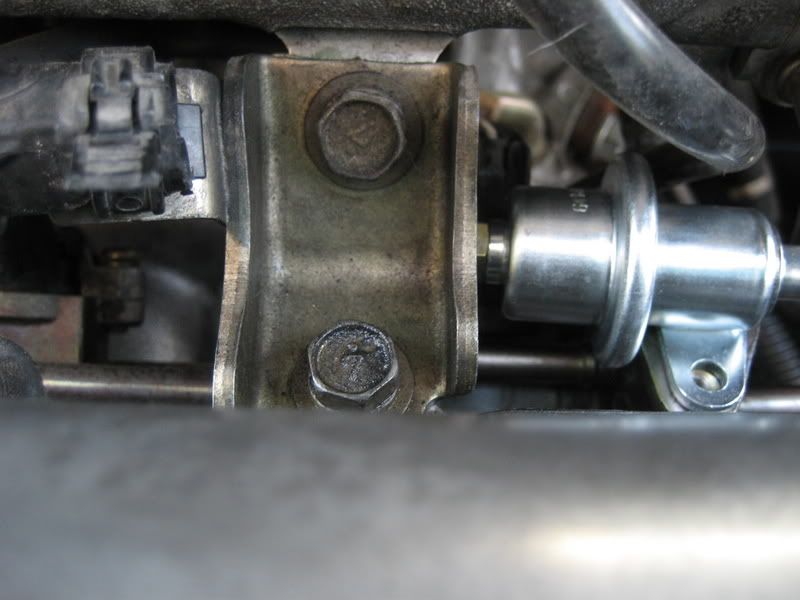
Here is the stock FPR. It is located on the driver side of the fuel rail between the valve cover and intake manifold.
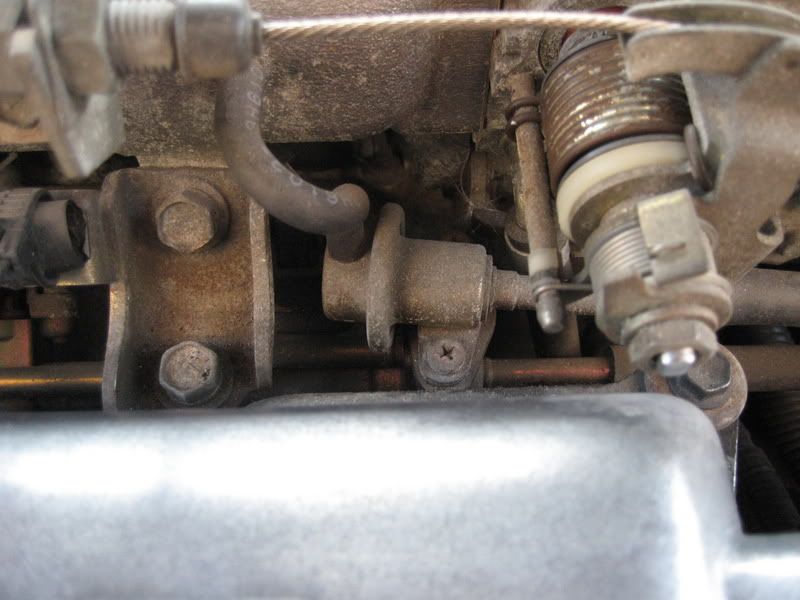
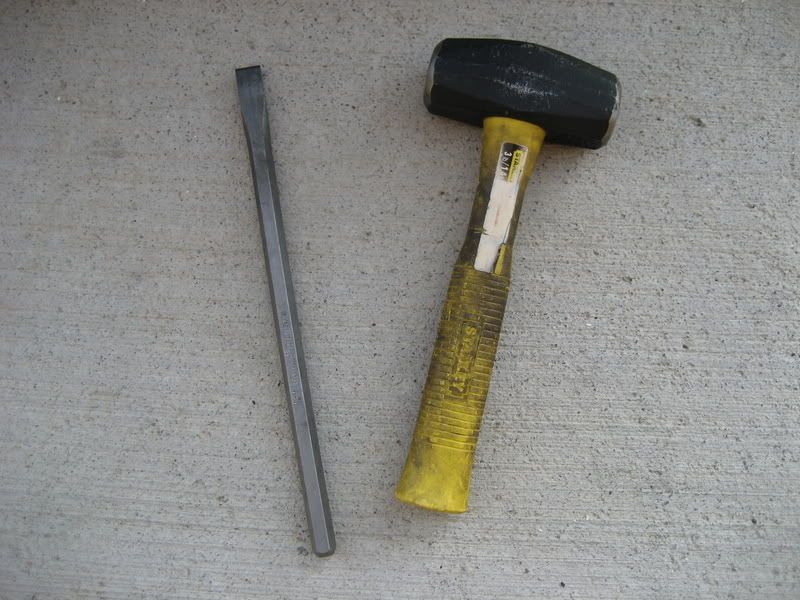
It is held in place with two Phillips head screws (wow Nissan, that was a great idea). After 10 or so years, they will be very stubborn. Whatever you do… DO NOT STRIP THEM OUT. Start with a dose of PB Blaster, and then tap them with a large flathead screwdriver (I used a pry bar instead) and a hammer. Don’t get carried away, though. You don’t want to break the head off of the screw.
Now try the screw, but don’t force it. If it doesn’t want to go, give it another round of tapping. Repeat this process (it took me about 5 rounds) until the screws turn with minimal effort.
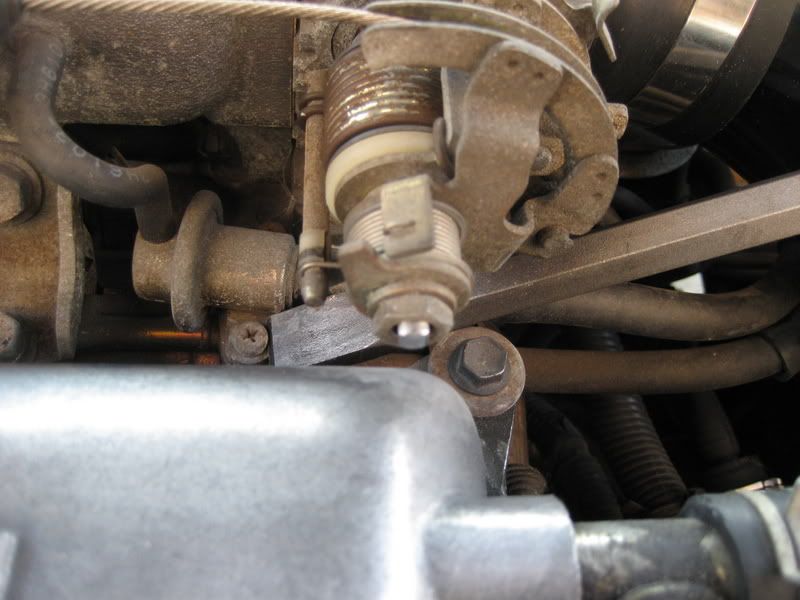
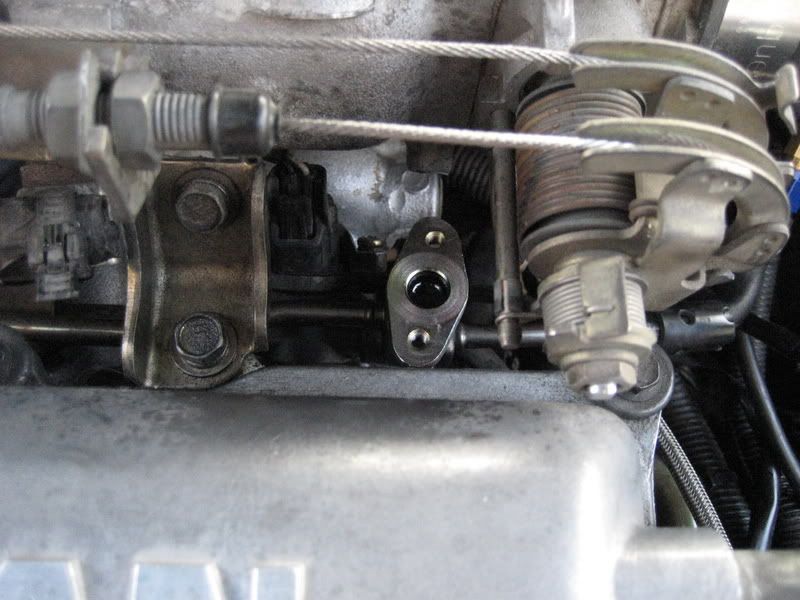
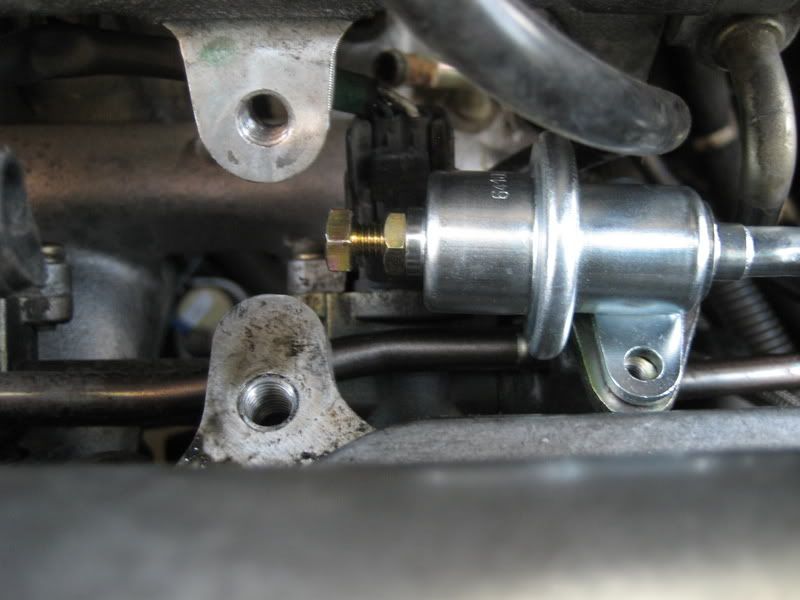
After removing the screws, wiggle the FPR out of the fuel rail. Have a shop towel handy. You will still have some fuel leftover in the lines. Loosen the hose clamp and remove the fuel return line, and then remove the vacuum line. Your stock FPR can now be removed.
The Nismo unit won’t fit a lowport motor without slight modification. You’ll need to adjust the angle of the return line tube in order to clear the valve cover. To bend the tube, find the largest size allen wrench that will fit in the tube.
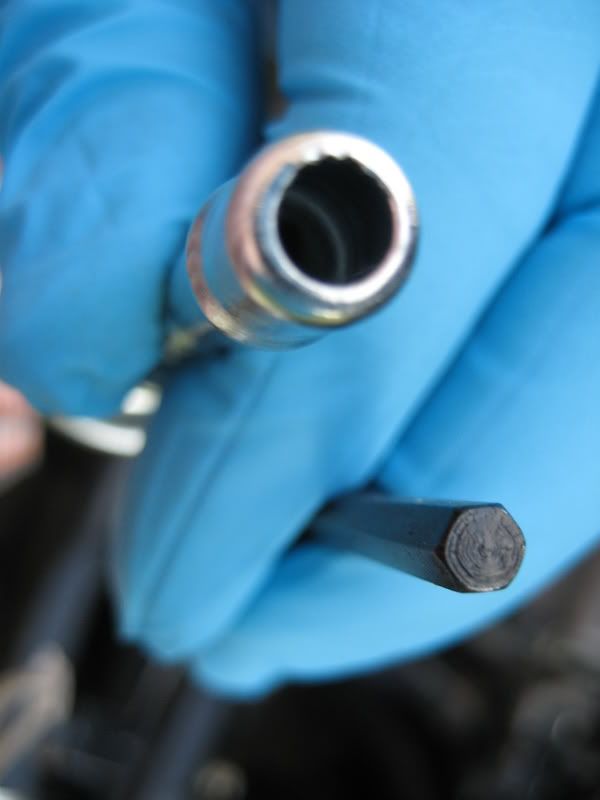
Put it in until the end of the allen wrench is right at the bend in the FPR tube. Bend it sloooowly, a little at a time. It doesn’t need to be perfectly straight.
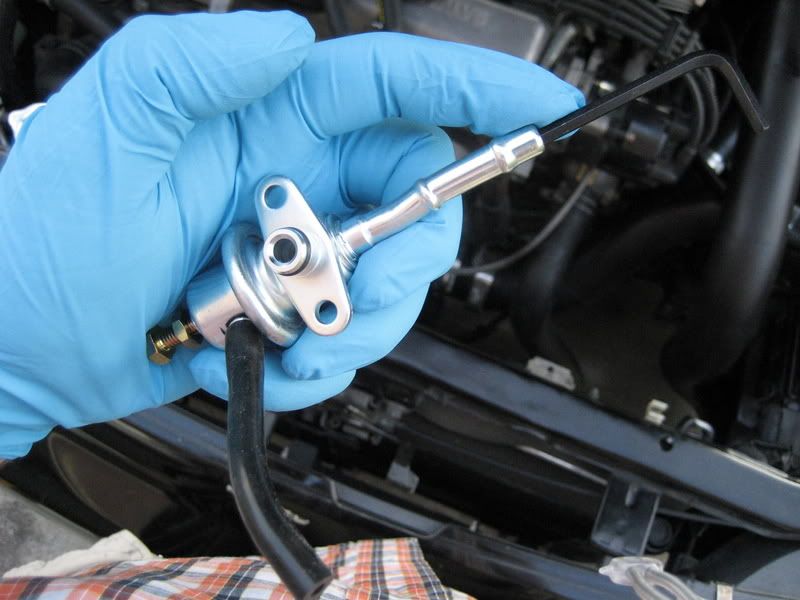
Use a little motor oil to lubricate the o-ring on the new FPR.
Attach the fuel return line and tighten down the hose clamp. Attach the vacuum line as well (I had to use a longer vacuum line and “coil” it around to prevent any kinks). Now wiggle the FPR into place.
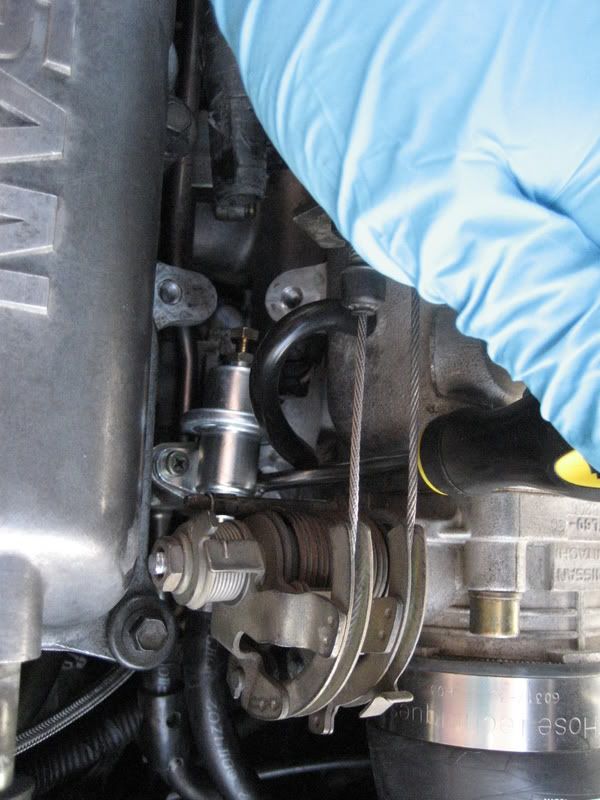
At this point, I realized the intake manifold support bracket was going to be in the way of the FPR adjustment screw. I decided to go ahead and remove it (temporarily).
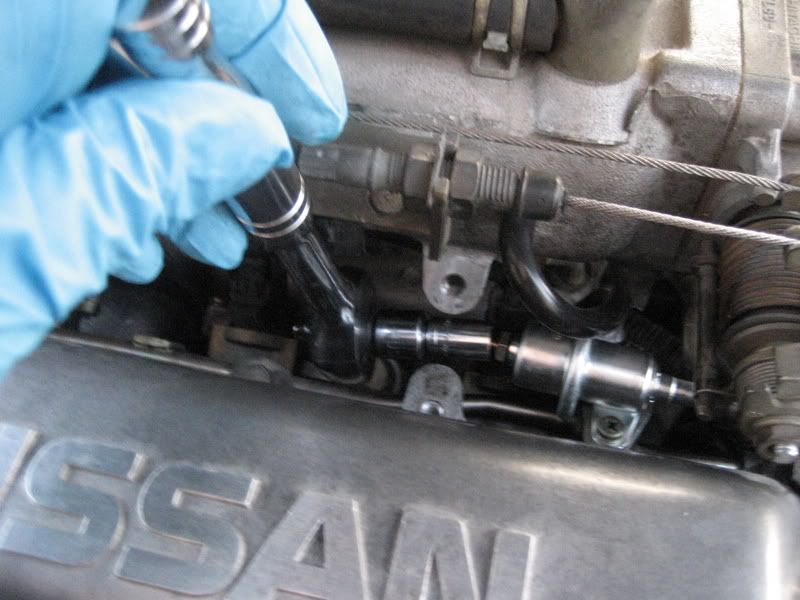
Replace the screws that hold the FPR in place. Again, be cautious not to damage the screw heads.
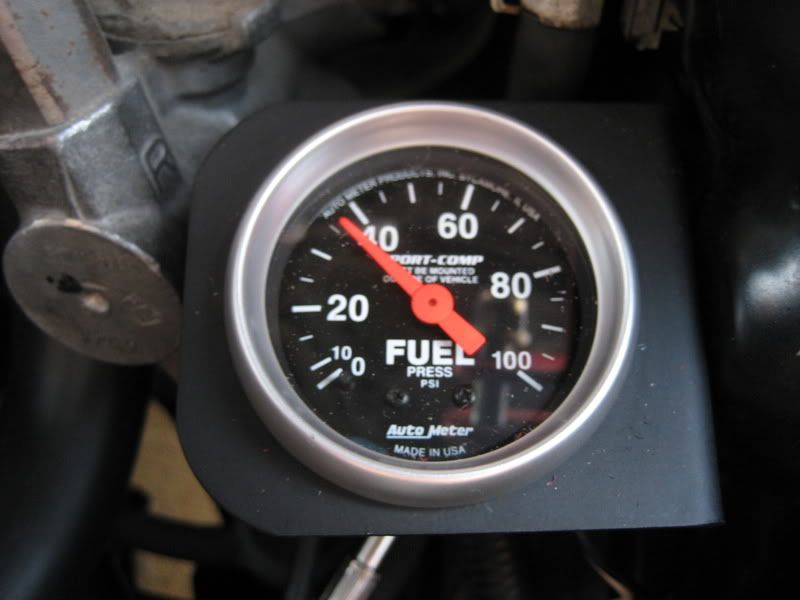
Double check your connections. If all looks well, replace the fuel pump fuse and reconnect your battery. Turn the key to the accessory position without starting the car. This will activate the fuel pump and pressurize the lines without actually running the car. Check for leaks first. If your connections look good, check the fuel pressure gauge.
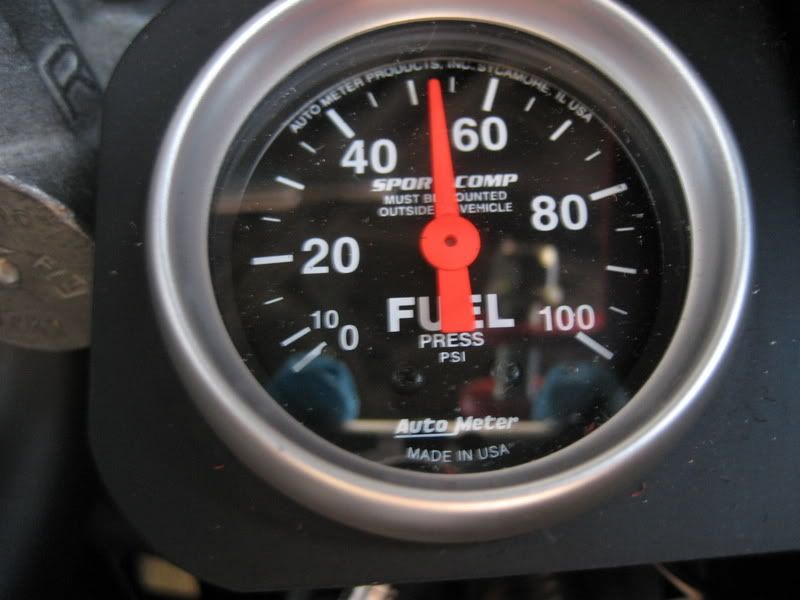
Mine was running over 50psi (it should be at ~37psi for a 3bar setup). This is why you don’t start the car. It could be waaay off. Use a 10mm wrench to adjust the pressure screw at the top. Clockwise increases the pressure, counter-clockwise decreases it.
You may need to periodically “re-prime” the fuel pump by switching the key off and back on (still not starting the car). Mine seemed to lose some pressure after a minute or so. Once you have your FPR adjusted properly (or pretty close), start the car and check the gauge to make sure it stayed where you set it.
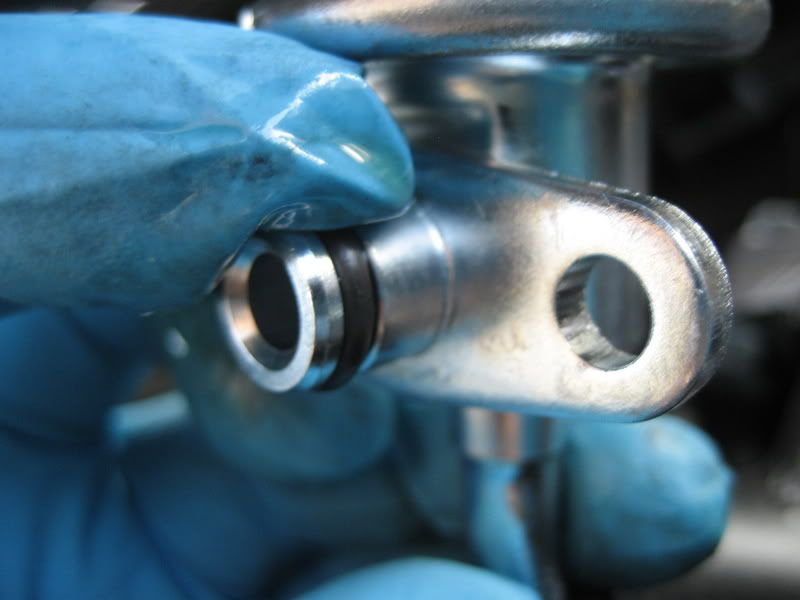
Once you are satisfied with the pressure, spin the retainer nut down to the head of the FPR. This protects your adjustment screw from unintentional movement. Replace the intake manifold bracket and you’re done.
The Nismo Fuel Pressure Regulator install is pretty straightforward. This one is going on a lowport motor. Highports are a little different, but most of it would be the same.
My camera was dead when I started, so the removal part didn’t have any pictures. I mocked up some pictures with the stock FPR on my 200sx.
The first step will be purging your fuel lines. If you don’t do this gas is going to spray all over your engine bay when you remove the stock FPR. Purging the fuel lines is pretty simple. Locate the fuel pump fuse in the panel under your steering wheel (this is a 1998 Sentra SE, yours may be in a different place).
With the car running, pull the fuse. After a few seconds the car will die. At this point the lines should be pretty much drained, but there will always be some leftover.
Disconnect your negative battery terminal. You don’t want anything electrical to have power when you are working with the fuel.
Here is the stock FPR. It is located on the driver side of the fuel rail between the valve cover and intake manifold.
It is held in place with two Phillips head screws (wow Nissan, that was a great idea). After 10 or so years, they will be very stubborn. Whatever you do… DO NOT STRIP THEM OUT. Start with a dose of PB Blaster, and then tap them with a large flathead screwdriver (I used a pry bar instead) and a hammer. Don’t get carried away, though. You don’t want to break the head off of the screw.
Now try the screw, but don’t force it. If it doesn’t want to go, give it another round of tapping. Repeat this process (it took me about 5 rounds) until the screws turn with minimal effort.
After removing the screws, wiggle the FPR out of the fuel rail. Have a shop towel handy. You will still have some fuel leftover in the lines. Loosen the hose clamp and remove the fuel return line, and then remove the vacuum line. Your stock FPR can now be removed.
The Nismo unit won’t fit a lowport motor without slight modification. You’ll need to adjust the angle of the return line tube in order to clear the valve cover. To bend the tube, find the largest size allen wrench that will fit in the tube.
Put it in until the end of the allen wrench is right at the bend in the FPR tube. Bend it sloooowly, a little at a time. It doesn’t need to be perfectly straight.
Use a little motor oil to lubricate the o-ring on the new FPR.
Attach the fuel return line and tighten down the hose clamp. Attach the vacuum line as well (I had to use a longer vacuum line and “coil” it around to prevent any kinks). Now wiggle the FPR into place.
At this point, I realized the intake manifold support bracket was going to be in the way of the FPR adjustment screw. I decided to go ahead and remove it (temporarily).
Replace the screws that hold the FPR in place. Again, be cautious not to damage the screw heads.
Double check your connections. If all looks well, replace the fuel pump fuse and reconnect your battery. Turn the key to the accessory position without starting the car. This will activate the fuel pump and pressurize the lines without actually running the car. Check for leaks first. If your connections look good, check the fuel pressure gauge.
Mine was running over 50psi (it should be at ~37psi for a 3bar setup). This is why you don’t start the car. It could be waaay off. Use a 10mm wrench to adjust the pressure screw at the top. Clockwise increases the pressure, counter-clockwise decreases it.
You may need to periodically “re-prime” the fuel pump by switching the key off and back on (still not starting the car). Mine seemed to lose some pressure after a minute or so. Once you have your FPR adjusted properly (or pretty close), start the car and check the gauge to make sure it stayed where you set it.
Once you are satisfied with the pressure, spin the retainer nut down to the head of the FPR. This protects your adjustment screw from unintentional movement. Replace the intake manifold bracket and you’re done.
 Be the first to like this post.


