


Hello All,
I just did an upgrade in my B13 and after reading and searching on numerous threads on both forums I finally was able to upgrade my front speakers with 100% success.
I couldn't find the answers in one place anywhere so I kept taking notes before I bought anything. All the information was here but took a while to find it.
The only reason for this thread is just so anyone else looking to do this can find the info in 1 easy location.. Hopefully it will save someone some time..
B13's as you know have 4x6 front speakers but they are mounted in a 6.5 plate, Once you remove that plate you are left with a nice 6.5 hole.
The problem starts with the hole being shallow.
Max Depth before hitting window track - Around 2.2 inches and most 6.5"s are deeper than 2"
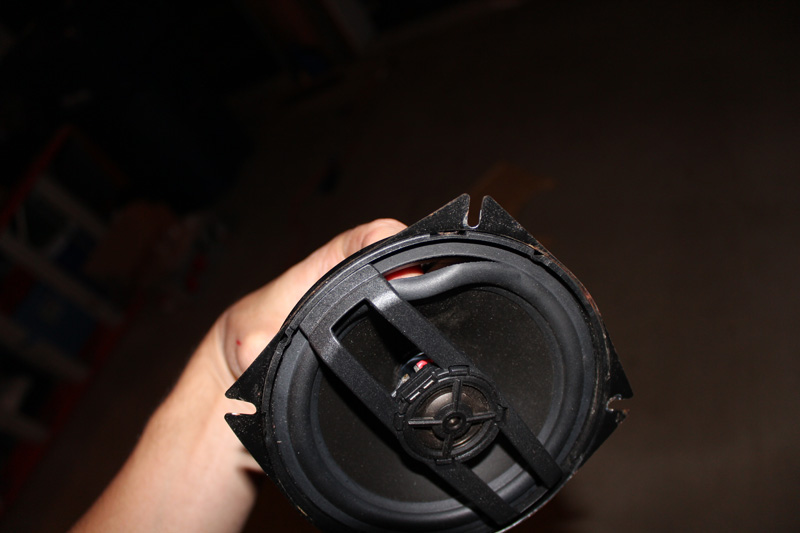
Initially I had MB Quart 5.25" mounted in the cut up OEM plates which gave me some extra depth..

I installed these back in 2000 ( I was young not the best install for SQ ) But they were killer speakers.. Made in Germany MB's that went for over $350 in 2000..
The only reason they were replaced is they started making crackling noises when some hard mids kicked in.. ( there being fed 75 watts RMS )
Well heres why, I guess 10 years of service in a car will take its toll.
I have been out of the audio scene for years, Turns out alot has changed and MB Quart isn't made in Germany anymore and isn't as good as it once was so now it was time to find replacements.. I started reading reviews and kept on seeing this brand CDT come up.. It is built in the USA/Europe and can be had for good prices + has amazing reviews ( never even heard of them 2 weeks ago )..
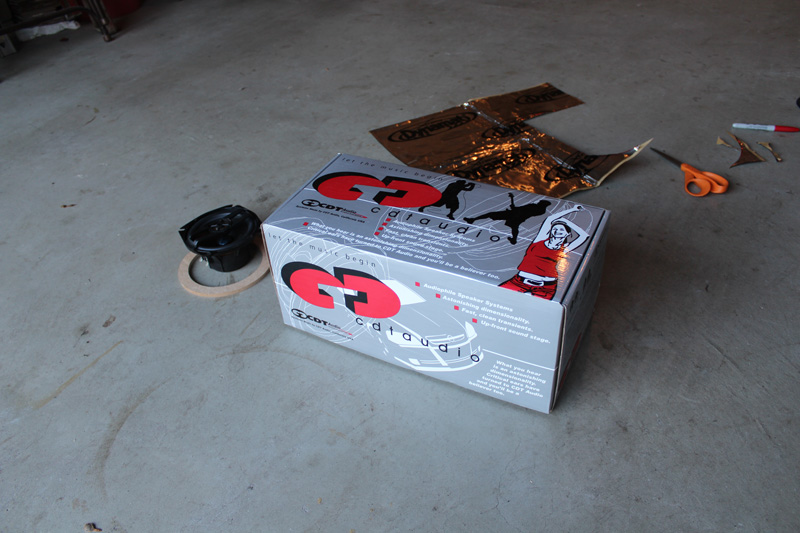
Well ordered the following which should make a nice upgrade.
The MDF spacers I got were 3/4 Again I wasn't sure how much depth I needed so I went bigger. After measuring 3/8 worked perfect so I cut the ring in 1/2

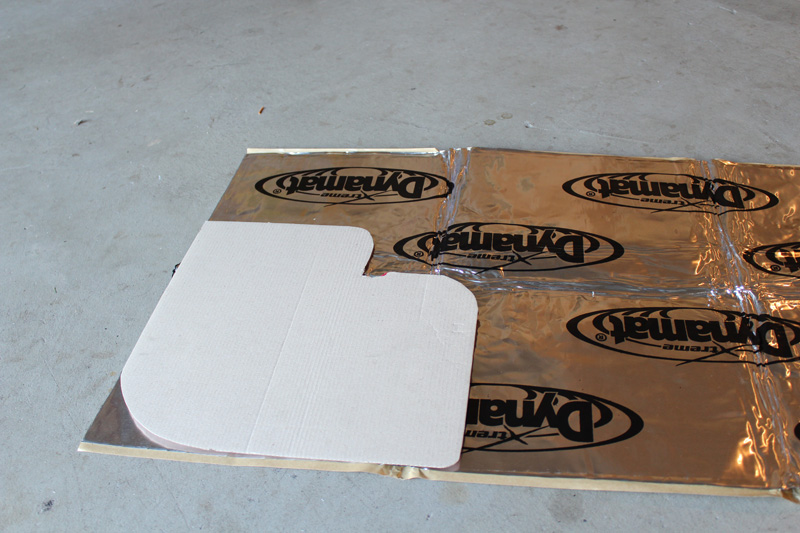
Time for the install, I cut a cardboard template of the corner of the door and then cut the dynamat to size.
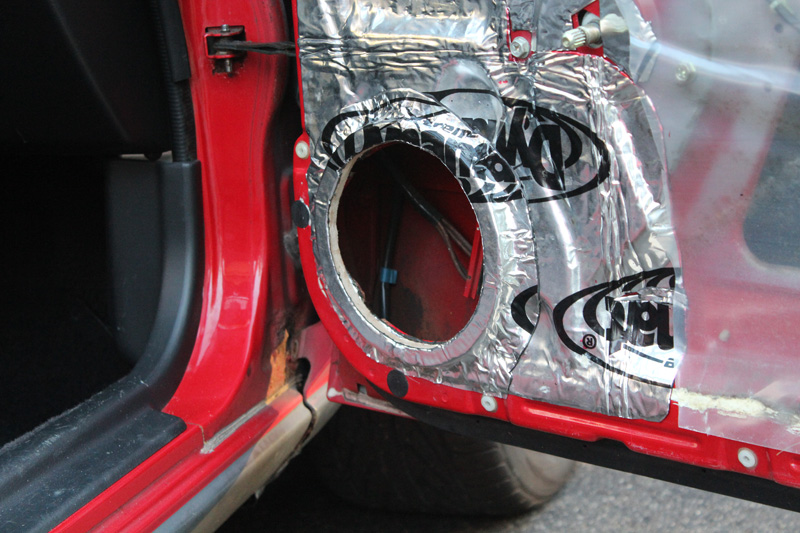
Trimmed the plastic, Cleaned the door with wax and grease remover and applied the first layer of dynamat... This should dampen it alot more than it was.

I only secured them with 2 screws as they would be covered with another layer of dynamat and I split one ring in 1/2 trying to secure it.
Def pre-drill the holes through the ring and metal and then screw in by hand.
Added a second layer of dynamat
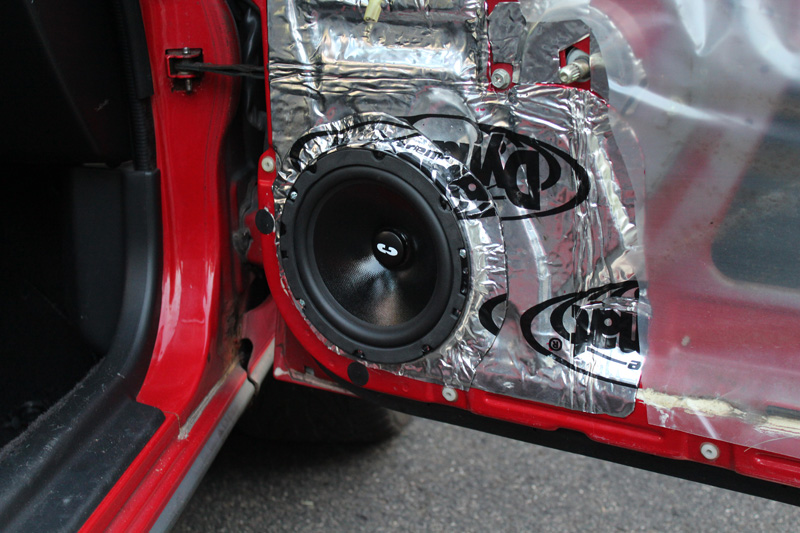
Finally time to install the new 6.5's
Here you can see the CDT 6.5 next to the MB Quart 5.25 both have 2.5 max depth.

Speaker now installed clears the window track 100%
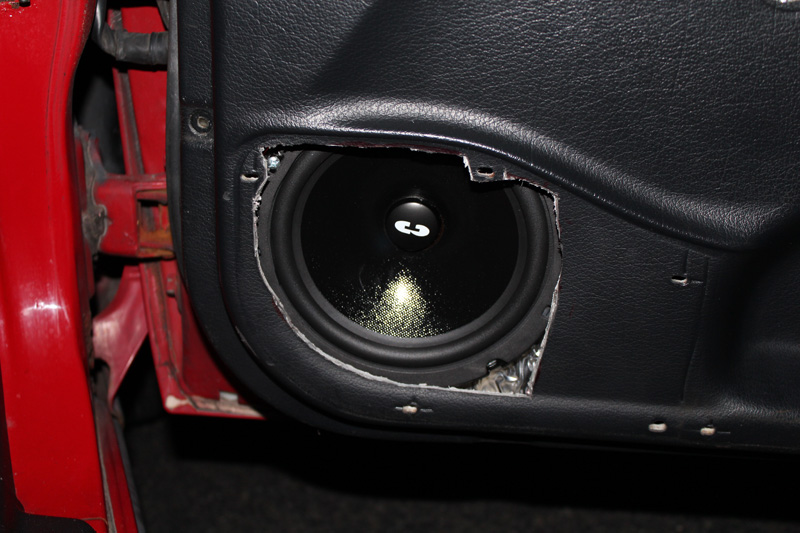
Now its time to mark & trim the door panel for the 6.5 as much as you can ( space is limited but works out pretty good ) NX's look like they will have more space than Sentra's
First fit up and marking
Marked

Trimmed & Test fitted again
Door panel with Tweeter hole drilled ( no pics drilling ) but used a 3/4 hole saw bit and then fine tuned with a dremel until it fit perfect.
Trimmed + Tweeter Circle

And thats it for modifying the B13 door speakers fit perfect, Woofer clears the window and also clears the door panel Im sure if you push the speakers hard enough the surround could hit the inside of the door but I dont hear that happening at all.
Heres what it looks like 100% done & Installed

Some quick Cliff Notes
Tweeter Install
Again hope this helps someone looking to do a B13 speaker install. I def wanna thank everyone who's posted bits and pieces and who helped me in my other threads. I didn't figure out all of this on my own but put it in one nice easy place.
I just did an upgrade in my B13 and after reading and searching on numerous threads on both forums I finally was able to upgrade my front speakers with 100% success.
I couldn't find the answers in one place anywhere so I kept taking notes before I bought anything. All the information was here but took a while to find it.
The only reason for this thread is just so anyone else looking to do this can find the info in 1 easy location.. Hopefully it will save someone some time..
B13's as you know have 4x6 front speakers but they are mounted in a 6.5 plate, Once you remove that plate you are left with a nice 6.5 hole.
The problem starts with the hole being shallow.
Max Depth before hitting window track - Around 2.2 inches and most 6.5"s are deeper than 2"
Initially I had MB Quart 5.25" mounted in the cut up OEM plates which gave me some extra depth..
I installed these back in 2000 ( I was young not the best install for SQ ) But they were killer speakers.. Made in Germany MB's that went for over $350 in 2000..
The only reason they were replaced is they started making crackling noises when some hard mids kicked in.. ( there being fed 75 watts RMS )
Well heres why, I guess 10 years of service in a car will take its toll.
I have been out of the audio scene for years, Turns out alot has changed and MB Quart isn't made in Germany anymore and isn't as good as it once was so now it was time to find replacements.. I started reading reviews and kept on seeing this brand CDT come up.. It is built in the USA/Europe and can be had for good prices + has amazing reviews ( never even heard of them 2 weeks ago )..
Well ordered the following which should make a nice upgrade.
- CDT Audio CL-61A - 6.5" 2-Way Component Speakers
- 3/4 MDF Spacers ( THIS is a must ) Had to trim in 1/2 to 3/8 in size.
- Dynamat or equiv ( went with Dynamat extreme )
The MDF spacers I got were 3/4 Again I wasn't sure how much depth I needed so I went bigger. After measuring 3/8 worked perfect so I cut the ring in 1/2
Time for the install, I cut a cardboard template of the corner of the door and then cut the dynamat to size.
Trimmed the plastic, Cleaned the door with wax and grease remover and applied the first layer of dynamat... This should dampen it alot more than it was.
I only secured them with 2 screws as they would be covered with another layer of dynamat and I split one ring in 1/2 trying to secure it.
Def pre-drill the holes through the ring and metal and then screw in by hand.
Added a second layer of dynamat
Finally time to install the new 6.5's
Here you can see the CDT 6.5 next to the MB Quart 5.25 both have 2.5 max depth.
Speaker now installed clears the window track 100%
Now its time to mark & trim the door panel for the 6.5 as much as you can ( space is limited but works out pretty good ) NX's look like they will have more space than Sentra's
First fit up and marking
Marked
Trimmed & Test fitted again
Door panel with Tweeter hole drilled ( no pics drilling ) but used a 3/4 hole saw bit and then fine tuned with a dremel until it fit perfect.
Trimmed + Tweeter Circle
And thats it for modifying the B13 door speakers fit perfect, Woofer clears the window and also clears the door panel Im sure if you push the speakers hard enough the surround could hit the inside of the door but I dont hear that happening at all.
Heres what it looks like 100% done & Installed
Some quick Cliff Notes
- 6.5 Speakers w/2.5 Depth
- 3/8th MDF Spacers
- 2 Layers of Dynamat
Tweeter Install
- 3/4 hole saw ( slowly trimmed to final size with dremel )
Again hope this helps someone looking to do a B13 speaker install. I def wanna thank everyone who's posted bits and pieces and who helped me in my other threads. I didn't figure out all of this on my own but put it in one nice easy place.
Last edited by QUiKSR20
on 2011-10-13
at 05-16-05.
 Be the first to like this post.


