


NOTE: You Will Lose The Function's And Use Of The Horn, Air Bag, and Cruise Control.
NOTE!! I'm not responsible for anything that brakes or "goes wrong" this is a "how to help" and a guide.
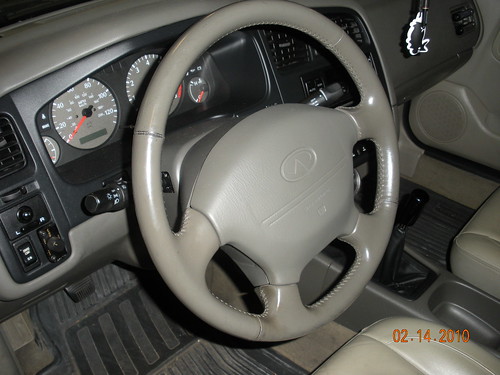
This is a guide to a how to for a p11 (1999) G20 install of a aftermarket steering wheel and quick release hub. The steering wheel in my case is a Nismo wheel with a NRG short base hub and NRG quick release hub. Be aware that your air bag light will be on, remove your air bag fuse so the light will stay on steady if not it will just flash. I recommend to remove the bulb out of the gauge cluster.
Parts You Will Need: (What I Used)
-Your Choice Of Aftermarket Steering Wheel (Nismo Steering Wheel)
-Your Choice Of Short Hub (NRG s13 240sx Part #SRK-140H)
-Your Choice Of A Quick Release Hub (NRG s13 240sx Part #SRK-200BK)
-Horn Button If You Want (Nismo Horn Button)
-6 bolts for the steering wheel to the hub (M5 x 16mm 10.9)
Tools You Will Need (Note I was using air tools):
-1/2 air impact gun
-1/2 ratchet (If not using air tools)
-3/8 ratchet
-small 3/8 extension
-19mm socket
-T50 specialty air bag bolt socket (not at your local auto parts store)
-3mm allen tool / socket
-Phillips screw driver
-Small flat blade screw driver

#1. Disconnect you battery!!! Very Important! Don't skip this step.
#2. Take your small flat blade screw driver and pop off the left side air bag bolt cover.

#3. Take your T50 socket and remove the Air bag bolt on the left side.

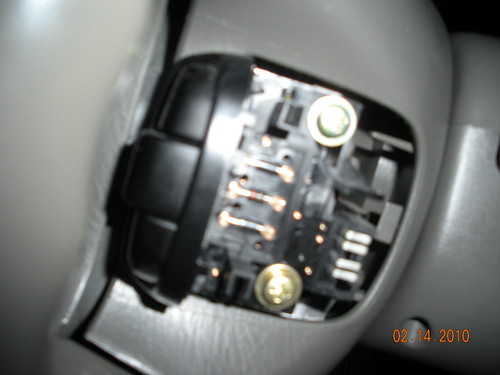
#4. Now on the right side of the steering wheel where your cruise controls are pop off the cover using the small flat blade screw driver. With it off you will see the 2 screws holding on the cruise control . With the screw out the cruise switches comes right off.

#5. With the switch removed you will see the right side air bag bolt. Remove the bolt and now the air bag will be loose.
#6. Gently pop off the air bag (note wires are still connected to the air bag) there's 2 connector's on the air bag. One of course for the air bag system and the other is for the spiral cable. Disconnect both from there connectors. Now the air bag is free and can be set aside.
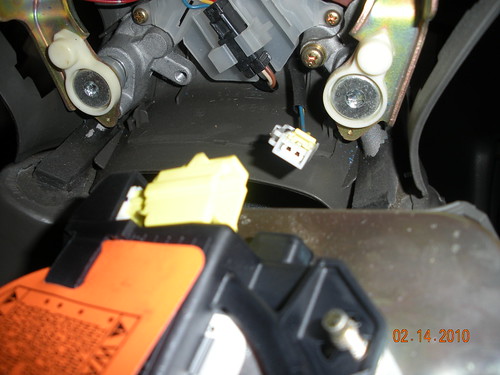

#7. Pop this black connector out of its holder and disconnect it.

#8. Making sure your front wheels are strait, pointing forward. (Note: There are two stamped indentation, one on the steering wheel and one on the end of the steering column. As you can see in the picture above) Making sure the 2 stamped "dots" are pointing strait up to insure you wheel is strait. Remove the 19mm nut that holds the steering wheel on. If you want spray abit of WD-40 on the steering wheel splines when the nut is removed. To get the steering wheel off you need abit of mussels. Take one of your hands on the top of the wheel and your other hand at the bottom of the wheel and start wiggling it back and forth trying to get the wheel to pop off. Might also help by moving your hands to the sides of the steering wheel and wiggling that way as well. Note this might take some time so be patient.
#9. Carefully feed the 2 spiral cable connector wires through the wheel. Set the steering wheel aside.

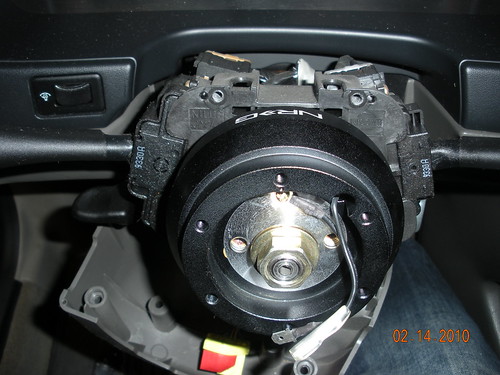
#10. Time to remove the steering column covers, there's many screws so make sure you have them all removed before you split the top and bottom covers. Some of the screws are way up there and not much room for "some" screw drivers. The thinner screw drivers are the ones that work. (Prob. test out your screw drivers to make sure it can reach the screws before you start on step one, if not you will need to find/get one) When the covers are off this is what you should be looking at.
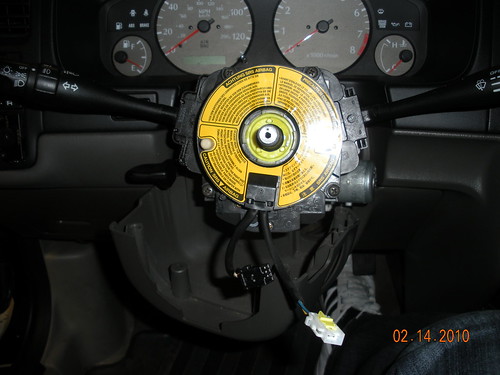
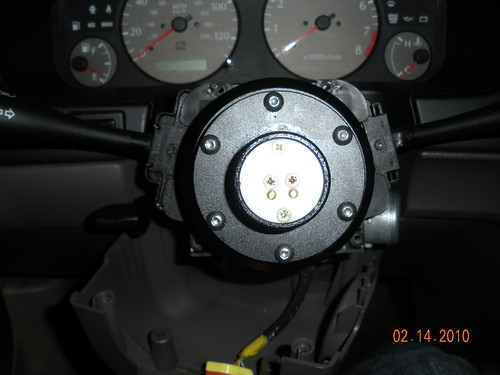
#11. Removing the spiral cable is the next step. Doing so remove the 4 screws that are located one on each corner. There's still a major connector on the back so when the screw are removed be careful. To remove this connector push the red tab to the left and it will come off. You will not be using the spiral cable so you can add it to the pile of parts


On To Installing The New Parts!
#12. If using the short hub base like I did, install it with the logo up and center it as best as possible. Install the 19mm nut that you took off and re tighten it.
#13. Now installing the quick release hub. Split the quick release hub apart and install the bottom part to the hub. (I connected the horn connectors even though I don't have it hooked up to the factory harness so in case i want to fix the horn issue down the road) Install the base of the quick release hub as shown in the picture with the 2 nipples on the bottom half.

#14. Install the other half of the quick release hub and install your choice of steering wheel to it.


NOTE!! I'm not responsible for anything that brakes or "goes wrong" this is a "how to help" and a guide.
This is a guide to a how to for a p11 (1999) G20 install of a aftermarket steering wheel and quick release hub. The steering wheel in my case is a Nismo wheel with a NRG short base hub and NRG quick release hub. Be aware that your air bag light will be on, remove your air bag fuse so the light will stay on steady if not it will just flash. I recommend to remove the bulb out of the gauge cluster.
Parts You Will Need: (What I Used)
-Your Choice Of Aftermarket Steering Wheel (Nismo Steering Wheel)
-Your Choice Of Short Hub (NRG s13 240sx Part #SRK-140H)
-Your Choice Of A Quick Release Hub (NRG s13 240sx Part #SRK-200BK)
-Horn Button If You Want (Nismo Horn Button)
-6 bolts for the steering wheel to the hub (M5 x 16mm 10.9)
Tools You Will Need (Note I was using air tools):
-1/2 air impact gun
-1/2 ratchet (If not using air tools)
-3/8 ratchet
-small 3/8 extension
-19mm socket
-T50 specialty air bag bolt socket (not at your local auto parts store)
-3mm allen tool / socket
-Phillips screw driver
-Small flat blade screw driver
#1. Disconnect you battery!!! Very Important! Don't skip this step.
#2. Take your small flat blade screw driver and pop off the left side air bag bolt cover.
#3. Take your T50 socket and remove the Air bag bolt on the left side.
#4. Now on the right side of the steering wheel where your cruise controls are pop off the cover using the small flat blade screw driver. With it off you will see the 2 screws holding on the cruise control . With the screw out the cruise switches comes right off.
#5. With the switch removed you will see the right side air bag bolt. Remove the bolt and now the air bag will be loose.
#6. Gently pop off the air bag (note wires are still connected to the air bag) there's 2 connector's on the air bag. One of course for the air bag system and the other is for the spiral cable. Disconnect both from there connectors. Now the air bag is free and can be set aside.
#7. Pop this black connector out of its holder and disconnect it.
#8. Making sure your front wheels are strait, pointing forward. (Note: There are two stamped indentation, one on the steering wheel and one on the end of the steering column. As you can see in the picture above) Making sure the 2 stamped "dots" are pointing strait up to insure you wheel is strait. Remove the 19mm nut that holds the steering wheel on. If you want spray abit of WD-40 on the steering wheel splines when the nut is removed. To get the steering wheel off you need abit of mussels. Take one of your hands on the top of the wheel and your other hand at the bottom of the wheel and start wiggling it back and forth trying to get the wheel to pop off. Might also help by moving your hands to the sides of the steering wheel and wiggling that way as well. Note this might take some time so be patient.
#9. Carefully feed the 2 spiral cable connector wires through the wheel. Set the steering wheel aside.
#10. Time to remove the steering column covers, there's many screws so make sure you have them all removed before you split the top and bottom covers. Some of the screws are way up there and not much room for "some" screw drivers. The thinner screw drivers are the ones that work. (Prob. test out your screw drivers to make sure it can reach the screws before you start on step one, if not you will need to find/get one) When the covers are off this is what you should be looking at.
#11. Removing the spiral cable is the next step. Doing so remove the 4 screws that are located one on each corner. There's still a major connector on the back so when the screw are removed be careful. To remove this connector push the red tab to the left and it will come off. You will not be using the spiral cable so you can add it to the pile of parts
On To Installing The New Parts!
#12. If using the short hub base like I did, install it with the logo up and center it as best as possible. Install the 19mm nut that you took off and re tighten it.
#13. Now installing the quick release hub. Split the quick release hub apart and install the bottom part to the hub. (I connected the horn connectors even though I don't have it hooked up to the factory harness so in case i want to fix the horn issue down the road) Install the base of the quick release hub as shown in the picture with the 2 nipples on the bottom half.
#14. Install the other half of the quick release hub and install your choice of steering wheel to it.
 Be the first to like this post.