Hey
I saw another member who did this on a 91-92 sentra so I figured i would try on my 93-94 bumper. Keep in mind, I have never done anything like this so this is basically practice for me and I know its not going to come out perfect but why not give it a shot.
Well first I took one of the foglights out of its bracket and placed the foglight on a piece of cardboard (with the glass part down) to trace a stencil with to get an idea on the size of the hole I need to cut in the bumper.

Then I placed some blue masking tape on the bumper for the area that will be cut out so I can mark the lines with a pencil. I took the stencil and placed it approximately where the foglights will be and traced it with the pencil.

Then I cut the area that was marked off but a little smaller, this way you can slowly sand it so no gaps are made (if you cut too much out then you cant go back, but if you cut it smaller then slowly sand up to the size you need cut out you will be safe) Basically I cut out most of the area that was marked and then placed the foglight in from the front to see how it fit. I did that till it fit perectly.

This is what it looks like with the fog placed in nice and snug.

Today I was only able to get done with cutting out the drivers side foglight hole to make it fit good. Tomorrow I will cut out the passenger side to make the foglight fit and then figure out somesort of bracket. I will update tomorrow with more info.
Update
Today I was able to finish the install.
I cut out the other side of the bumper so I can place the other foglight in.
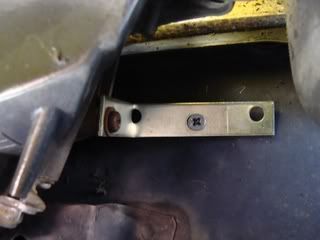
I used a strip of metal for a "custom" bracket. I bent the metal into an L shape then screwed one side into one of the holes on the foglight from its original bracket then placed the foglight into position then screwed the other side into the bumpersupport.


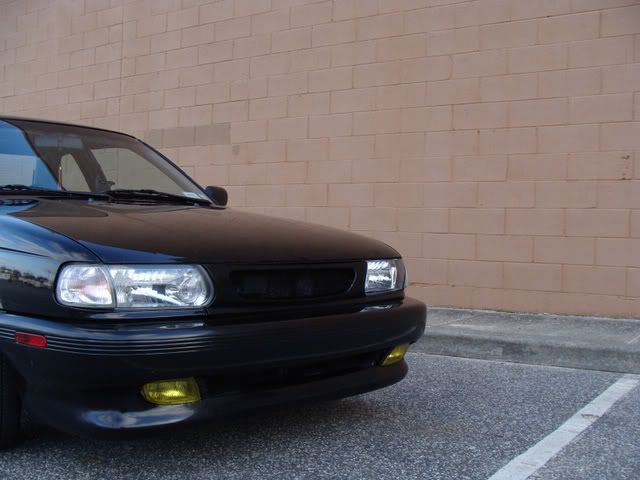
I also painted the foglights yellow and this is how they sit now.


Let me know what you think Thanks
-Tamas
I saw another member who did this on a 91-92 sentra so I figured i would try on my 93-94 bumper. Keep in mind, I have never done anything like this so this is basically practice for me and I know its not going to come out perfect but why not give it a shot.
Well first I took one of the foglights out of its bracket and placed the foglight on a piece of cardboard (with the glass part down) to trace a stencil with to get an idea on the size of the hole I need to cut in the bumper.

Then I placed some blue masking tape on the bumper for the area that will be cut out so I can mark the lines with a pencil. I took the stencil and placed it approximately where the foglights will be and traced it with the pencil.

Then I cut the area that was marked off but a little smaller, this way you can slowly sand it so no gaps are made (if you cut too much out then you cant go back, but if you cut it smaller then slowly sand up to the size you need cut out you will be safe) Basically I cut out most of the area that was marked and then placed the foglight in from the front to see how it fit. I did that till it fit perectly.

This is what it looks like with the fog placed in nice and snug.

Today I was only able to get done with cutting out the drivers side foglight hole to make it fit good. Tomorrow I will cut out the passenger side to make the foglight fit and then figure out somesort of bracket. I will update tomorrow with more info.
Update
Today I was able to finish the install.
I cut out the other side of the bumper so I can place the other foglight in.
I used a strip of metal for a "custom" bracket. I bent the metal into an L shape then screwed one side into one of the holes on the foglight from its original bracket then placed the foglight into position then screwed the other side into the bumpersupport.


I also painted the foglights yellow and this is how they sit now.


Let me know what you think Thanks
-Tamas


 . Thanks
 Back to top
