


I'm laying out the basics for the install and wiring of the B14 Lucino JDM Power Folding Mirrors. The wiring should be the same for the B13 Sunny JDM Power Folding Mirrors.
What you will need:
Both Mirrors (Driver & Passenger, duh)
Ratchet w/ 10mm Socket
All-In-One Wire Cutter/Stripper/Crimper
(14) 18-22 Gauge Butt Splices
(4) 18-22 Gauge Male/Female Disconnects
(2) 5 ft Length 18 Gauge Automotive Wiring
(2) 10 ft Length 18 Gauge Automotive Wiring
Electrical Tape
Phillips Screwdriver
Flathead Screwdriver or Butter Knife
Existing USDM Power Mirror Harness
Black Sharpie or Marker
Several Zip-Ties (Optional for clean installation)
Total Time For Installation: 2-3.5 hours. For those with good electrical know-how, should be able to tackle this job in a 2 hour span, in which it took me to do.
1. Since the JDM mirrors have a 5-wire harness (3 for the mirror adjustment and 2 for the folding mechanism), I decided to use the existing USDM 3-wire harness for this project. As shown in the pic below, the JDM harness is on the left and USDM harness on the right.
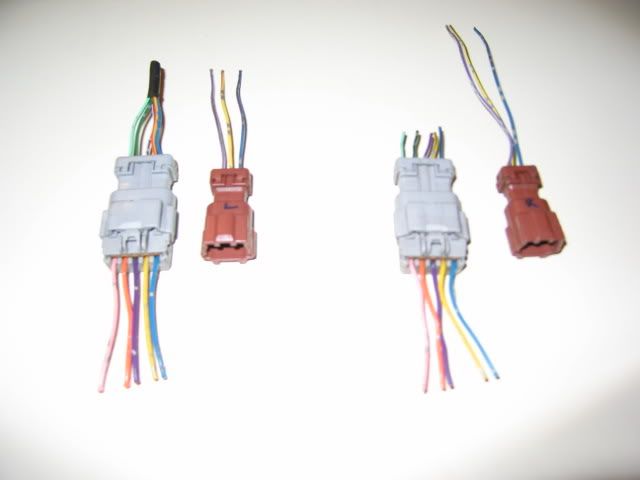
You will be using the harness that attaches to the mirror. By using the USDM harness, you just match up the wires by color using butt splices. This will leave you with the 2 wires on each mirror for the folding.
Wiring From Mirror to USDM Harness: Blue, Yellow & Purple
Remaining 2 wires for folding off mirror: Orange & Pink
With all wiring connected, you should have something like this:

2. Now with the wiring to the mirror out of the way, we now move on to the JDM remote unit. The remote unit have 9 wires compare to the USDM unit, which have 7. On the JDM unit, you will be stripping out 7 wires to be connected and crimped with butt splices. NOTE: Depending on the JDM unit you have (I've seen 2 different ones for B14), the solid purple or orange wire from the unit, connects to the solid purple on the car harness side and yellow w/ red stripe or yellow w/ blue stripe from unit, connects to yellow w/ red stripe on car harness side. For B13, solid orange and yellow w/ blue stripe wires matches to harness side.
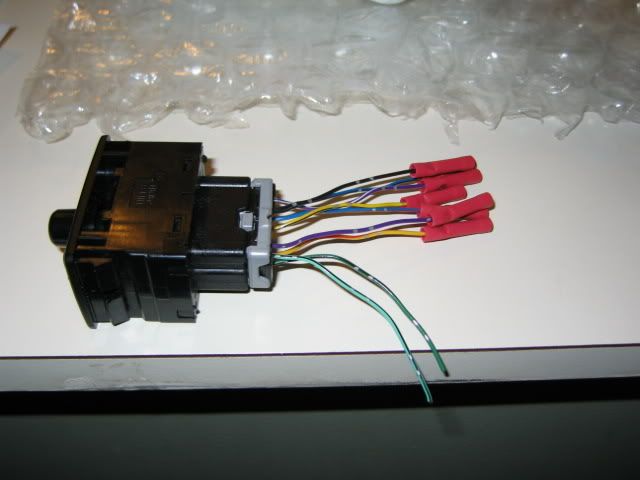
You will be left with 2 wires for the folding: Dark Green w/ Black Stripe (or Solid Green) & Light Green w/ Black Stripe (or Purple w/ White stripe). We will be wiring the remote unit to the existing wiring in the car shortly.
You should have something like this after you crimped the 7 wires:

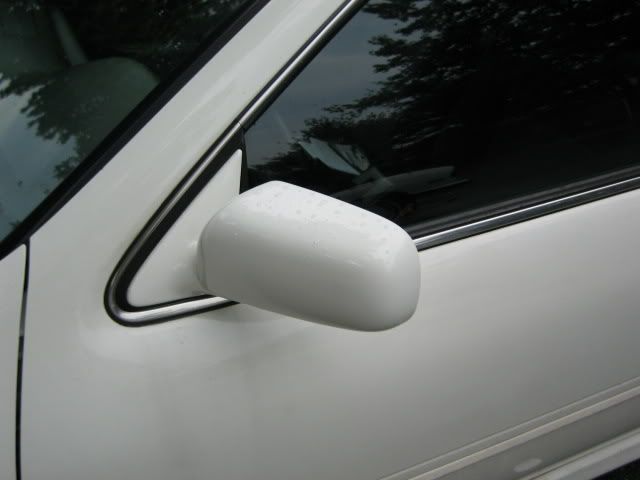
3. Next, we now move to the car and will be doing one side at a time. As in this case, driver side will be done first. Using your phillips screwdriver, start removing the 8 screws that hold the door panel in place and the 1 screw deep in the door arm rest. With all the screws removed, you will need to move the door panel upwards for removal. Disconnect any power door or window harness as the panel will be in the way of install. You should be able to see the power mirror harness, disconnect at this point. Next, using a flathead screwdriver or butter knife gently pry off the mirror cover which is held in place by 3 push tabs. This will expose the 3 10mm bolts that is holding the USDM mirror. Using your ratchet with 10mm socket, remove middle bolt first, then remove the other 2 bolts. You should be able to remove the mirror easily from the outside. Be careful when removing the last bolt, mirror may fall to the ground.
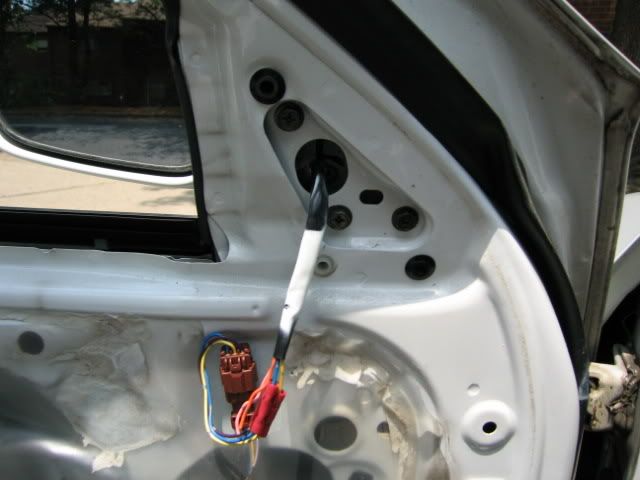
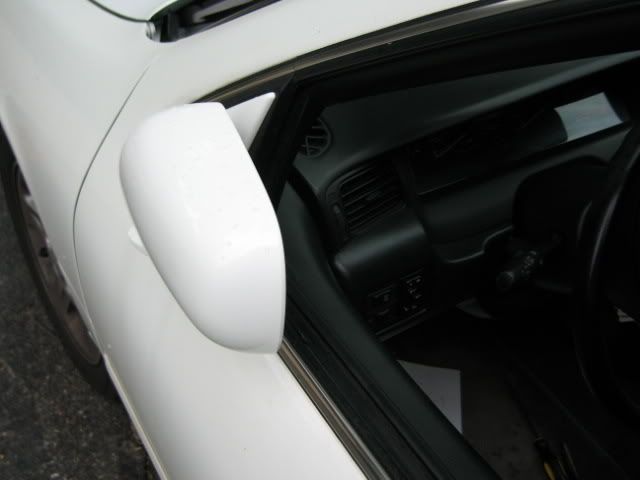
We can now take our JDM mirror unit and bolt it in place with the 3 10mm bolts. Do not over-tighten the bolts, you should be able to hand tighten and 2-3 turns on the ratchet will do. Now connect the harness from the mirror to the harness on the door.
This is what it should look like after connection:
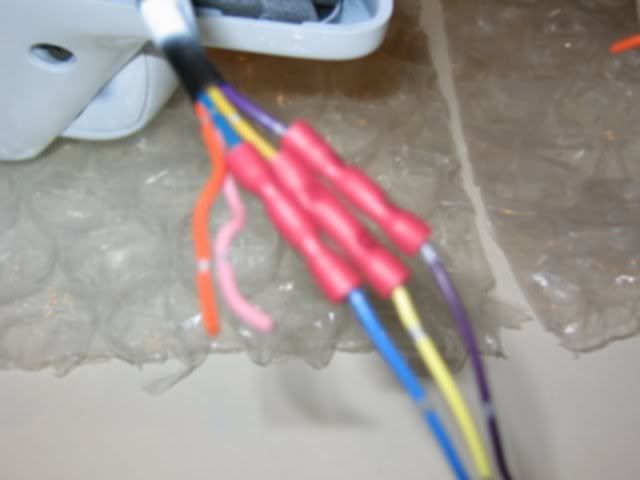
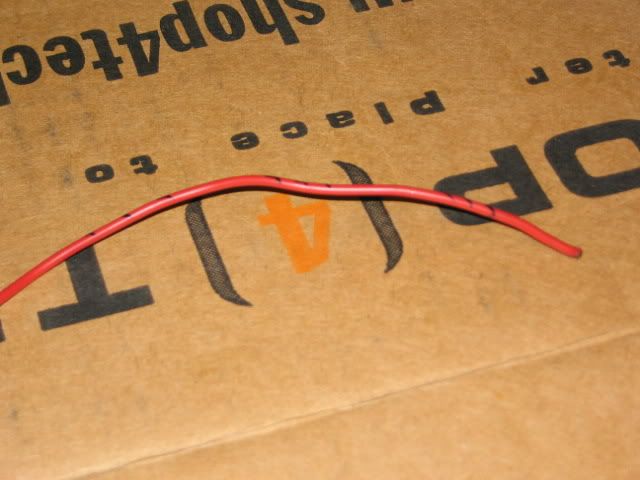
4. Now for the tricky part which will involve work. The two wires that we touched upon earlier on the mirror is now the main focus. The orange and pink wire are for the folding operation of the unit. Since we are working on the driver side, we will be using (2) 5 foot length 18 gauge automotive wiring. Passenger side will be using the (2) 10 foot wiring. Since the wiring will be the same color and not to confuse the installation, I've marked one of the wires with a black marker with 3 sets of 3 uniformed lines on each end of the wire.
Here is an example of what I've done:
5. Since we want to make this install as easy as possible, I decided to snake the (2) 5 ft wires from underneath the dash thru the rubber grommet in the door. Now take a piece of electrical tape and tape the 2 wires together at one end. This is the end that you will be navigating to the mirror unit. The hard part is trying to find the rubber grommet from underneath the dash. You may want to remove the kick panel(both sides) and knee dash unit(driver side only). I had a hell of a time bringing the wires to the rubber grommet. It'll take some effort to get to. You can undo the rubber grommet between the door and car. Now you are thinking to yourself, how am i supposed to get these 2 wires thru the grommet. For me, I just slit 2 openings with a utility knife in between the grommet to help me guide the wires thru.
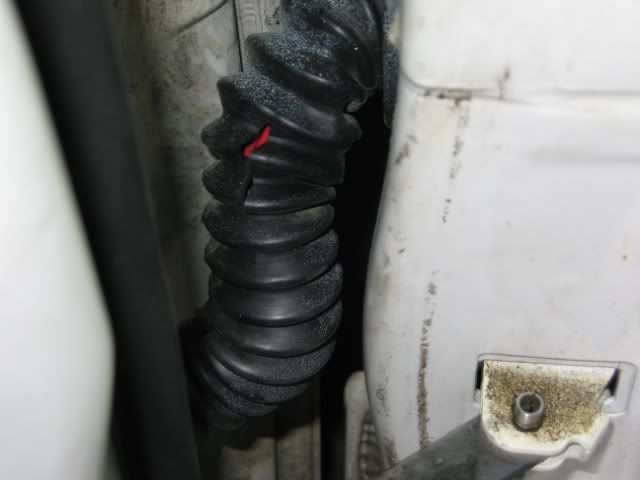
After you are able to get the wires thru the grommet, pull the wires gently towards the harness on the door. You can now put the rubber grommet back into place. You can remove the electrical tape off the 2 wires.
Splicing the 2 wires (one wire with the markings and the other without). In this case, the one with the marking will be connected to the Orange wire using a set of 18-22 AWG male/female disconnects. Connect the other wiring to Pink using another set of disconnects. Insulate all of the wirings with enough electrical tape. You can reinstall the door panel and reconnect any electrical connections that were disconnected. You should be able to test the mirror adjustment with the existing USDM remote unit still in the car. If you are able to adjust the mirror, then congratulations you are half-way complete of the wiring part to the mirror.
6. For Passenger side, repeat steps 3-5.
7. With the passenger side done, you will now need to bring over the wiring from the passenger side to the remote unit. I simply ran the passenger wiring underneath the carpet by the firewall over to the driver side. You will need a couple zip-ties to secure the wiring in several spots.
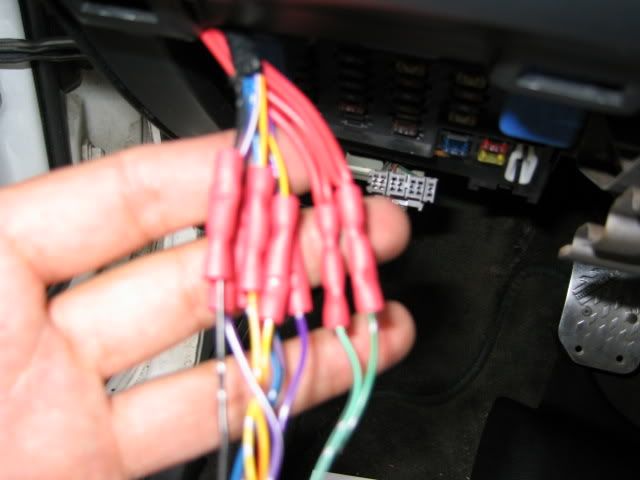
8. Remove USDM remote unit from dash, it will be easier if push from underneath the dash. Disconnect remote unit from harness. Now take your wire cutter and cut the 7 wires. The JDM remote unit now comes into play. Since the JDM unit already have the butt splices connected, all you need to do now is match the color wiring off the cut harness and strip/crimp. We are almost done, all we need to do now is connect the wires for folding operation on the JDM unit.
9. You may have excess wiring from the (2) 5 ft wires running from the driver side, you may want to match the length of the passenger side at this point and cut any additional length from the driver side. We now have our 4 wires for folding operation. Strip the 4 wires and connect together the following:
Wire with marking (driver and passenger)
Wire without marking (driver and passenger)
At this point, we unified 4 wires to become 2. On each end of the 2 unified wires, connect to a butt splice and crimp wire into place. Now take the spliced and connect to the 2 wires left uncrimped on the JDM unit. The following connects:
Wire with marking = Dark Green w/ Black Stripe
Wire without marking = Light Green w/ Black Stripe
The back of the JDM unit harness should look like this:
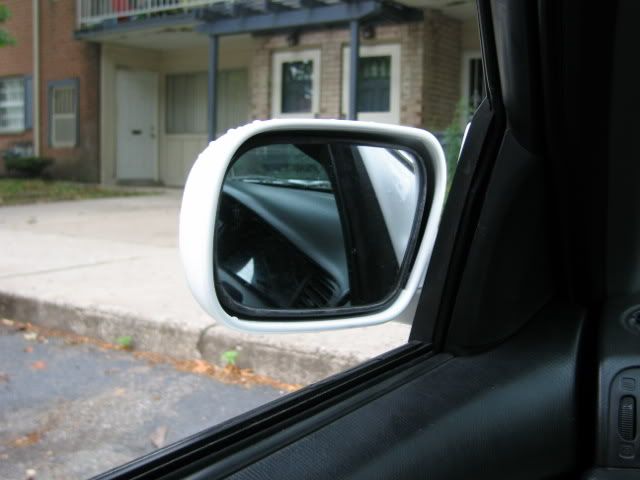
Test the folding operation on the unit, if successful in folding/unfolding the mirror, then you have completed the installation of the Power Folding Mirrors.
10. Reinstall JDM remote unit into dash, hide any shown mirror wiring from underneath dash with zip-ties. Reinstall knee dash cover and both kick panel sides. Check all rubber grommets in between doors are in place. Check both door panels to make sure it is secure. Now enjoy the new mirrors!!!!!
What you will need:
Both Mirrors (Driver & Passenger, duh)
Ratchet w/ 10mm Socket
All-In-One Wire Cutter/Stripper/Crimper
(14) 18-22 Gauge Butt Splices
(4) 18-22 Gauge Male/Female Disconnects
(2) 5 ft Length 18 Gauge Automotive Wiring
(2) 10 ft Length 18 Gauge Automotive Wiring
Electrical Tape
Phillips Screwdriver
Flathead Screwdriver or Butter Knife
Existing USDM Power Mirror Harness
Black Sharpie or Marker
Several Zip-Ties (Optional for clean installation)
Total Time For Installation: 2-3.5 hours. For those with good electrical know-how, should be able to tackle this job in a 2 hour span, in which it took me to do.
1. Since the JDM mirrors have a 5-wire harness (3 for the mirror adjustment and 2 for the folding mechanism), I decided to use the existing USDM 3-wire harness for this project. As shown in the pic below, the JDM harness is on the left and USDM harness on the right.
You will be using the harness that attaches to the mirror. By using the USDM harness, you just match up the wires by color using butt splices. This will leave you with the 2 wires on each mirror for the folding.
Wiring From Mirror to USDM Harness: Blue, Yellow & Purple
Remaining 2 wires for folding off mirror: Orange & Pink
With all wiring connected, you should have something like this:
2. Now with the wiring to the mirror out of the way, we now move on to the JDM remote unit. The remote unit have 9 wires compare to the USDM unit, which have 7. On the JDM unit, you will be stripping out 7 wires to be connected and crimped with butt splices. NOTE: Depending on the JDM unit you have (I've seen 2 different ones for B14), the solid purple or orange wire from the unit, connects to the solid purple on the car harness side and yellow w/ red stripe or yellow w/ blue stripe from unit, connects to yellow w/ red stripe on car harness side. For B13, solid orange and yellow w/ blue stripe wires matches to harness side.
You will be left with 2 wires for the folding: Dark Green w/ Black Stripe (or Solid Green) & Light Green w/ Black Stripe (or Purple w/ White stripe). We will be wiring the remote unit to the existing wiring in the car shortly.
You should have something like this after you crimped the 7 wires:
3. Next, we now move to the car and will be doing one side at a time. As in this case, driver side will be done first. Using your phillips screwdriver, start removing the 8 screws that hold the door panel in place and the 1 screw deep in the door arm rest. With all the screws removed, you will need to move the door panel upwards for removal. Disconnect any power door or window harness as the panel will be in the way of install. You should be able to see the power mirror harness, disconnect at this point. Next, using a flathead screwdriver or butter knife gently pry off the mirror cover which is held in place by 3 push tabs. This will expose the 3 10mm bolts that is holding the USDM mirror. Using your ratchet with 10mm socket, remove middle bolt first, then remove the other 2 bolts. You should be able to remove the mirror easily from the outside. Be careful when removing the last bolt, mirror may fall to the ground.
We can now take our JDM mirror unit and bolt it in place with the 3 10mm bolts. Do not over-tighten the bolts, you should be able to hand tighten and 2-3 turns on the ratchet will do. Now connect the harness from the mirror to the harness on the door.
This is what it should look like after connection:
4. Now for the tricky part which will involve work. The two wires that we touched upon earlier on the mirror is now the main focus. The orange and pink wire are for the folding operation of the unit. Since we are working on the driver side, we will be using (2) 5 foot length 18 gauge automotive wiring. Passenger side will be using the (2) 10 foot wiring. Since the wiring will be the same color and not to confuse the installation, I've marked one of the wires with a black marker with 3 sets of 3 uniformed lines on each end of the wire.
Here is an example of what I've done:
5. Since we want to make this install as easy as possible, I decided to snake the (2) 5 ft wires from underneath the dash thru the rubber grommet in the door. Now take a piece of electrical tape and tape the 2 wires together at one end. This is the end that you will be navigating to the mirror unit. The hard part is trying to find the rubber grommet from underneath the dash. You may want to remove the kick panel(both sides) and knee dash unit(driver side only). I had a hell of a time bringing the wires to the rubber grommet. It'll take some effort to get to. You can undo the rubber grommet between the door and car. Now you are thinking to yourself, how am i supposed to get these 2 wires thru the grommet. For me, I just slit 2 openings with a utility knife in between the grommet to help me guide the wires thru.
After you are able to get the wires thru the grommet, pull the wires gently towards the harness on the door. You can now put the rubber grommet back into place. You can remove the electrical tape off the 2 wires.
Splicing the 2 wires (one wire with the markings and the other without). In this case, the one with the marking will be connected to the Orange wire using a set of 18-22 AWG male/female disconnects. Connect the other wiring to Pink using another set of disconnects. Insulate all of the wirings with enough electrical tape. You can reinstall the door panel and reconnect any electrical connections that were disconnected. You should be able to test the mirror adjustment with the existing USDM remote unit still in the car. If you are able to adjust the mirror, then congratulations you are half-way complete of the wiring part to the mirror.
6. For Passenger side, repeat steps 3-5.
7. With the passenger side done, you will now need to bring over the wiring from the passenger side to the remote unit. I simply ran the passenger wiring underneath the carpet by the firewall over to the driver side. You will need a couple zip-ties to secure the wiring in several spots.
8. Remove USDM remote unit from dash, it will be easier if push from underneath the dash. Disconnect remote unit from harness. Now take your wire cutter and cut the 7 wires. The JDM remote unit now comes into play. Since the JDM unit already have the butt splices connected, all you need to do now is match the color wiring off the cut harness and strip/crimp. We are almost done, all we need to do now is connect the wires for folding operation on the JDM unit.
9. You may have excess wiring from the (2) 5 ft wires running from the driver side, you may want to match the length of the passenger side at this point and cut any additional length from the driver side. We now have our 4 wires for folding operation. Strip the 4 wires and connect together the following:
Wire with marking (driver and passenger)
Wire without marking (driver and passenger)
At this point, we unified 4 wires to become 2. On each end of the 2 unified wires, connect to a butt splice and crimp wire into place. Now take the spliced and connect to the 2 wires left uncrimped on the JDM unit. The following connects:
Wire with marking = Dark Green w/ Black Stripe
Wire without marking = Light Green w/ Black Stripe
The back of the JDM unit harness should look like this:
Test the folding operation on the unit, if successful in folding/unfolding the mirror, then you have completed the installation of the Power Folding Mirrors.
10. Reinstall JDM remote unit into dash, hide any shown mirror wiring from underneath dash with zip-ties. Reinstall knee dash cover and both kick panel sides. Check all rubber grommets in between doors are in place. Check both door panels to make sure it is secure. Now enjoy the new mirrors!!!!!
Last edited by jet
on 2012-08-08
at 23-38-49.
Reason: Amend wiring info for remote unit.
 Be the first to like this post.


