I see alot of faded paint and scratches on this forum, I think people could benefit from a little education in the arts of detailing your car! I worked as a detailer for two year's at a dealership which is where I learned the rudimentary skills involved with the craft, also I learned NEVER TO LET DEALERSHIPS DETAIL YOUR CAR! The number one goal at dealerships is the dollar, and time is money so corners will definitely be cut and your car will have more fillers on it than an oscar mayer lunchable. Many dealerships also don't have a well trained staff, unfortunately I can attest to this. I started working as a dealership detailer when I was 17 and didn't really know what I was doing, just learning stuff along the way. When I actually started reading articles and getting industry updates I realized that the process by which we cleaned cars was completely bonkers! When suggesting new methods or means of detailing the "senior" detailers ignored me. To this day only one bucket is used for all cars, that are washed with nylon bristle brushes that are let sit on the floor, and the wash water gets changed once a day at best. The polishes we used contained fillers so you really had no way of knowing if the scratches were actually removed, or just covered up.
I've found the best detailers are ones that don't work for a business, the independent detailers who work out of their trunk often achieve the best results, but there are also some VERY good quality detail shops but these also charge a very pretty penny. Okay back to the detailing, every good detail starts with the wash...
STEP 1: The Wash.
WHY DO WE WASH?
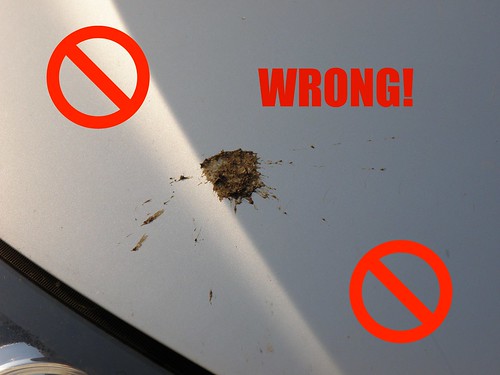
Washing your car is the most important step towards maintaining a smooth, shiny, and clean surface to your vehicles exterior and should be done weekly. Certain paint contaminants like bird droppings and bug residue are quick to damage your paint and need to be removed quickly, the acid and digestive enzymes in these contaminates will eat through your clean coat causing weak spots or clear coat failure. Brake dust is also a quick acting contaminant which is removed through your weekly washes. As you drive brake dust is released which will coat your wheels and the lower portion of your vehicle, the fine metal fragments and adhesives in the pad will become bonded and embedded in your paint. These metal fragments is left alone may eventually pierce through your clearcoat, your paint, and your primer and begin rust in the sheetmetal below.
TOOLS.
Washing your car is the first step, but it needs to be done right! No more brushes, no more sponges you found under the sink, no more old t-shirts. Get yourself a QUALITY washing tool! Cotton chenille wash mitts are okay, microfiber mitts or sponges are better, but what would be ideal is to get yourself a 100% Sheepskin washmitt, but be prepared to pay around $15-30 for it. So that you have your mitt you need some soap, there are tons of varieties out there and many can be had for extremely low prices. Avoid them. Once again the magic price is about $15, the price of your detailing medium is usually a good indication of the quality, but this is not always the case so it doesn't hurt to read some reviews about a product before purchasing. Another note on trying new products is to buy the smallest container available if you're unsure of whether the product is quality or not, you can usually save money if you buy a larger volume but it sucks to be stuck with a lot of product that doesn't function! Oh yeah, soap. Okay, the soap that I use currently is the Meguiar's nXt Generation Car Wash and the Black Magic Wet Shine Wash. The Meguiar's works very well, it has a nice foaming action to it and it is able to remove dirt easily. The Black Magic I will not be reordering, simply put, I bought it because it was cheap. The soap that I'm currently eyeing up is the Poorboy's World Super Slick Suds, the Meguiar's doesn't have enough suds for my liking. Another thing to note when purchasing soap is to always read the dilution instructions, sometimes a larger bottle may have less uses to it than may appear. The third essential tool to a good wash are buckets! Two good, clean buckets are vital for an effective washing technique. They don't need to be anything special, just able to hold enough water to wash your car with and to be inpecably clean! If you're going to be soaking a mitt in there and then rub it all over your car you need to make sure that there isn't any foreign debris, dirt, dust, rocks, hell even gravel that you'll end up rubbing all over your car, inducing scratches as you wash. A good way to keep dirt out of your buckets while washing is to invest in a grit guard, a small metal grille that will let all the dirt and debris fall to the bottom of the bucket when you rinse your mitt as you clean, this way it will stay off your car for good. One thing I forgot to mention is location, make sure you wash your car somewhere in the shade! Otherwise you'll have all your solutions dry out on your paint and leave residues that will be difficult to remove.
SUMMARY: Sheepskin washmitt, quality soap, two clean buckets, shade.
TECHNIQUE.
When starting your wash you'll want to pretreat any majorly soiled areas; spray down wheel wells using a good APC (all purpose cleaner), areas of your paint that are splattered with bug residue, behind the wheels where dirt is usually kicked up, and the back of your car (I've found that a layer of dirt/dust usually collects here). Let that sit for a few minutes. Get your two buckets, put your grit guards in the bottom if you have them, and fill the first one with water (deionized would be nice, but not exactly a necessity) and the second with your soap and water solution while being careful to read the directions on your container. Rinse off the areas that you pretreated earlier, once again deionized water is nice but not really necessary, and begin to wash your car. Start with the least soiled areas of the car, the roof, hood, trunk, and doors, then wipe down the bumpers, lower parts of the door panels, and side skirts. Be sure to rinse your mitt in your water bucket 3-5 times during your wash depending on the severity of dirt in your washmitt. And now it's time to do your final rinse, take off any attachment you have on your hose and start pouring water on the roof until it spills down over the edges, then quickly try to follow the water down the side of the car, repeat this with the hood and trunk. This is called 'sheeting' and the idea is to have the water rinse off the remaining dirt and soap while using the cohesive property of water to pull as much water off as well to leave you with minimal work for drying.
About deionized water, the purpose of using deionized water while washing and rinsing is to eliminate water spots. Normal tap water will leave mineral deposits on your paint called water spots, you can either buy large jugs of deionized water or you can purchase a water deionizing system (although this is a very expensive thing to do for most people). These systems are available in 100 gallon to 300 gallon output with either wall mount or wheeled carts. Price varies from $300 to about $450 and the added cost of recharging your filter element periodically. A more economical product is the inline hose filter/water softener, with interchangeable filter packs you choose to use a sediment filter (for those of your with well water supply) or a magnesium and calcium filter (the two main minerals responsible for water spots). You could also purchase two filter housings to remove both sediments and minerals if you have really poor water. An inline hose filter/water softener will run you about $50 for the basic kit to $140 for the deluxe kit. It is perfectly acceptable not to use as well, there are other ways to avoid water spots.

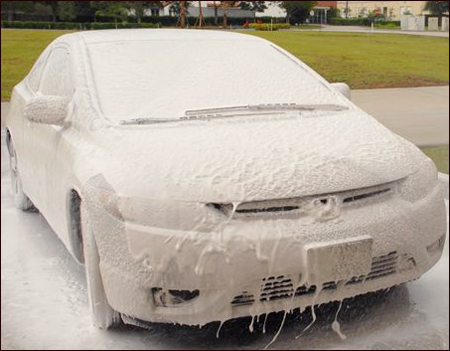
Another option to washing your car, if you have a pressure washer this is the preferred method as you don't run the risk of inducing scratches while wiping. I've had good results using electric washers, you should be careful with gas washers as you may damage fins on heat exchangers or if you have a failed clearcoat you might even strip off large sections of your clearcoat, which will most likely make you very angry! An even better tool is a foam gun, which coats your vehicle in a thick sudsy solution of surfactants and wetting agents. This is ideal as you don't have to touch the car and you don't have the risks of damaging your vehicle with high pressure water. Foam guns kick ass, are definitely on my list of products to try. There are different variations on it available, they can connect to a standard hose, an air compressor, or a pressure washer. Each of these adds a little extra cleaning force through water/air pressure.
SUMMARY: Pretreat, two bucket method, rinse mitt often, sheeting technique, deionized water, pressure washer.
DRYING.
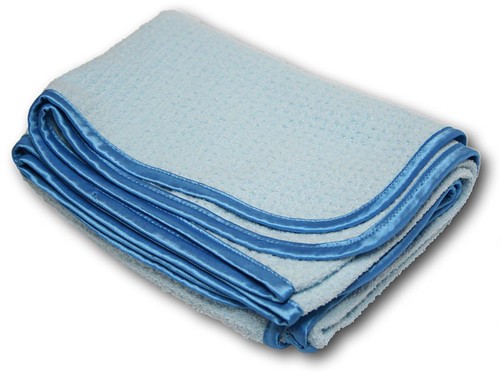
Now that you've washed your car it's time to dry it! If you've been using deionized water up until this point, good for you! You've saved yourself much worry for the drying stage. If you have a good, clean leaf blower (not covered in dust/leaf debris/mulch) that won't slingshot tiny particulates at your paint feel free to use that to dry your vehicle, this is good to remove water out of hard to access cracks and crevices. Pressurized air is also a wonderful tool to use. If you have no source of forced air at your disposal, don't worry we can still use towels. NO! Put down the bath towel you just picked up, in fact, burn the bath towel. You will NEVER touch your paint with a bath towel. No, we're going to use large waffle weaved microfiber drying towels. A synthetic or natural leather chamois is also acceptable, but you're going to add micro scratches to your paint, no two ways about it. The purpose of the waffle weave is to trap any remaining dirt in the towel where it won't scrape across the paint, a chamois generally has a flat surface and will assuredly marr the surface. A good method to practice is to follow your drying with an application of quick detailing spray so as to remove any mineral deposits before they affix themselves to your paint. When drying doorjambs and around the hood and trunk use an all purpose microfiber cloth, not the waffle weaved you used earlier. The jambs will be much dirtier than the rest of the drying area and they are less important in terms of shine. Another effective strategy for jambs is using a waterless wash product as these tend to have high strength surfactants that will reduce your scratching of the paint.

TIP: If you're drying in a hot environment and are concerned about water evaporating before you get a chance to dry it, try using an authentic California Blade. A few quick smooth strokes starting at the top of the vehicle should remove most of the water, my only problem with this is that if there is any dirt left on the surface the flat blade will drag it along your paint leaving long scratches, BUT if you have a good washing technique you shouldn't have to worry. A quick follow up with your waffle weave towel and the outside should be dry.
SUMMARY: Chamois is okay, microfiber is better, pressurized air or leaf blower is best.
RINSELESS WASH.
A recent development in car washing is the rinseless wash, sometimes referred to as an eco wash. You can think of this as a heavy duty quick detailer spray. There are two methods for application. The first is preferred for a more heavily soiled vehicle, and you only need one bucket. Fill the bucket with two gallons of water and one ounce of the rinseless wash concentration, this is all you need! Increasing the concentration of wash will not make the solution more effective, it is fine as it is. You will also need a spray bottle of about 32 ounces, fill with 2.5 ounces of concentrate and the rest with water. Spray the panel down with the bottle and let that sit for a minute or two to begin loosening and encapsulating the dirt particles, then take your wash media and get it dripping wet from your bucket. Wipe down the panel with your media and then rinse it out in your bucket. Get it dripping wet again and wipe down the panel a second time. Now take a clean microfiber drying towel and dry off the panel, you don't have to get it perfectly dry as the rinseless wash should not leave water spots. Once you get the hang of it you can wash and dry your car in as little as 30 minutes.
The other option for application is to just your spray bottle, with the concentration given above. Spray onto a panel and wipe off with a plush microfiber towel. And that's! Your car will come out clean and shiny without adding any extra scratches. This method is really only appropriate for a vehicle that gets washed at least once a week, (I do mine two, sometimes three times a week). When done properly you can wash your car in 15 minutes.
Regarding rinseless wash products, they come in bottles of concentrate from as little as 16 ounces to 128 ounces, and price should range from $10-$40. Rinseless wash (most commonly referred to as ONR, which mean Optimum No Rinse, this is a specific brand of the wash but often refers to any brand. Think of it how Kleenex is used to refer to facial tissue.) can be diluted for a few different purposes. The 1 ounce to 2 gallon dilution is used for bucket washes, 2.5 ounces per 32 ounces is for quick detailing, and 1.5 ounces per 32 ounces is for use as a clay lube. ONR is an amazing time saver and is very handy for people without access to a hose (apartment dwellers).
I'll post up a series of pictures showing the process being done to a panel of my dad's truck in a few days.
WHEELS.
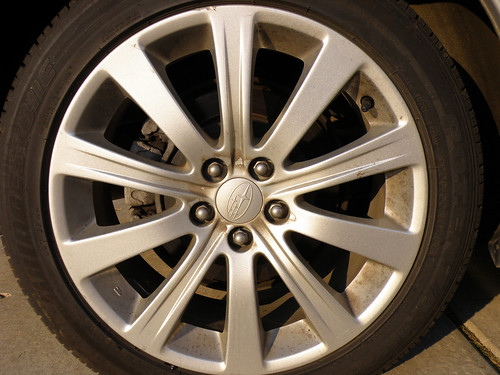
Wheels are usually your most soiled area on the car, they are coated with brake dust and road grime. Because of this heavy build up of dirt and debris it is important to either clean them before or after you wash the car itself, not during. By washing the wheels simultaneously with the car you run the risk of cross contamination between the comparatively clean surface of your paint and soiled cesspool of your wheels.
I choose to wash the wheels after washing the car, this reduces the risk of cross contamination between surfaces as the wheels will have a coating of brake dust that is very bad for your paint. This is another situation where waterless wash products come in handy, I use ONR (Optimum No Rinse) with great results. Get a clean bucket and fill it with about a gallon of water, add the appropriate amount of waterless wash (I use 1.5 oz of ONR) and get another all purpose microfiber cloth. Soak the cloth and start wiping down the wheel, starting at the top, dry with an all purpose microfiber immediately after.
Another option to clean the wheels is to include it in your pretreating stage and to spray them with your APC or specific wheel and tire cleaner and let soak, wipe as necessary with microfiber or use a soft wheel spoke brush, rinse, and dry. Respray any stubborn areas and wipe with an all purpose microfiber cloth. If you choose to clean with this method it is important to do this before you wash your car, this is so any overspray of your wheel cleaner doesn't sit on your paint and potentially damage it. Also make sure that any buckets or cloths are free of grime that you may want to use on your vehicle, don't settle for 'clean enough' with your washing tools, no brake dust residue should remain otherwise you are guaranteed to induce swirl marks during your wash.
CONGRATULATIONS! YOU JUST WASHED YOUR CAR!
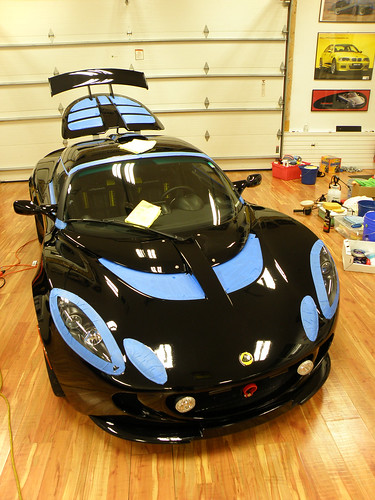
Here is a testament to dealership quality. This was a brand new 325i from a California dealership, the so called hub of detailing.

I've found the best detailers are ones that don't work for a business, the independent detailers who work out of their trunk often achieve the best results, but there are also some VERY good quality detail shops but these also charge a very pretty penny. Okay back to the detailing, every good detail starts with the wash...
STEP 1: The Wash.
WHY DO WE WASH?
Washing your car is the most important step towards maintaining a smooth, shiny, and clean surface to your vehicles exterior and should be done weekly. Certain paint contaminants like bird droppings and bug residue are quick to damage your paint and need to be removed quickly, the acid and digestive enzymes in these contaminates will eat through your clean coat causing weak spots or clear coat failure. Brake dust is also a quick acting contaminant which is removed through your weekly washes. As you drive brake dust is released which will coat your wheels and the lower portion of your vehicle, the fine metal fragments and adhesives in the pad will become bonded and embedded in your paint. These metal fragments is left alone may eventually pierce through your clearcoat, your paint, and your primer and begin rust in the sheetmetal below.
TOOLS.
Washing your car is the first step, but it needs to be done right! No more brushes, no more sponges you found under the sink, no more old t-shirts. Get yourself a QUALITY washing tool! Cotton chenille wash mitts are okay, microfiber mitts or sponges are better, but what would be ideal is to get yourself a 100% Sheepskin washmitt, but be prepared to pay around $15-30 for it. So that you have your mitt you need some soap, there are tons of varieties out there and many can be had for extremely low prices. Avoid them. Once again the magic price is about $15, the price of your detailing medium is usually a good indication of the quality, but this is not always the case so it doesn't hurt to read some reviews about a product before purchasing. Another note on trying new products is to buy the smallest container available if you're unsure of whether the product is quality or not, you can usually save money if you buy a larger volume but it sucks to be stuck with a lot of product that doesn't function! Oh yeah, soap. Okay, the soap that I use currently is the Meguiar's nXt Generation Car Wash and the Black Magic Wet Shine Wash. The Meguiar's works very well, it has a nice foaming action to it and it is able to remove dirt easily. The Black Magic I will not be reordering, simply put, I bought it because it was cheap. The soap that I'm currently eyeing up is the Poorboy's World Super Slick Suds, the Meguiar's doesn't have enough suds for my liking. Another thing to note when purchasing soap is to always read the dilution instructions, sometimes a larger bottle may have less uses to it than may appear. The third essential tool to a good wash are buckets! Two good, clean buckets are vital for an effective washing technique. They don't need to be anything special, just able to hold enough water to wash your car with and to be inpecably clean! If you're going to be soaking a mitt in there and then rub it all over your car you need to make sure that there isn't any foreign debris, dirt, dust, rocks, hell even gravel that you'll end up rubbing all over your car, inducing scratches as you wash. A good way to keep dirt out of your buckets while washing is to invest in a grit guard, a small metal grille that will let all the dirt and debris fall to the bottom of the bucket when you rinse your mitt as you clean, this way it will stay off your car for good. One thing I forgot to mention is location, make sure you wash your car somewhere in the shade! Otherwise you'll have all your solutions dry out on your paint and leave residues that will be difficult to remove.
Cornerstone of the wash, two buckets, soap, and sheepskin mitt.

SUMMARY: Sheepskin washmitt, quality soap, two clean buckets, shade.
TECHNIQUE.
When starting your wash you'll want to pretreat any majorly soiled areas; spray down wheel wells using a good APC (all purpose cleaner), areas of your paint that are splattered with bug residue, behind the wheels where dirt is usually kicked up, and the back of your car (I've found that a layer of dirt/dust usually collects here). Let that sit for a few minutes. Get your two buckets, put your grit guards in the bottom if you have them, and fill the first one with water (deionized would be nice, but not exactly a necessity) and the second with your soap and water solution while being careful to read the directions on your container. Rinse off the areas that you pretreated earlier, once again deionized water is nice but not really necessary, and begin to wash your car. Start with the least soiled areas of the car, the roof, hood, trunk, and doors, then wipe down the bumpers, lower parts of the door panels, and side skirts. Be sure to rinse your mitt in your water bucket 3-5 times during your wash depending on the severity of dirt in your washmitt. And now it's time to do your final rinse, take off any attachment you have on your hose and start pouring water on the roof until it spills down over the edges, then quickly try to follow the water down the side of the car, repeat this with the hood and trunk. This is called 'sheeting' and the idea is to have the water rinse off the remaining dirt and soap while using the cohesive property of water to pull as much water off as well to leave you with minimal work for drying.
About deionized water, the purpose of using deionized water while washing and rinsing is to eliminate water spots. Normal tap water will leave mineral deposits on your paint called water spots, you can either buy large jugs of deionized water or you can purchase a water deionizing system (although this is a very expensive thing to do for most people). These systems are available in 100 gallon to 300 gallon output with either wall mount or wheeled carts. Price varies from $300 to about $450 and the added cost of recharging your filter element periodically. A more economical product is the inline hose filter/water softener, with interchangeable filter packs you choose to use a sediment filter (for those of your with well water supply) or a magnesium and calcium filter (the two main minerals responsible for water spots). You could also purchase two filter housings to remove both sediments and minerals if you have really poor water. An inline hose filter/water softener will run you about $50 for the basic kit to $140 for the deluxe kit. It is perfectly acceptable not to use as well, there are other ways to avoid water spots.
Another option to washing your car, if you have a pressure washer this is the preferred method as you don't run the risk of inducing scratches while wiping. I've had good results using electric washers, you should be careful with gas washers as you may damage fins on heat exchangers or if you have a failed clearcoat you might even strip off large sections of your clearcoat, which will most likely make you very angry! An even better tool is a foam gun, which coats your vehicle in a thick sudsy solution of surfactants and wetting agents. This is ideal as you don't have to touch the car and you don't have the risks of damaging your vehicle with high pressure water. Foam guns kick ass, are definitely on my list of products to try. There are different variations on it available, they can connect to a standard hose, an air compressor, or a pressure washer. Each of these adds a little extra cleaning force through water/air pressure.
A foam gun in action!
SUMMARY: Pretreat, two bucket method, rinse mitt often, sheeting technique, deionized water, pressure washer.
DRYING.
Now that you've washed your car it's time to dry it! If you've been using deionized water up until this point, good for you! You've saved yourself much worry for the drying stage. If you have a good, clean leaf blower (not covered in dust/leaf debris/mulch) that won't slingshot tiny particulates at your paint feel free to use that to dry your vehicle, this is good to remove water out of hard to access cracks and crevices. Pressurized air is also a wonderful tool to use. If you have no source of forced air at your disposal, don't worry we can still use towels. NO! Put down the bath towel you just picked up, in fact, burn the bath towel. You will NEVER touch your paint with a bath towel. No, we're going to use large waffle weaved microfiber drying towels. A synthetic or natural leather chamois is also acceptable, but you're going to add micro scratches to your paint, no two ways about it. The purpose of the waffle weave is to trap any remaining dirt in the towel where it won't scrape across the paint, a chamois generally has a flat surface and will assuredly marr the surface. A good method to practice is to follow your drying with an application of quick detailing spray so as to remove any mineral deposits before they affix themselves to your paint. When drying doorjambs and around the hood and trunk use an all purpose microfiber cloth, not the waffle weaved you used earlier. The jambs will be much dirtier than the rest of the drying area and they are less important in terms of shine. Another effective strategy for jambs is using a waterless wash product as these tend to have high strength surfactants that will reduce your scratching of the paint.
TIP: If you're drying in a hot environment and are concerned about water evaporating before you get a chance to dry it, try using an authentic California Blade. A few quick smooth strokes starting at the top of the vehicle should remove most of the water, my only problem with this is that if there is any dirt left on the surface the flat blade will drag it along your paint leaving long scratches, BUT if you have a good washing technique you shouldn't have to worry. A quick follow up with your waffle weave towel and the outside should be dry.
SUMMARY: Chamois is okay, microfiber is better, pressurized air or leaf blower is best.
RINSELESS WASH.
A recent development in car washing is the rinseless wash, sometimes referred to as an eco wash. You can think of this as a heavy duty quick detailer spray. There are two methods for application. The first is preferred for a more heavily soiled vehicle, and you only need one bucket. Fill the bucket with two gallons of water and one ounce of the rinseless wash concentration, this is all you need! Increasing the concentration of wash will not make the solution more effective, it is fine as it is. You will also need a spray bottle of about 32 ounces, fill with 2.5 ounces of concentrate and the rest with water. Spray the panel down with the bottle and let that sit for a minute or two to begin loosening and encapsulating the dirt particles, then take your wash media and get it dripping wet from your bucket. Wipe down the panel with your media and then rinse it out in your bucket. Get it dripping wet again and wipe down the panel a second time. Now take a clean microfiber drying towel and dry off the panel, you don't have to get it perfectly dry as the rinseless wash should not leave water spots. Once you get the hang of it you can wash and dry your car in as little as 30 minutes.
The other option for application is to just your spray bottle, with the concentration given above. Spray onto a panel and wipe off with a plush microfiber towel. And that's! Your car will come out clean and shiny without adding any extra scratches. This method is really only appropriate for a vehicle that gets washed at least once a week, (I do mine two, sometimes three times a week). When done properly you can wash your car in 15 minutes.
Regarding rinseless wash products, they come in bottles of concentrate from as little as 16 ounces to 128 ounces, and price should range from $10-$40. Rinseless wash (most commonly referred to as ONR, which mean Optimum No Rinse, this is a specific brand of the wash but often refers to any brand. Think of it how Kleenex is used to refer to facial tissue.) can be diluted for a few different purposes. The 1 ounce to 2 gallon dilution is used for bucket washes, 2.5 ounces per 32 ounces is for quick detailing, and 1.5 ounces per 32 ounces is for use as a clay lube. ONR is an amazing time saver and is very handy for people without access to a hose (apartment dwellers).
I'll post up a series of pictures showing the process being done to a panel of my dad's truck in a few days.
WHEELS.
Wheels are usually your most soiled area on the car, they are coated with brake dust and road grime. Because of this heavy build up of dirt and debris it is important to either clean them before or after you wash the car itself, not during. By washing the wheels simultaneously with the car you run the risk of cross contamination between the comparatively clean surface of your paint and soiled cesspool of your wheels.
I choose to wash the wheels after washing the car, this reduces the risk of cross contamination between surfaces as the wheels will have a coating of brake dust that is very bad for your paint. This is another situation where waterless wash products come in handy, I use ONR (Optimum No Rinse) with great results. Get a clean bucket and fill it with about a gallon of water, add the appropriate amount of waterless wash (I use 1.5 oz of ONR) and get another all purpose microfiber cloth. Soak the cloth and start wiping down the wheel, starting at the top, dry with an all purpose microfiber immediately after.
Another option to clean the wheels is to include it in your pretreating stage and to spray them with your APC or specific wheel and tire cleaner and let soak, wipe as necessary with microfiber or use a soft wheel spoke brush, rinse, and dry. Respray any stubborn areas and wipe with an all purpose microfiber cloth. If you choose to clean with this method it is important to do this before you wash your car, this is so any overspray of your wheel cleaner doesn't sit on your paint and potentially damage it. Also make sure that any buckets or cloths are free of grime that you may want to use on your vehicle, don't settle for 'clean enough' with your washing tools, no brake dust residue should remain otherwise you are guaranteed to induce swirl marks during your wash.
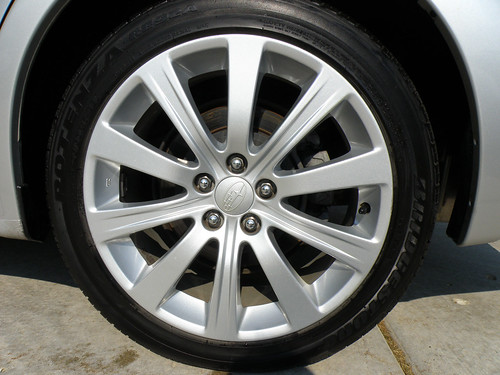
Here is a Subaru I detailed recently. Unfortunately the primary driver is a high school girl, as such the car is seriously neglected.
BEFORE!
AFTER!
BEFORE!
AFTER!
CONGRATULATIONS! YOU JUST WASHED YOUR CAR!