Welcome to the SR20 Community Forum - The Dash.
Register
SR20 forum logo

Thread: how to install transparent film

+ Reply To Thread
Posts: 1-10 of 22
2009-08-11 07:14:57
#1
how to install transparent film
YouTube - Red transparent film installation


secret solution is johnson & johnson baby shampoo , DO NOT USE DISH SOAP!


More tails and head light installations are in the works (SE-R,G20,Sentra,240)


stay tuned , request are welcome

any questions just ask


2009-08-11 13:33:45
#2
I will add to the Baby shampoo deal, make sure to use the clear baby shampoo. I made the mistake of using the Pinkish stuff, now my windows have black/pinkish tint

Are you using hair dryer or something special?
2009-08-11 15:02:00
#3
Originally Posted by Vadim
I will add to the Baby shampoo deal, make sure to use the clear baby shampoo. I made the mistake of using the Pinkish stuff, now my windows have black/pinkish tint

Are you using hair dryer or something special?


using a clear baby shampoo is Not recommended either,, and the pink stuff is a baby wash <<<< NOT good and not a shampoo..

using the pink or clear or dish detergents will Not cause your film to look pinkish ,,, if you have a pinkish look to your window film it means 2 things
#1 CHEAP FILM to start with! ,, even if it was a big names brand
#2 you have used a GLASS cleaner on the film itself causing a bleaching effect to the dyes in the film ,, AKA film is turning purple (it only take 1 time and your film will start to die!) film will still look good to the naked eye..but if you want to know if your window film is turning purple ,, simply pull into a car wash at night and LOOK THROUGH you tint at the florescent light,, (TELL TELL SIGN OF FAILURE) ,, looking through it during the day can give you a false appearance because the natural light is CLEAN where the film content(dyes are dirty) ,,


you should use regular baby shampoo for ONE reason alone,, contains NO detergents like dish soap,

detergents will cause the adhesive system to break down and also will cause an uneven drying problem making the film look foggy or distorted..


I use an industrial heat gun ,, it has 2 different settings (high,low) on high it gives me 1100 degrees and on low it gives me 650 degrees,,

melting point on automotive window film is at 210-270 degrees ,, with melting point being slightly lower on the transparent film,,, you should use a LOW setting and be careful..

as you can see on the video I make the film do what I want it to do with the heat.. key thing it to not be scared


This is what I use,,


2009-08-11 15:22:29
#4
Great video man!!!
Even has back ground music(and a dumbass starting a car,lol)
You make that look so easy.
Thanks again for doing up all my vehicles,too.
2009-08-12 22:20:32
#5
Good work!...I always used a drop or 2 of Dawn and a few squirts of Iso Alcohol in the atomizer. Works like a charm! The alcohol helps evaporate the liquid/bubbles too. I've seen places use glass cleaners or other chemicals But hey, what ever works for them...

Here is a trick for you FLA/warm location guys...Let the film sit in the sun for a few minutes before starting the application. Warm film is much easier to work with (before you even fire up the torch/heatgun). Especially on curvy areas!


Tint on my P11...
2009-08-14 22:46:44
#6
Originally Posted by G-sus!
Good work!...I always used a drop or 2 of Dawn and a few squirts of Iso Alcohol in the atomizer. Works like a charm! The alcohol helps evaporate the liquid/bubbles too. I've seen places use glass cleaners or other chemicals But hey, what ever works for them...


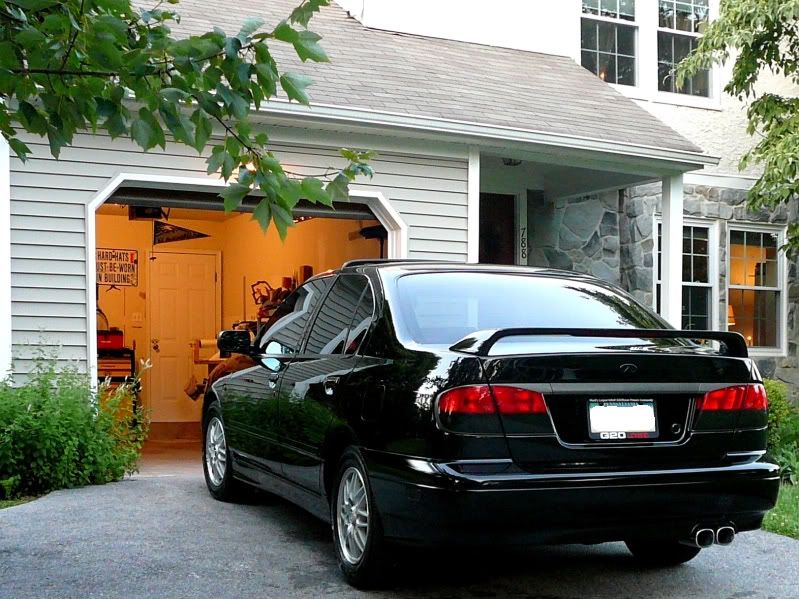
Thanks,, your ride looks nice with the smoked tails,, great job

I prefer not to use alcohol for the simple fact that Alcohol causes premature adhesive FAILURE ..by using alittle Alcohol in your solution it will help the film tack up quicker,, but whatever works for you. I personally don't have much of a problem bubbles after installation,,

EVERY vinyl film supplier tell us the Same thing over and over again,, Do Not use glass cleaners to prep the surface because of the contaminates that it leaves behind.. and I've seen that too! lol

Originally Posted by G-sus!
Here is a trick for you FLA/warm location guys...Let the film sit in the sun for a few minutes before starting the application. Warm film is much easier to work with (before you even fire up the torch/heatgun). Especially on curvy areas!


hate to burst your bubble but if you laid the vinly film in the sun for 2 days it would do NOTHING to help wrap around the corners..but thats true if the film is warmer it works well,, and I don't like to wait so I'll use the heat gun right away.

IF you watch any of my install videos or ANY vinyl suppliers install videos you will see it takes HEAT to form the film around the corners,, simply leaving it in the sun does absolutly Nothing to help with the intsall except waste time!

the reason you had No problems with your tails is because your tails curve ONE way not 2 so ,, heat is not needed untill you go to tuck the film over the edge..<< you did tuck the film ?? right? can't really tell,, like I said ,, your ride looks great!


---------------------------------------------------------------------

everyone has there own way of doing something,, rather its right or wrong all that matters is your happy with the finished product and installation..

I promise that if you use my methods of installations you will find that it was FASTER, CLEANER, and MOST of all EASIER,, because I've done all the hard ways,, lol ,, a few tricks can go a long way,,,


Heres some more install videos ... Note that the heat gun is what makes the film mold to the curve of the lens!!

YouTube - Transparent Vinyl installation

YouTube - larrys 001
2009-08-17 05:43:32
#7
Originally Posted by Tearoffguy

hate to burst your bubble but if you laid the vinly film in the sun for 2 days it would do NOTHING to help wrap around the corners..but thats true if the film is warmer it works well,, and I don't like to wait so I'll use the heat gun right away.

the reason you had No problems with your tails is because your tails curve ONE way not 2 so ,, heat is not needed untill you go to tuck the film over the edge..<< you did tuck the film ?? right? can't really tell,, like I said ,, your ride looks great!


I just meant that letting the film rest at a higher temperature makes it more pliable so it helps me stretch around corners on harder installs (like a GTI I did this weekend). But yes, bottom line the the heat gun is what does the work!

I also cad cut my film to be G20 specific...I made curved templates for my car so the vinyl almost lays flat by itself and butts right up to the red tops. But yes, I did add 1/4" excess on my cut to tuck the film underneath.

Anyway, thanks for taking the time to make the videos Larry! I enjoy all of your input!!!
2009-08-17 20:45:02
#8
Originally Posted by G-sus!
I just meant that letting the film rest at a higher temperature makes it more pliable so it helps me stretch around corners on harder installs (like a GTI I did this weekend). But yes, bottom line the the heat gun is what does the work!

I also cad cut my film to be G20 specific...I made curved templates for my car so the vinyl almost lays flat by itself and butts right up to the red tops. But yes, I did add 1/4" excess on my cut to tuck the film underneath.

Anyway, thanks for taking the time to make the videos Larry! I enjoy all of your input!!!


hey since your doing a few tails,, send me your address and I'll ship you some film to see what you think ,.,
2009-08-17 21:22:51
#9
have guys tried rapid tac it works pretty good and you dont get any bubbles and its easy to work with.
2009-08-17 21:47:45
#10
Originally Posted by 99sel-r
have guys tried rapid tac it works pretty good and you dont get any bubbles and its easy to work with.


yeah no doubt! I highly recommend that to install the film..

lol the only reason I don't use it , simply saving myself a few bucks..
+ Reply To Thread
  • [Type to search users.]
  • Quick Reply
    Thread Information
    There are currently ? users browsing this thread. (? members & ? guests)
    StubUserName

    Back to top