


I ordered these as a guinea pig from Liu and took upon the task of installing them the other night.
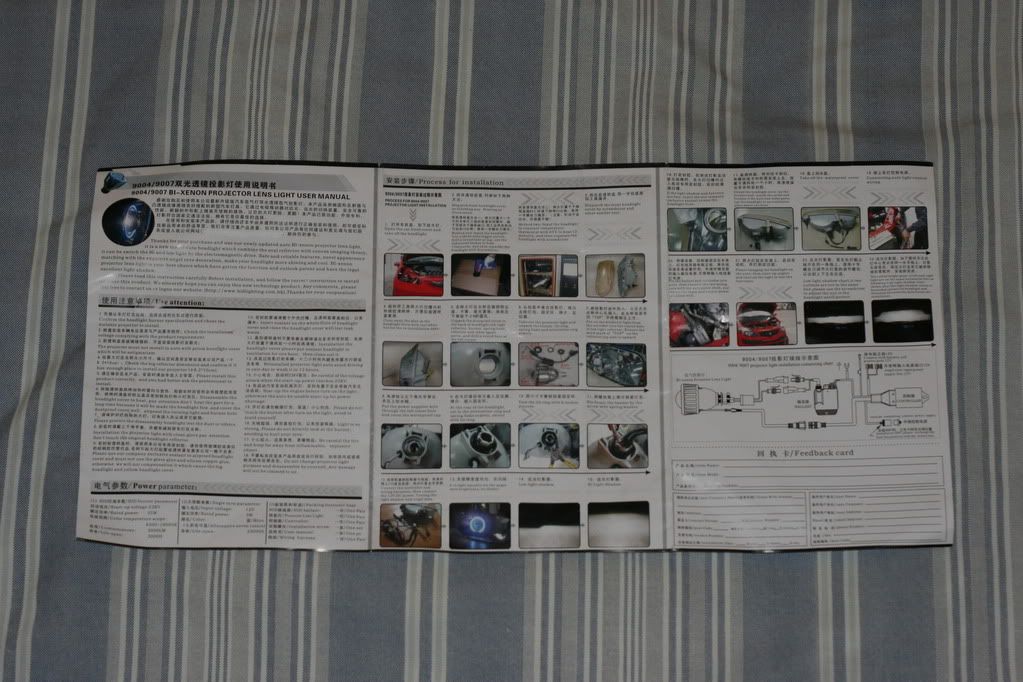
The installation instructions were pretty well documented, but I ended up just saying the heck with reading them as I went along as its such a goof proof process. The translation makes for some good laughs however.
Let me back up to what comes in the kit.
In my opinion, the slim ballasts are worth the extra couple bucks as they are the easiest to mount in the engine bay. I think these might come standard in his kit, you'll have to check with Liu though.
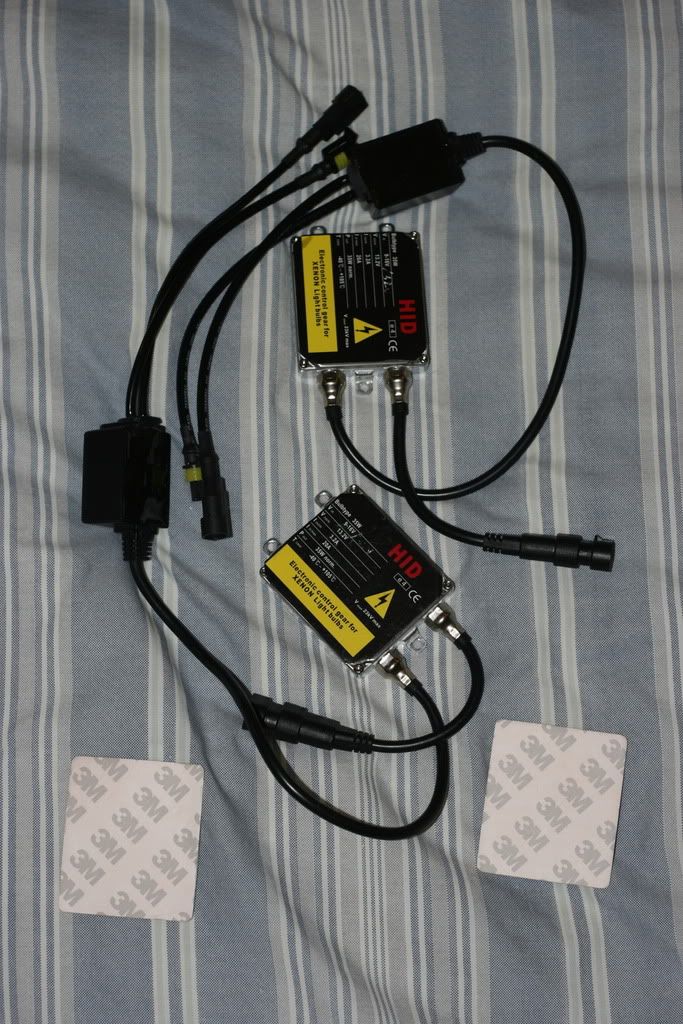
The 3M pads are for taping the ballasts to a flat surface. I didn't end up using them as I found some other places to zip tie them to.
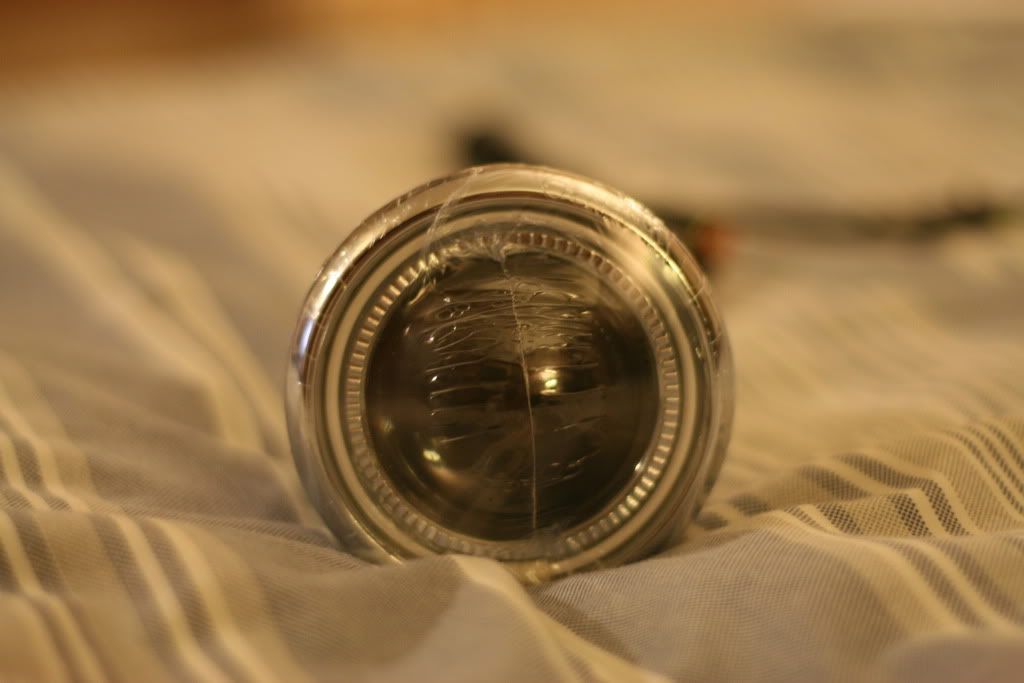
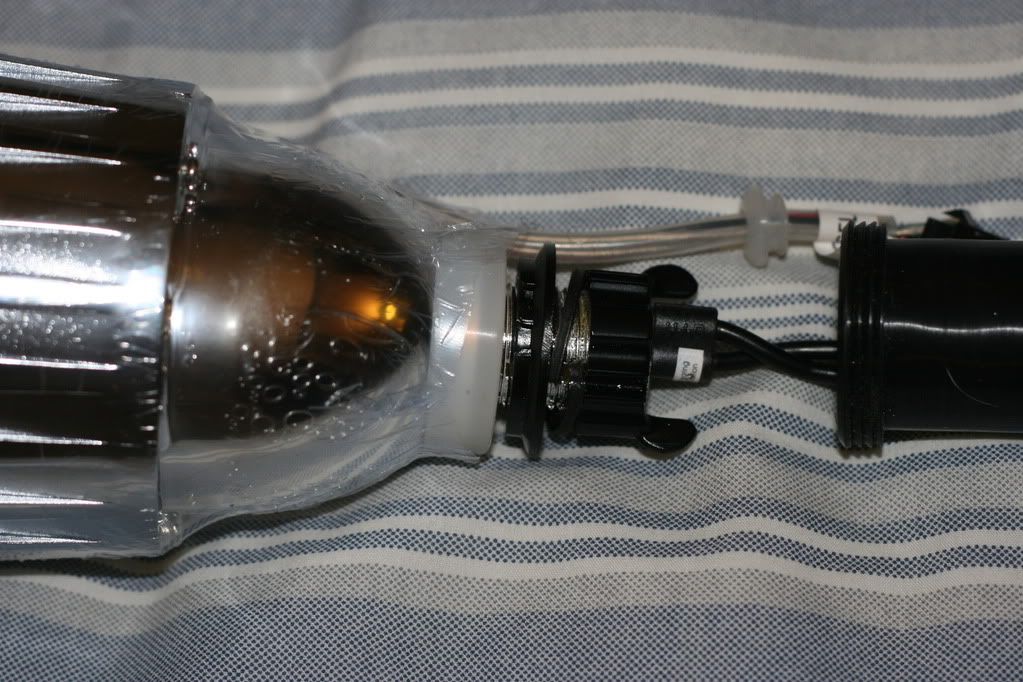
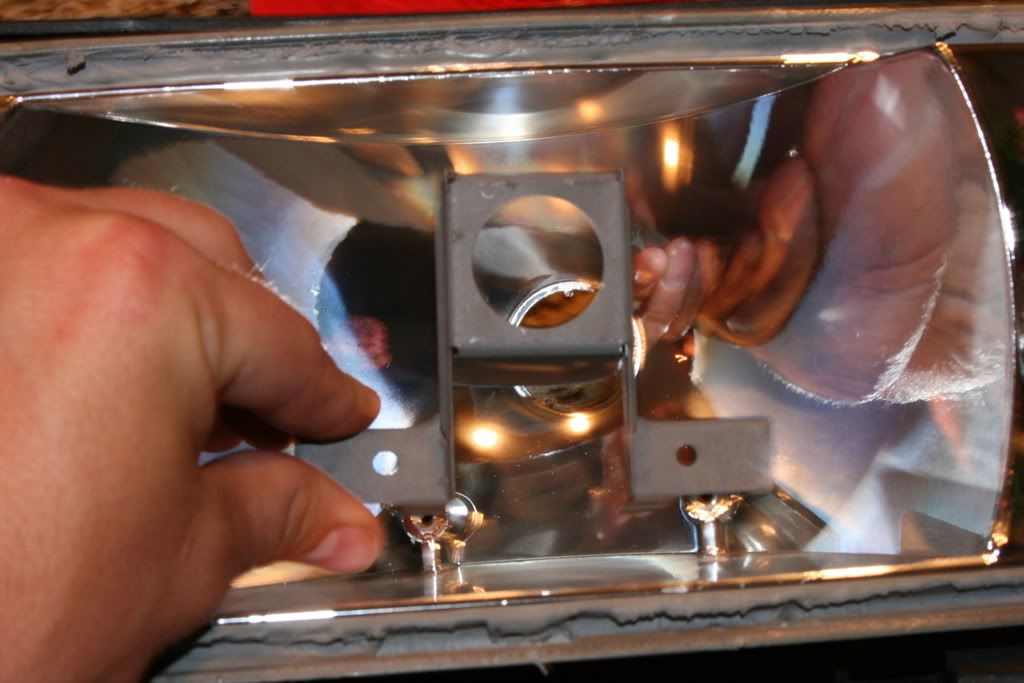
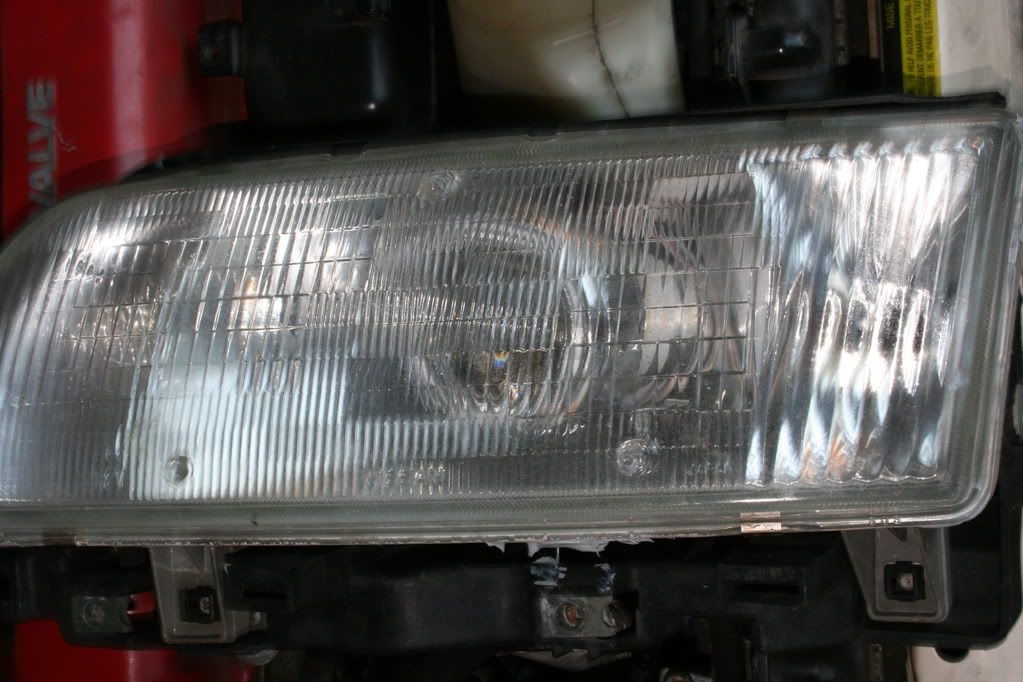
The projector itself is a very well constructed piece. It has a goof proof locking mechanism that makes replacing the lights a piece of cake. That is detailed there in the last photo.
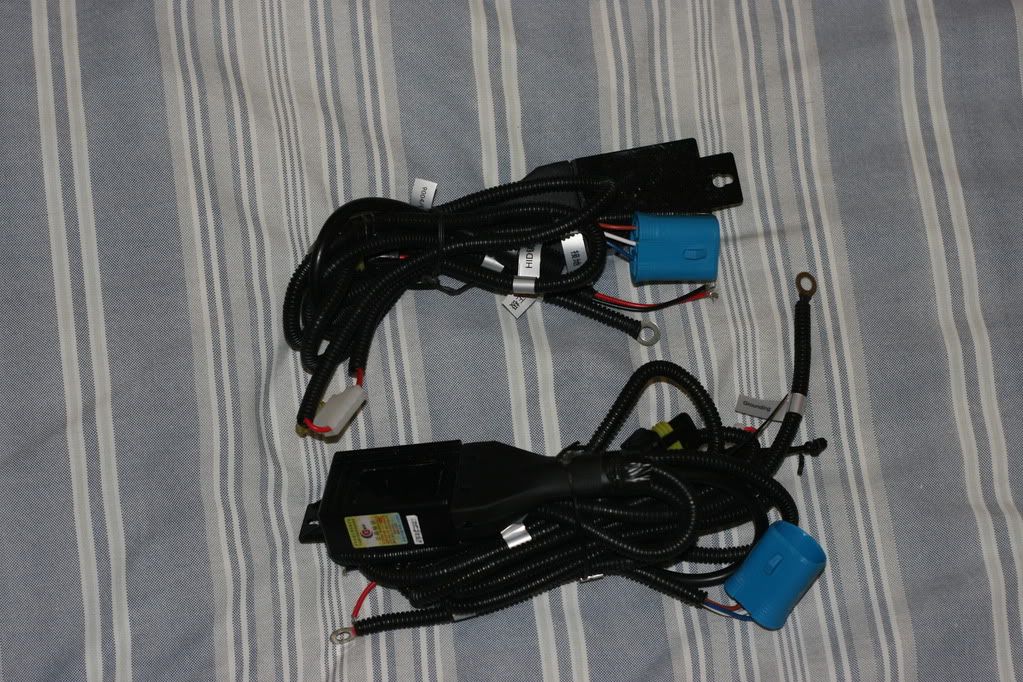
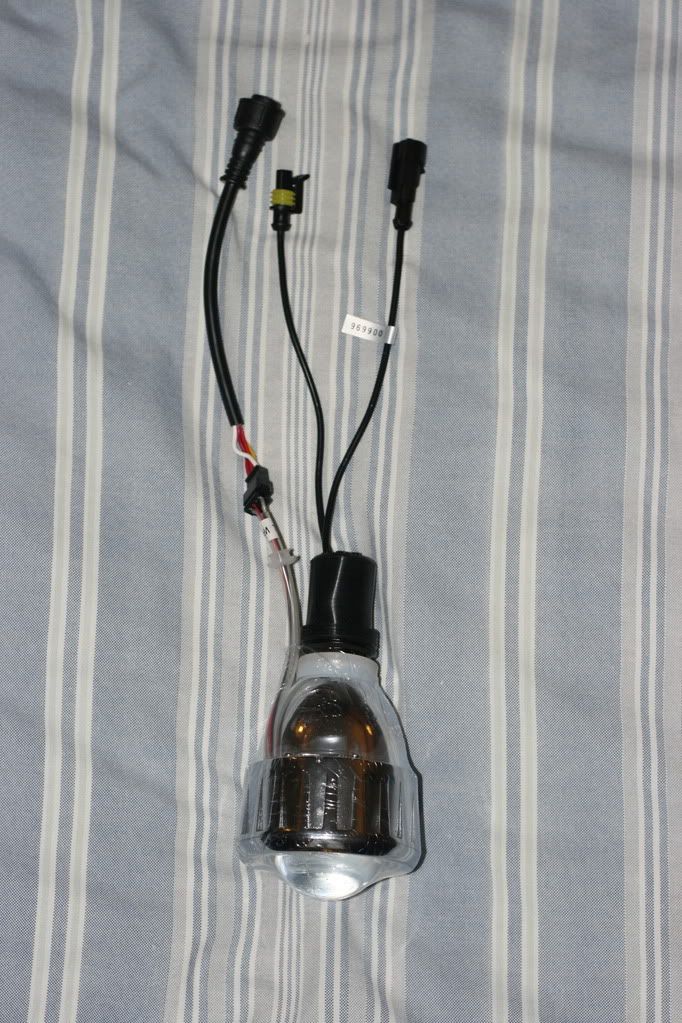
The wiring harnesses are very nicely put together and have several weatherproof connections throughout the harness to make sure that the connections stay connections throughout the lifespan of the kit and dont become shorts.
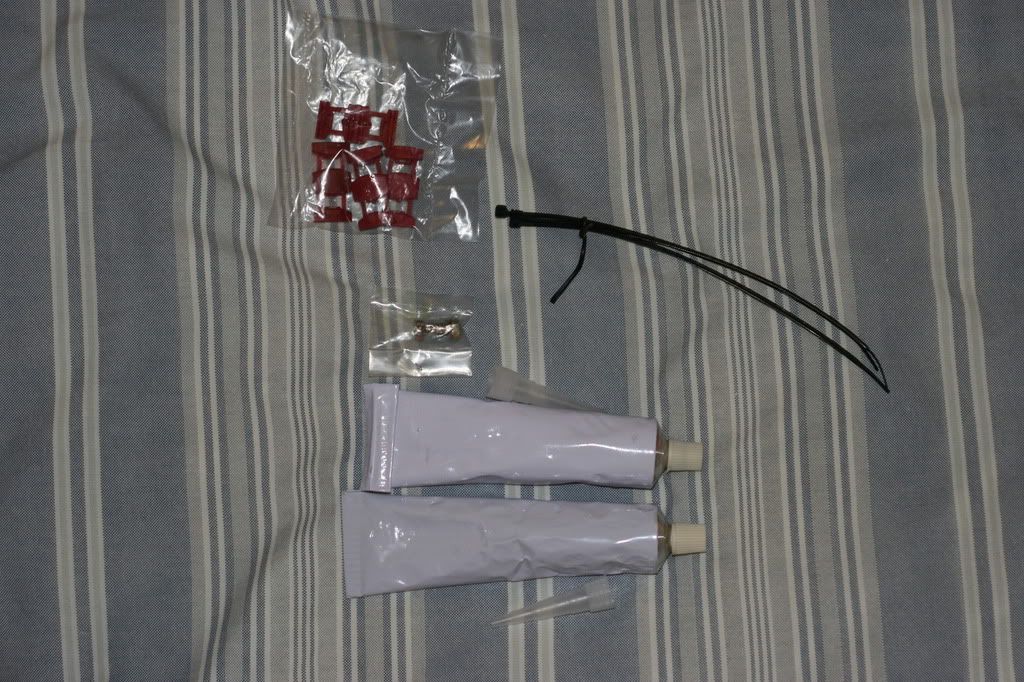
The goop that they give you is the same type of goop that was in my stock headlight housing. It was not a RTV or a silicone tube but more of a grey glue. It was a pain in the butt to squeeze out as its VERY thick but I haven't seen any leaks or moisture in there yet and I just washed my car today too so that's a good thing and the goop really works!
You'll also notice the vampire taps and zipties they give you in case you want to hook up the halo and make sure the wiring harness is installed in a clean manner.
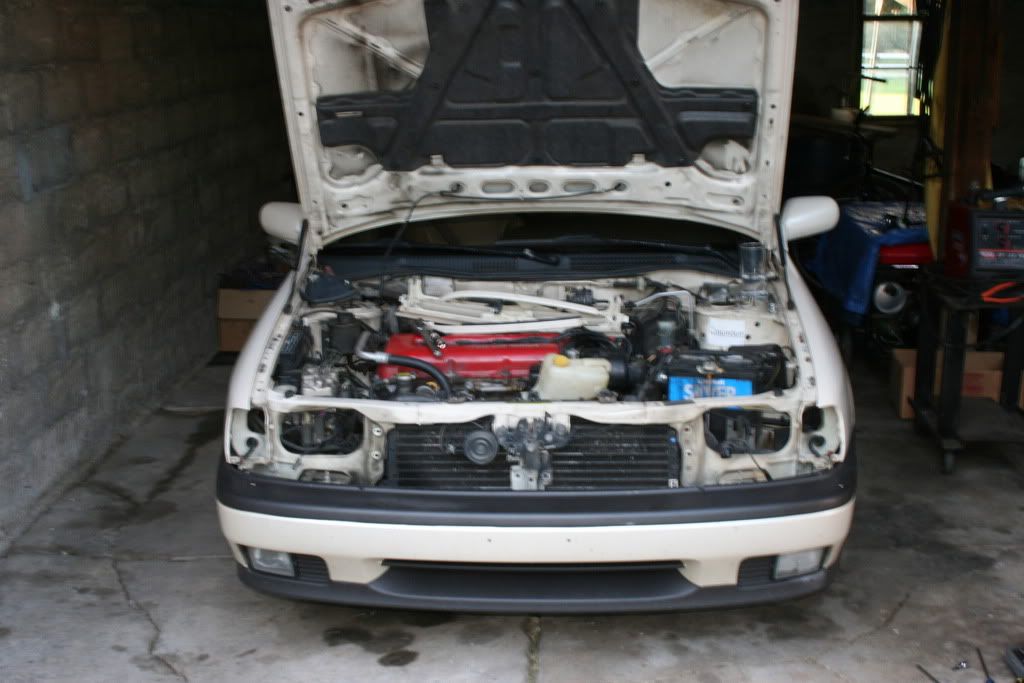
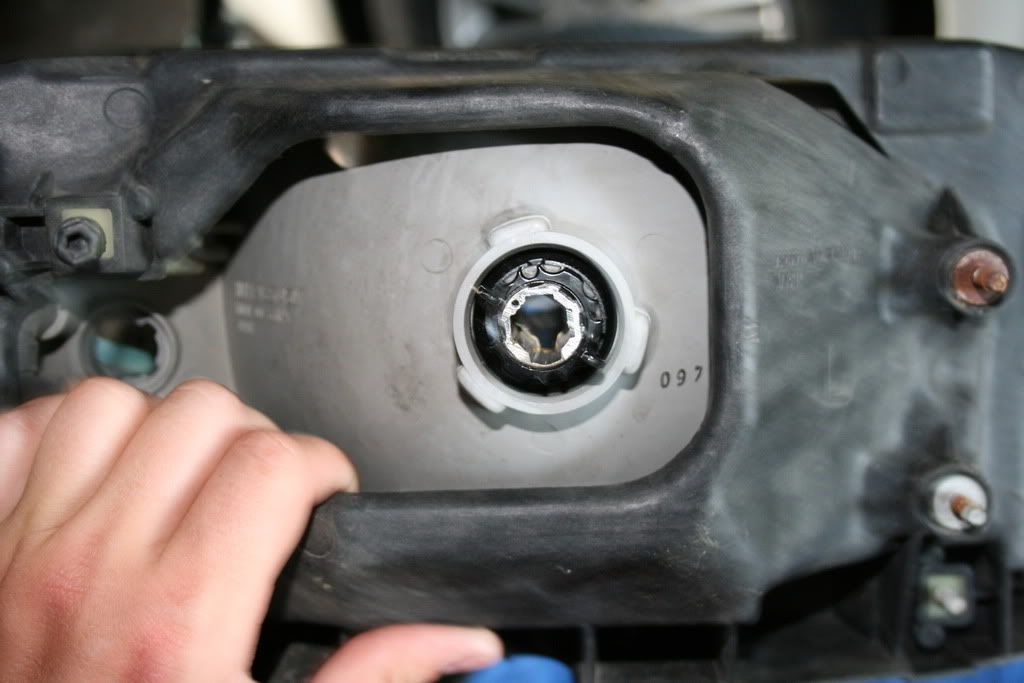
You need to take the headlights, grille, and corner lights off the car to complete this project.
To make this work, you're going to need to try a new recipe in the oven. Its called baked headlights.
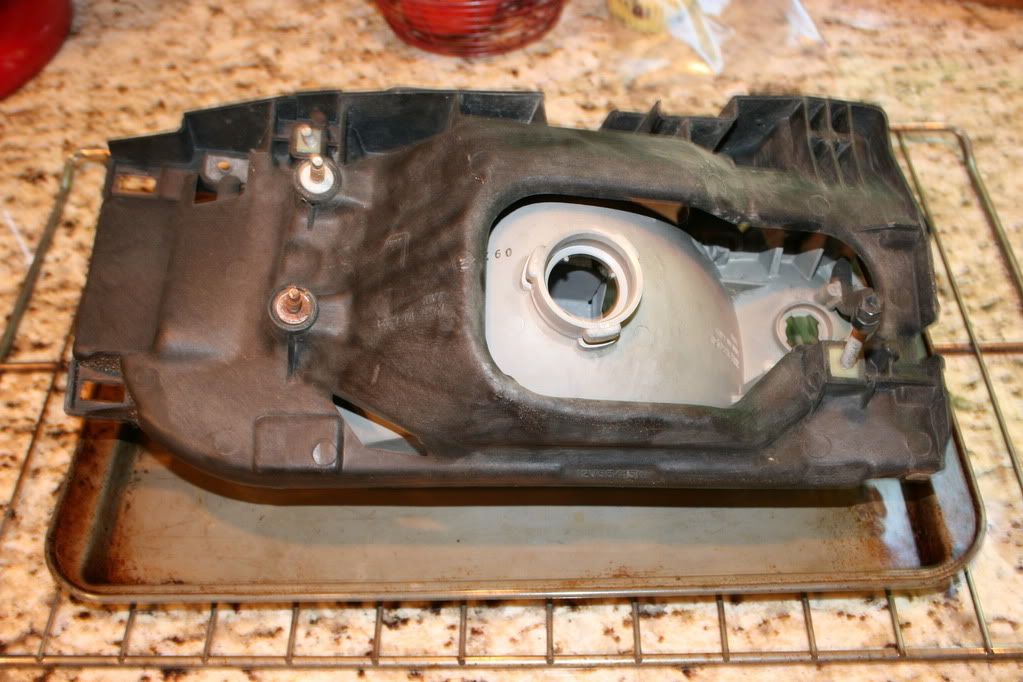
What I did was preheat the oven to 350 and bake the headlights for about 7 mins. This got the gray glue-ish goop hot enough so that I could separate the headlight glass from the back plastic piece.
Two things you'll notice in the picture above. There is a bunch of grey goop that you need to get out of the headlight if you want to be able to put the lights back together again. I just took a screwdriver and scraped most of it out. Took a while but it worked. The second thing you'll notice about that picture is I have removed the stock headlight reflector thingy (actual term Infiniti uses") ) via two screws that hold it on.
) via two screws that hold it on.
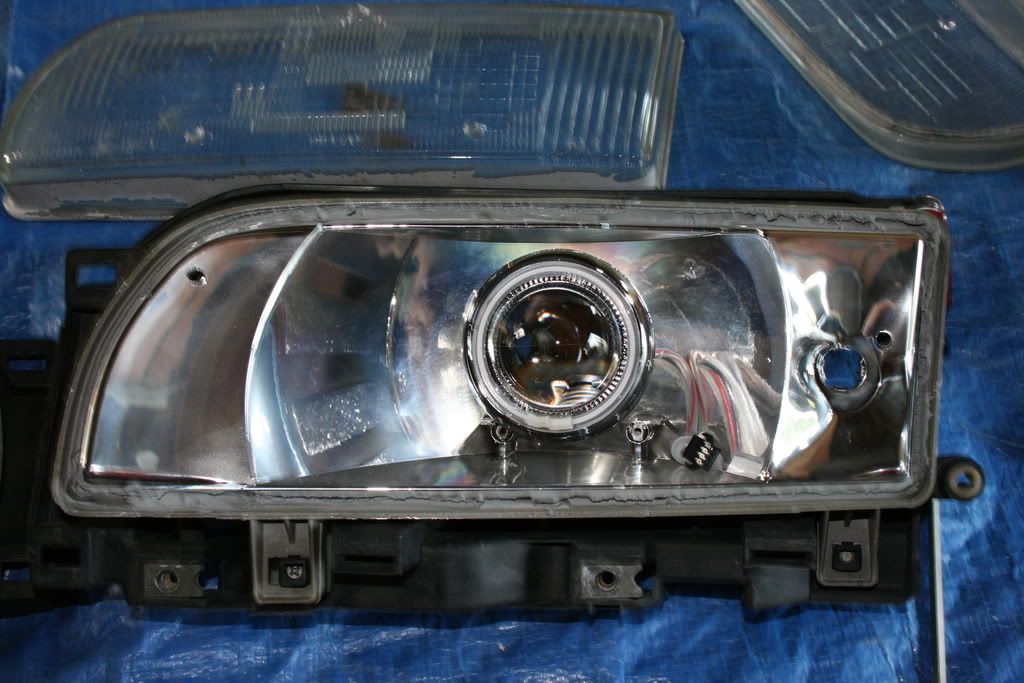
Then all you have to do is stick the projector in the housing through the stock light opening.
This is what it should look like when you are done with installing the projector from the back.
Use the gray goop tubes shown earlier and put a bead around the headlight and put the glass back in. Be sure to replace the metal clips that hold the glass to the housing.
Output Pics: (Taken with my Crackberry)
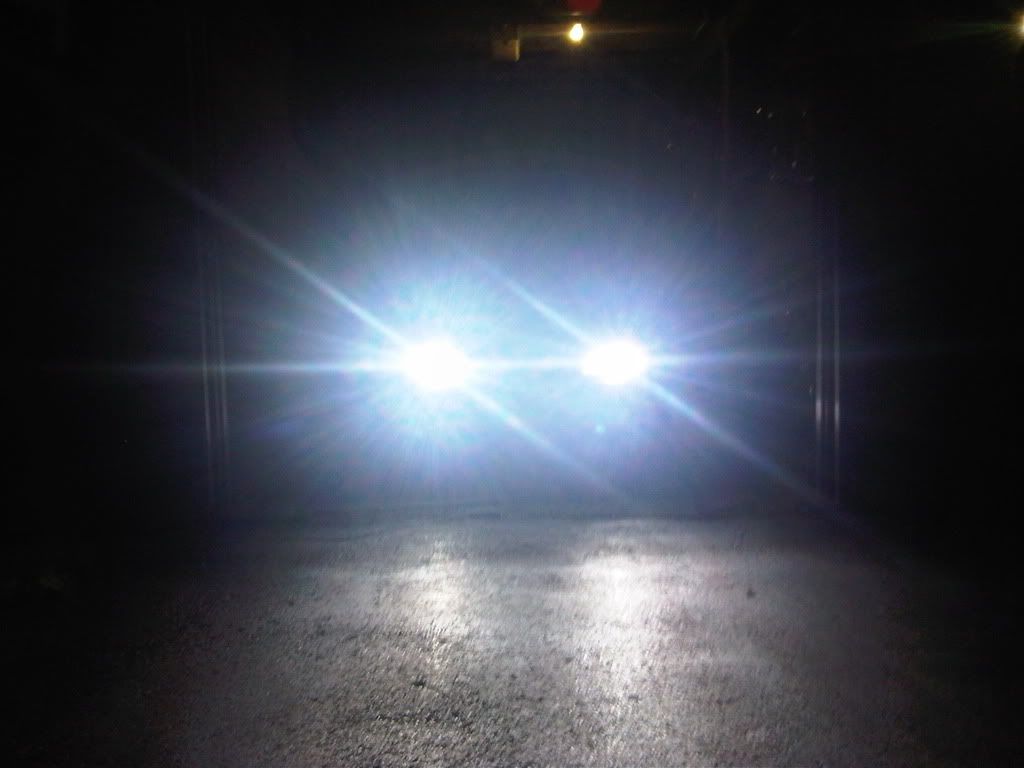
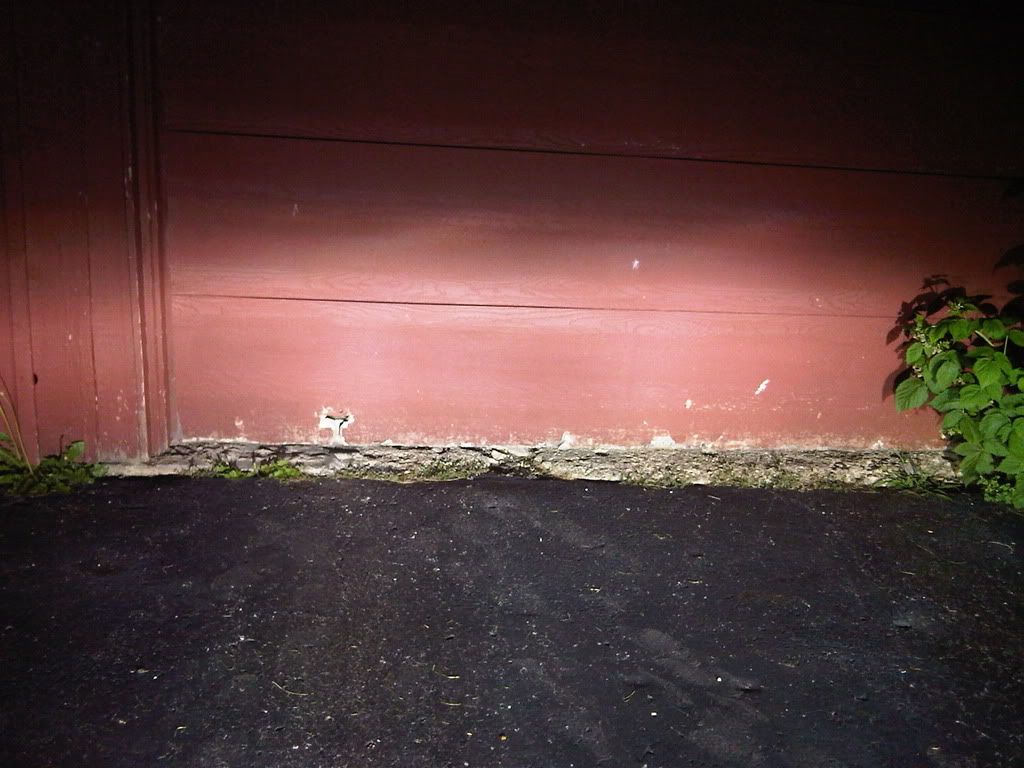
Not a perfect cutoff but WAY better than HIDs in the stock housing.
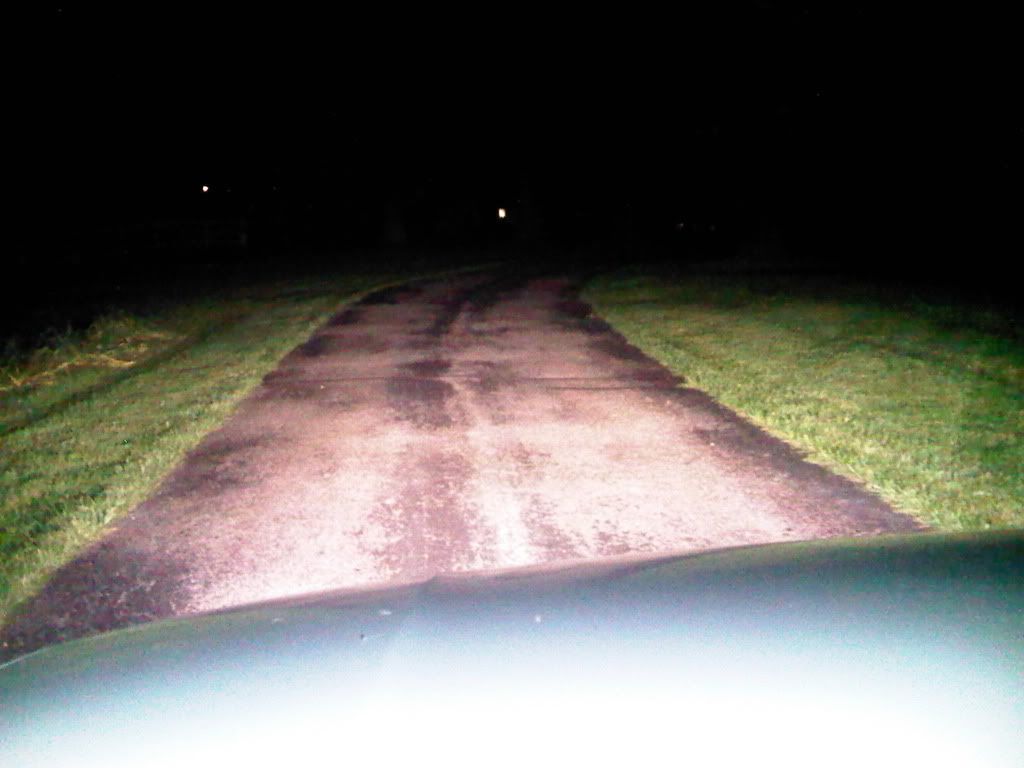
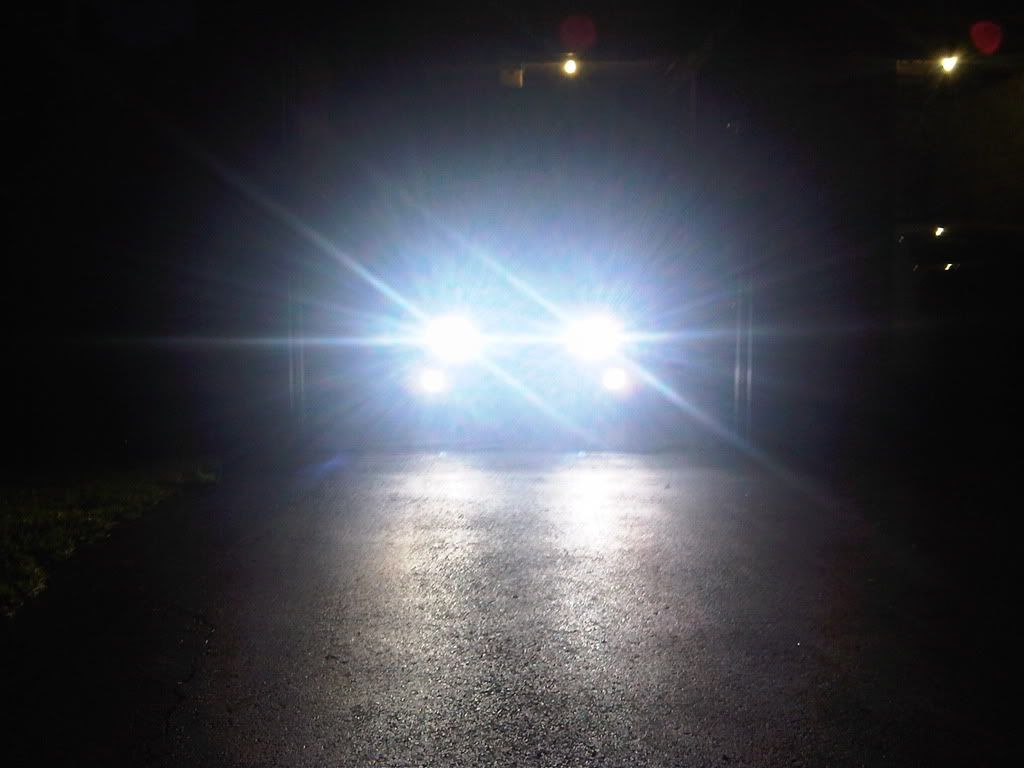
Picture from the drivers view.
I'm going to try and get a better picture of the output with my DSLR here over the next week or so, depending on how busy I get. So stay tuned for that as well.
I have yet to be flashed from anyone in the oncoming lanes of traffic so the imperfect cutoff you see isn't a huge deal.
The installation instructions were pretty well documented, but I ended up just saying the heck with reading them as I went along as its such a goof proof process. The translation makes for some good laughs however.
Let me back up to what comes in the kit.
In my opinion, the slim ballasts are worth the extra couple bucks as they are the easiest to mount in the engine bay. I think these might come standard in his kit, you'll have to check with Liu though.
The 3M pads are for taping the ballasts to a flat surface. I didn't end up using them as I found some other places to zip tie them to.
The projector itself is a very well constructed piece. It has a goof proof locking mechanism that makes replacing the lights a piece of cake. That is detailed there in the last photo.
The wiring harnesses are very nicely put together and have several weatherproof connections throughout the harness to make sure that the connections stay connections throughout the lifespan of the kit and dont become shorts.
The goop that they give you is the same type of goop that was in my stock headlight housing. It was not a RTV or a silicone tube but more of a grey glue. It was a pain in the butt to squeeze out as its VERY thick but I haven't seen any leaks or moisture in there yet and I just washed my car today too so that's a good thing and the goop really works!
You'll also notice the vampire taps and zipties they give you in case you want to hook up the halo and make sure the wiring harness is installed in a clean manner.
You need to take the headlights, grille, and corner lights off the car to complete this project.
To make this work, you're going to need to try a new recipe in the oven. Its called baked headlights.
What I did was preheat the oven to 350 and bake the headlights for about 7 mins. This got the gray glue-ish goop hot enough so that I could separate the headlight glass from the back plastic piece.
Two things you'll notice in the picture above. There is a bunch of grey goop that you need to get out of the headlight if you want to be able to put the lights back together again. I just took a screwdriver and scraped most of it out. Took a while but it worked. The second thing you'll notice about that picture is I have removed the stock headlight reflector thingy (actual term Infiniti uses
) via two screws that hold it on.Then all you have to do is stick the projector in the housing through the stock light opening.
This is what it should look like when you are done with installing the projector from the back.
Use the gray goop tubes shown earlier and put a bead around the headlight and put the glass back in. Be sure to replace the metal clips that hold the glass to the housing.
Output Pics: (Taken with my Crackberry)
Not a perfect cutoff but WAY better than HIDs in the stock housing.
Picture from the drivers view.
I'm going to try and get a better picture of the output with my DSLR here over the next week or so, depending on how busy I get. So stay tuned for that as well.
I have yet to be flashed from anyone in the oncoming lanes of traffic so the imperfect cutoff you see isn't a huge deal.
 Be the first to like this post.


