Ok so i decided to replace my axle boot after the old one falling off on my way home from the Markham meet. If your axle is clicking you want to consider a new axle or to rebuild it. If the boot wasn't torn for that long & it isn't clicking , chances are replacing just the boot will be ok.
This is for a 1991 B13, i have also done this on a 2000 P11, although some of the bolts and procedures are different , the steps are pretty much the same.
Things that are needed:
-Jack & jack stands ( optional )
-32MM deep socket
-17MM socket, 17 MM box wrench
-19MM deep , 14 MM socket.
-Air impact gun ( optional ) , 1/2" drive breaker bar.
-needle nose pliers, cutters, axle band pliers ( optional )
Ok so jack up the car, remove the wheel , in my case i removed the driver side wheel ......
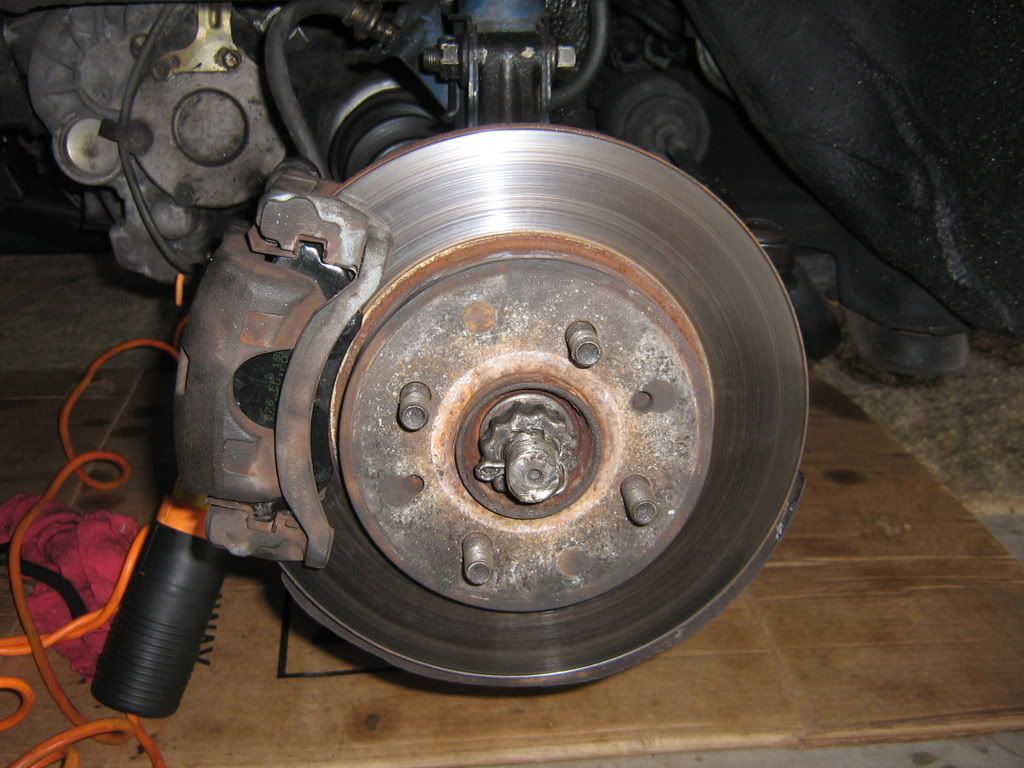
To make things easier i cracked loose the 32 MM axle nut at work with my air impact gun ( believe me it makes life easier if you can crack free the axle nut using an impact gun ) , i'm guessing a breaker bar ( quality one ) will also crack loose that nut, if it's super tight & doesn't want to budge, soak it in PB blaster for a few minutes, but i have not myself done it since i have acess to an air compressor. I tightened it back but not too tight so when i got home it would be easier to remove. Anyway.
Remove cotter pin & axle hold down bracket.
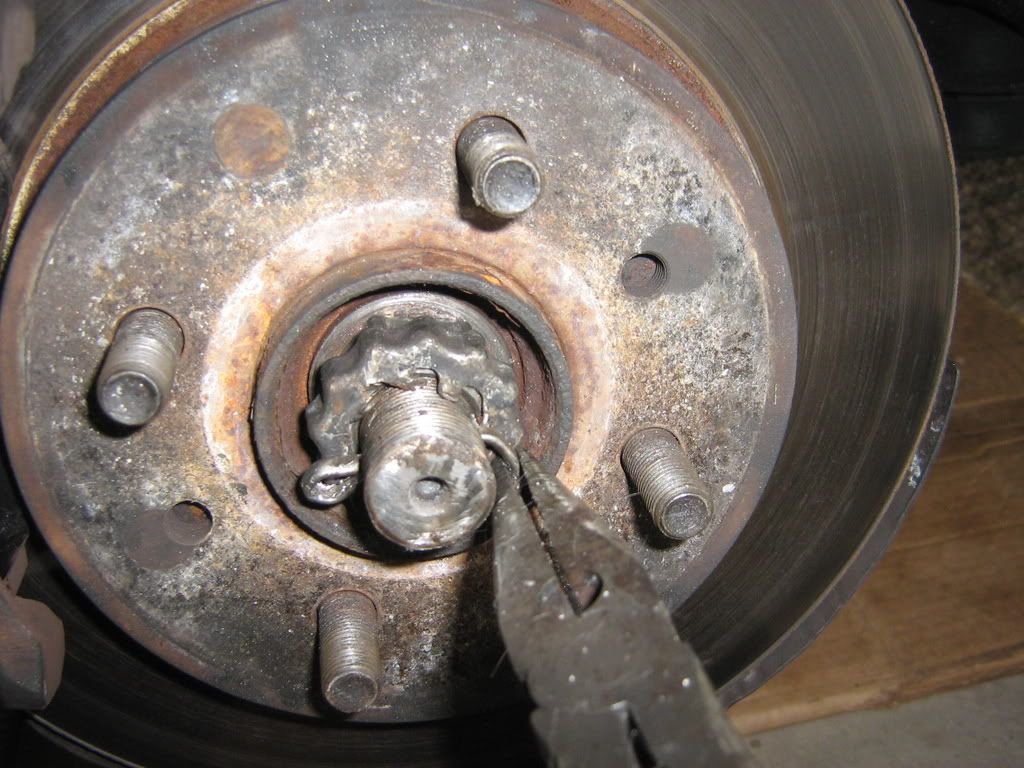
Next , take off the 32 MM axle nut.
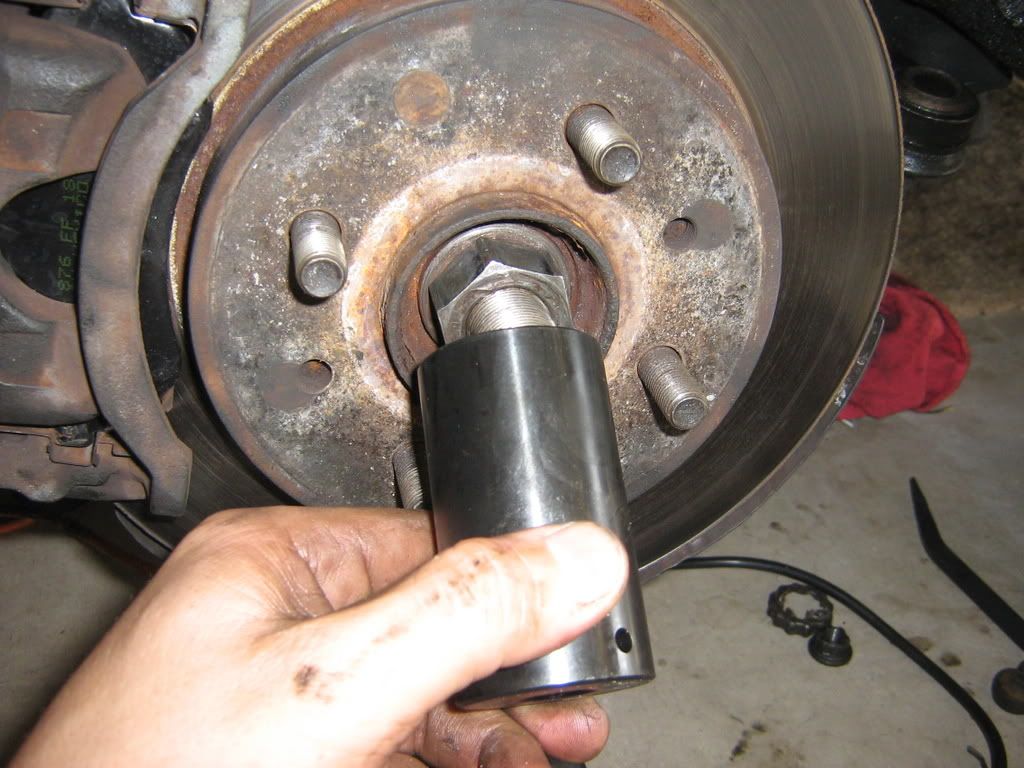
At this time you can take off the caliper & bracket if you want but it's not a vital step, if you want you can remove it and hang it off the spring with a ghetto rigged wire clothes hanger, i did it before but found out later it wasn't neccessary. You will need to remove the 2 camber bolts on the strut, before you do this you may want to etch the outline of the strut using either a pick, or a small flathead screwdriver. Again i have access to an alignment machine at work so i skipped this step. Also, the camber on our cars is not adjustable.
Use a 17 MM deep socket on the nut side , and a 17 MM box wrench on the bolt side ..
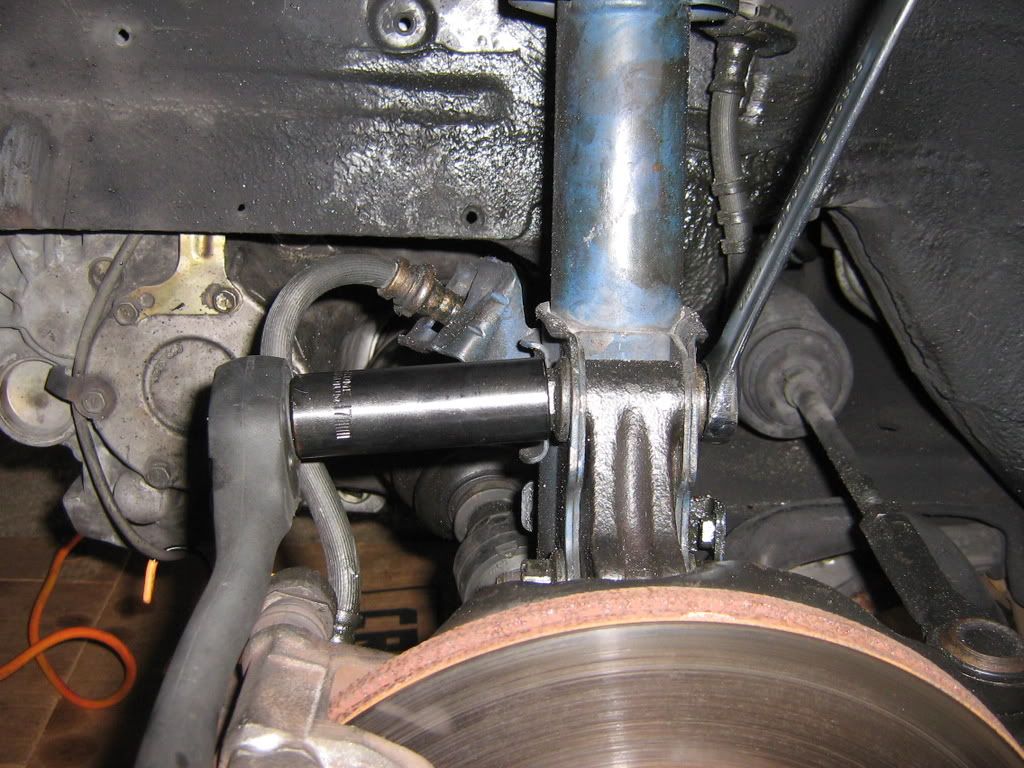
After that i removed the 14 MM nut on the sway bar end link so i can later swing the spindle out of the way when removing the axle.
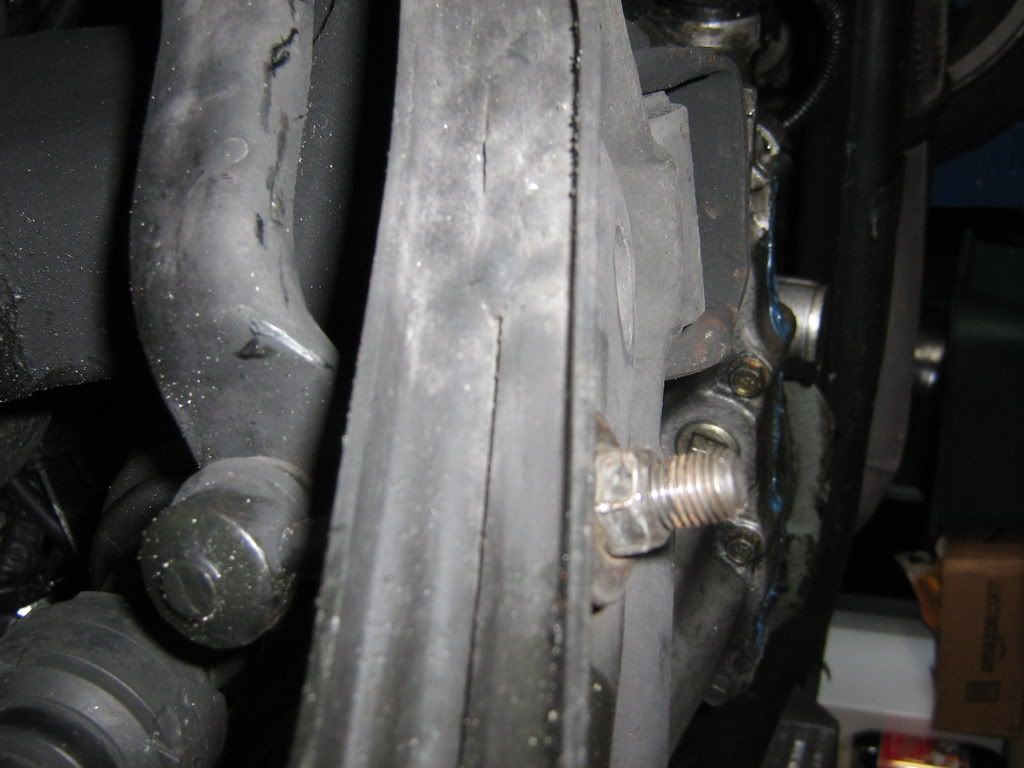
So then, i removed the 19 MM nut on the outer tie rod....
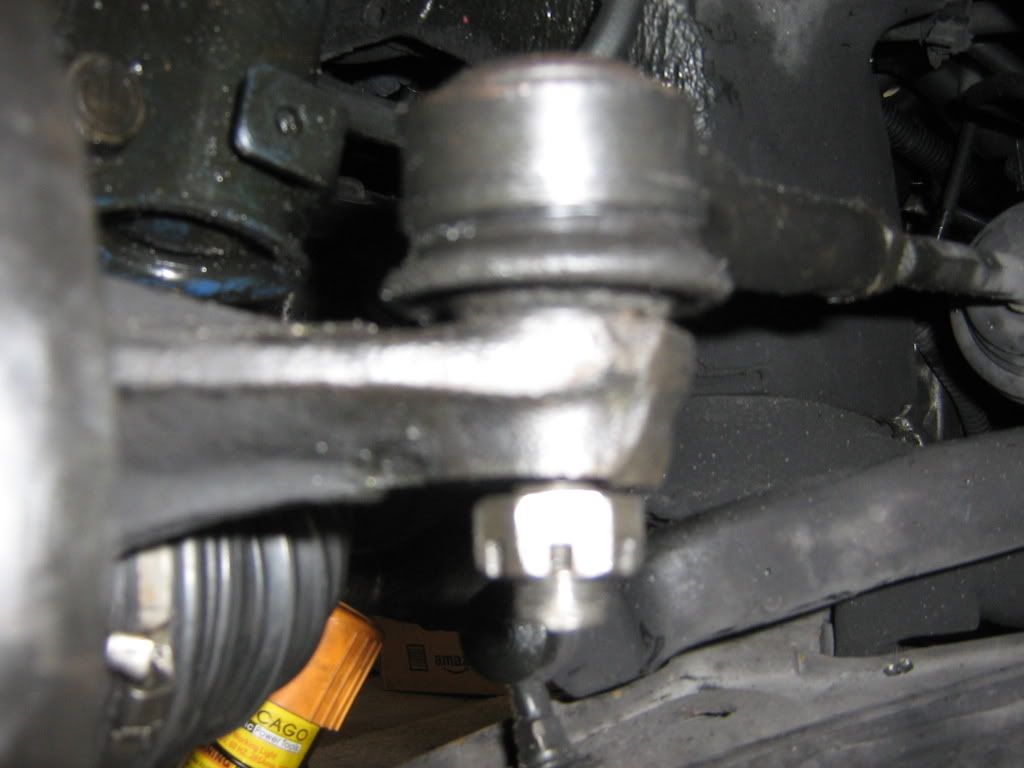
.....And banged the hell out of the spindle arm that holds the tie rod in...
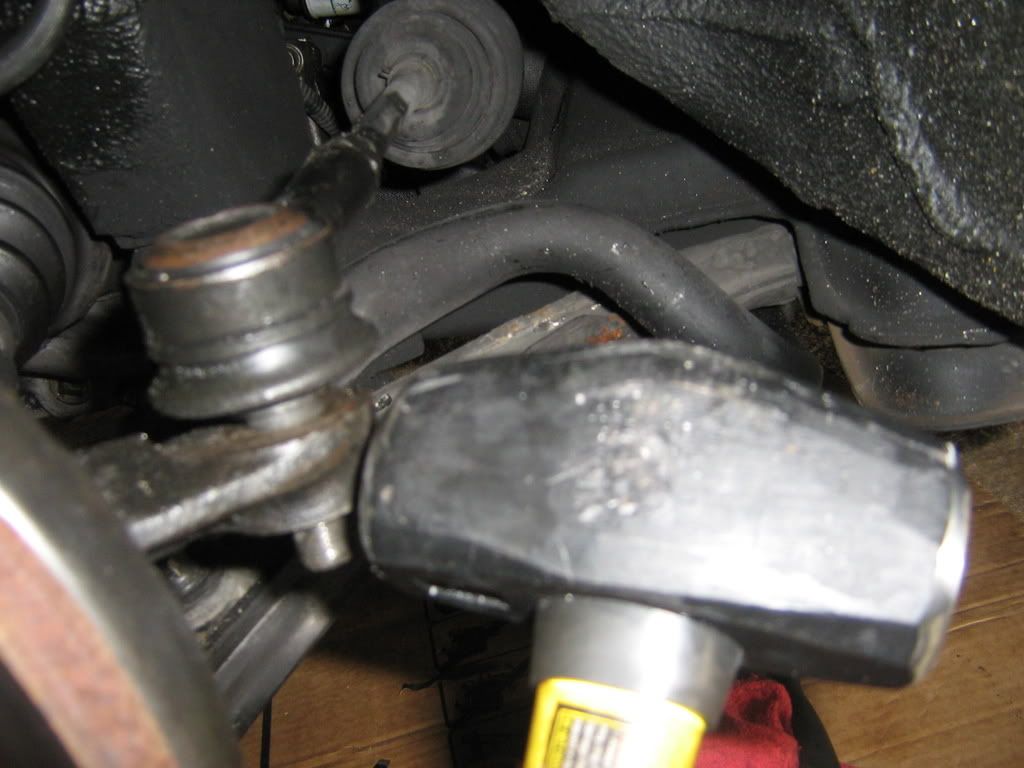
PLEASE DO NO HIT HERE!!! You will " spread " the threaded part of the tie rod and won't be able to get the nut back on , thus having to replace the whole thing. Please resist the temptation, just bang the crap out of the spindle arm, the outer tie rod WILL come loose...
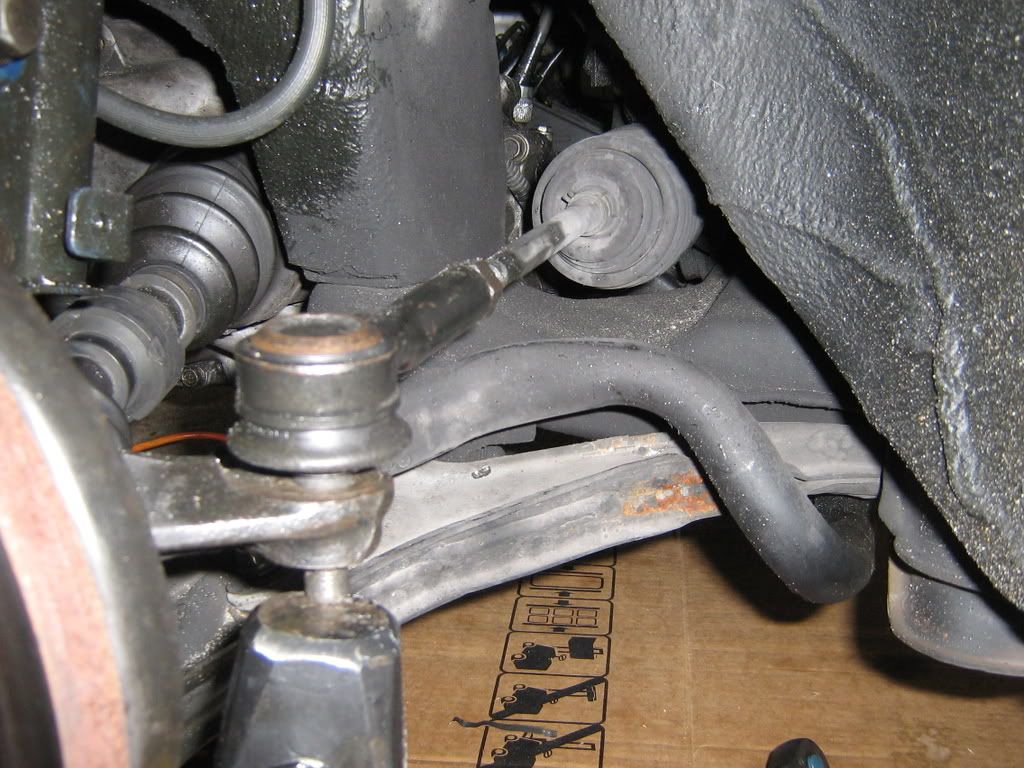
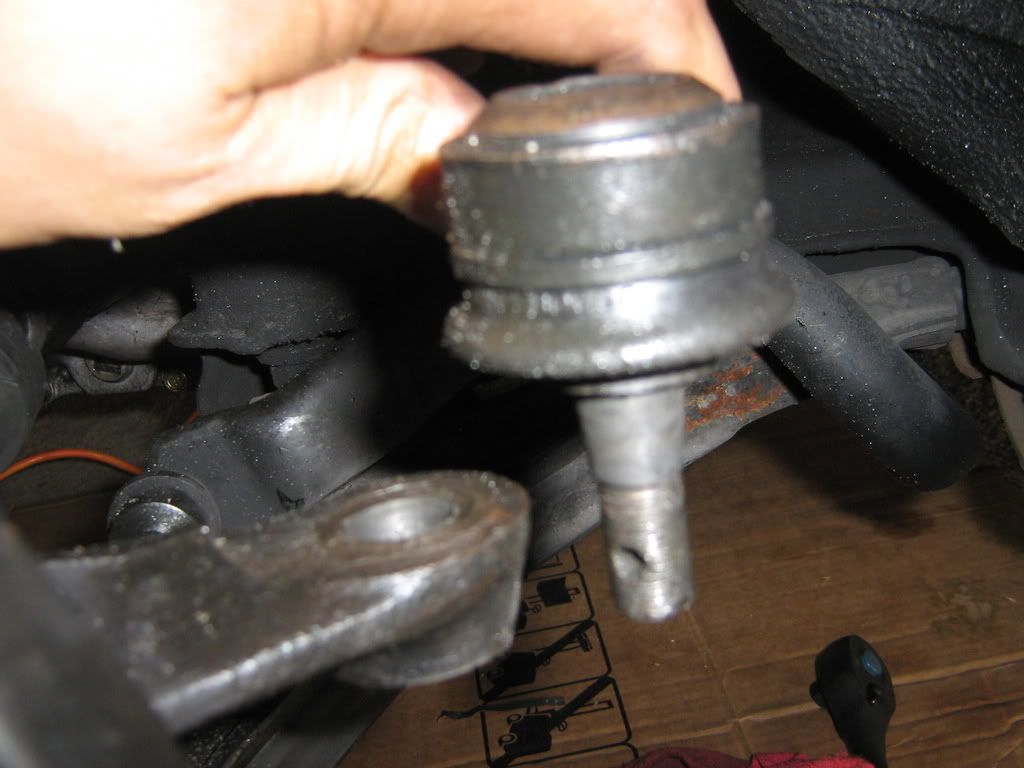
Then, you can hammer out the camber bolts.....
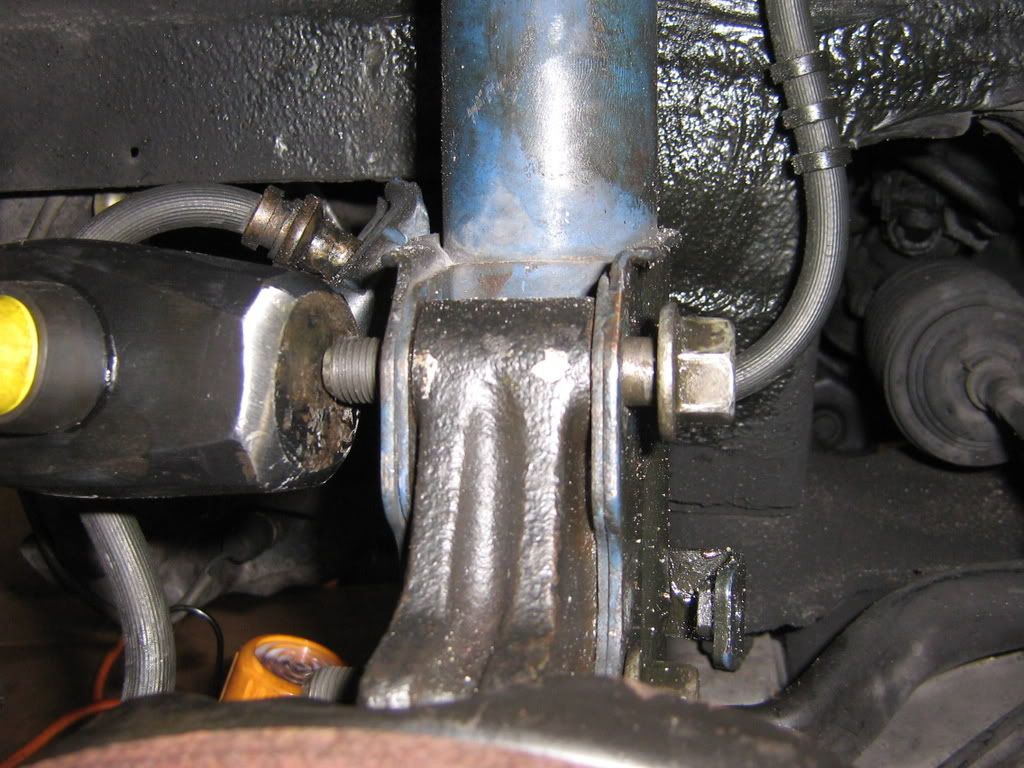
Next the axle should be ready to come loose. If the axle has never been removed , or if it's been a long time it may take alot of muscle to get it out.
If you have to bang on the axle please install the 32 MM axle nut back on before banging on it. A good thing to do also is to put a block of wood in front of the nut and bang on the outside of the wood. In my case the axle has already been out a few times before so it wasn't stuck or frozen in.

After you get the axle out, you can proceed to remove the old boot & clamps , if the old boot isn't there then you can probably just remove the bands ( NOTE: If your cv joint is clicking , better off getting a whole axle , or rebuild it, in my case my cv joint wasn't clicking . ) .
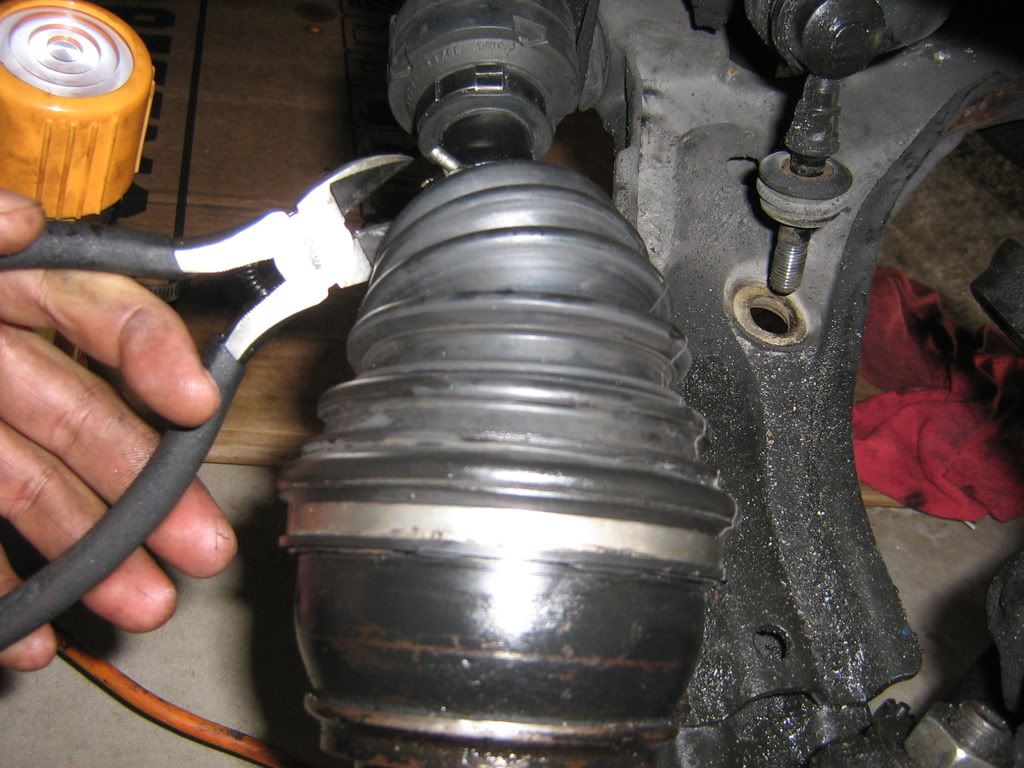
After the old boot & bands are off you can proceed to hammer out the cv joint. A few brisk bangs should get the cv joint out.
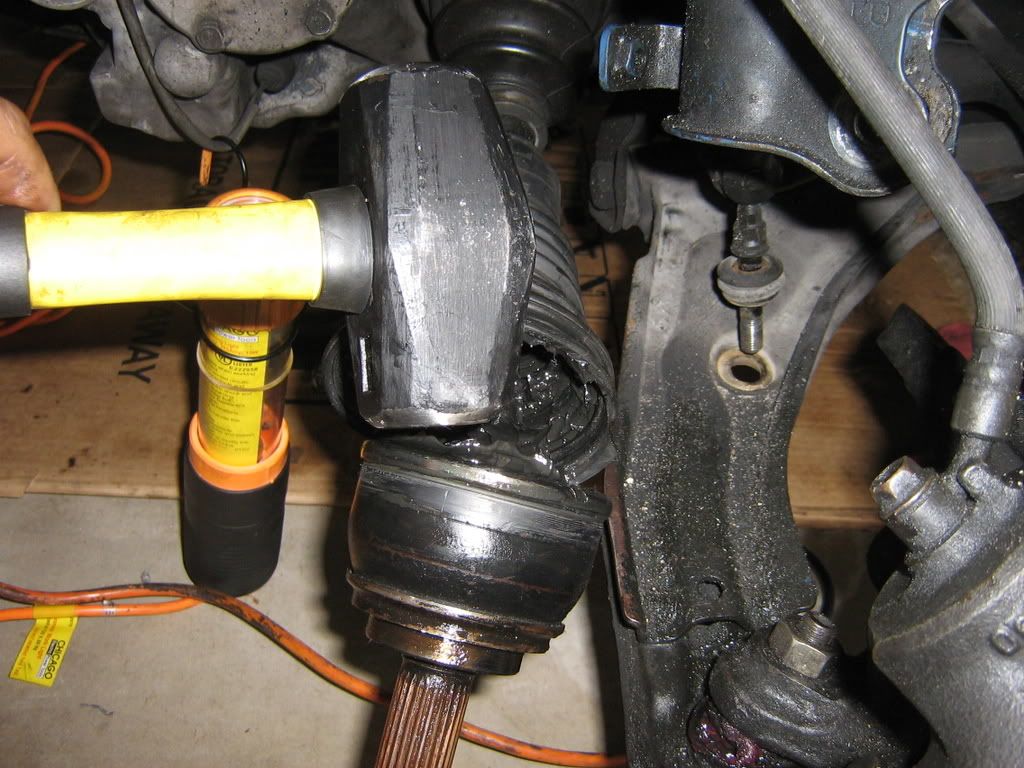
Here is what you should have at this point.
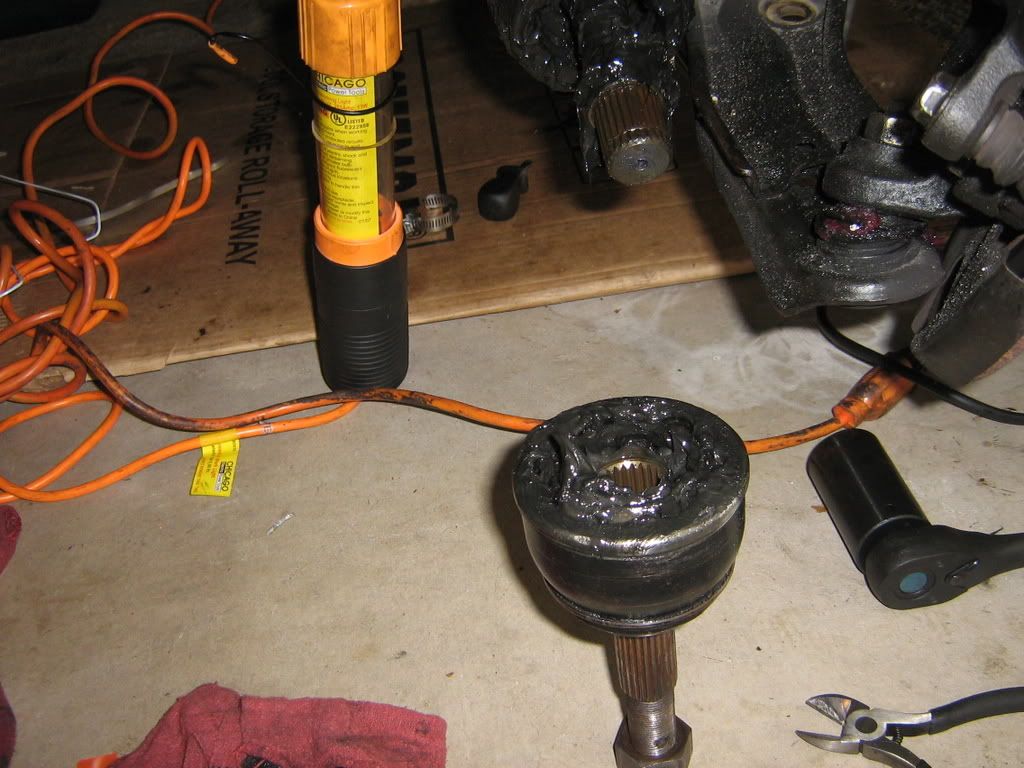
You can proceed to clean off old grease from the shaft side ....
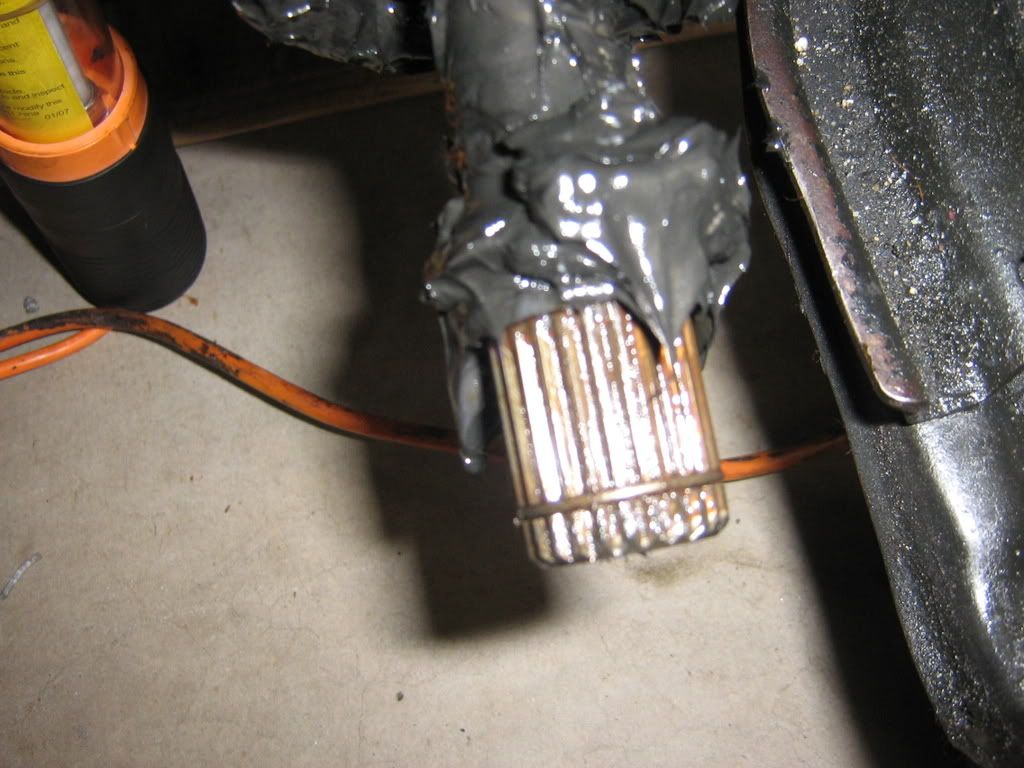
And/or remove old grease from cv joint...
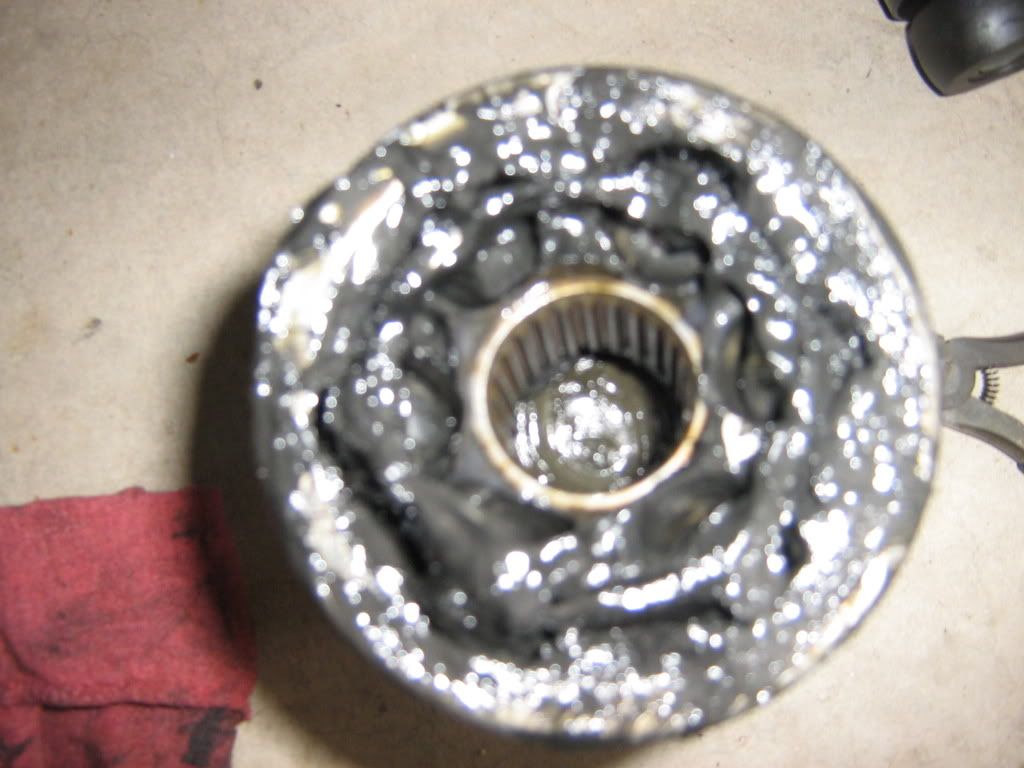
If you are going to rebuild the cv joint , now would be the time, ( there'll be a future writeup on rebuilding your cv joint. ) ,in my case my joint wasn't clicking so i just removed as much grease from the cv joint.
After cleaning off old grease from axle shaft, you want to install the new boot on the shaft & install the clamp here.....

I didn't have a axle boot band clamp tool so i had to ghetto rig it. What i did was i shortened the band by cutting some off and i had a tire plug set that i used to twist the band like so....
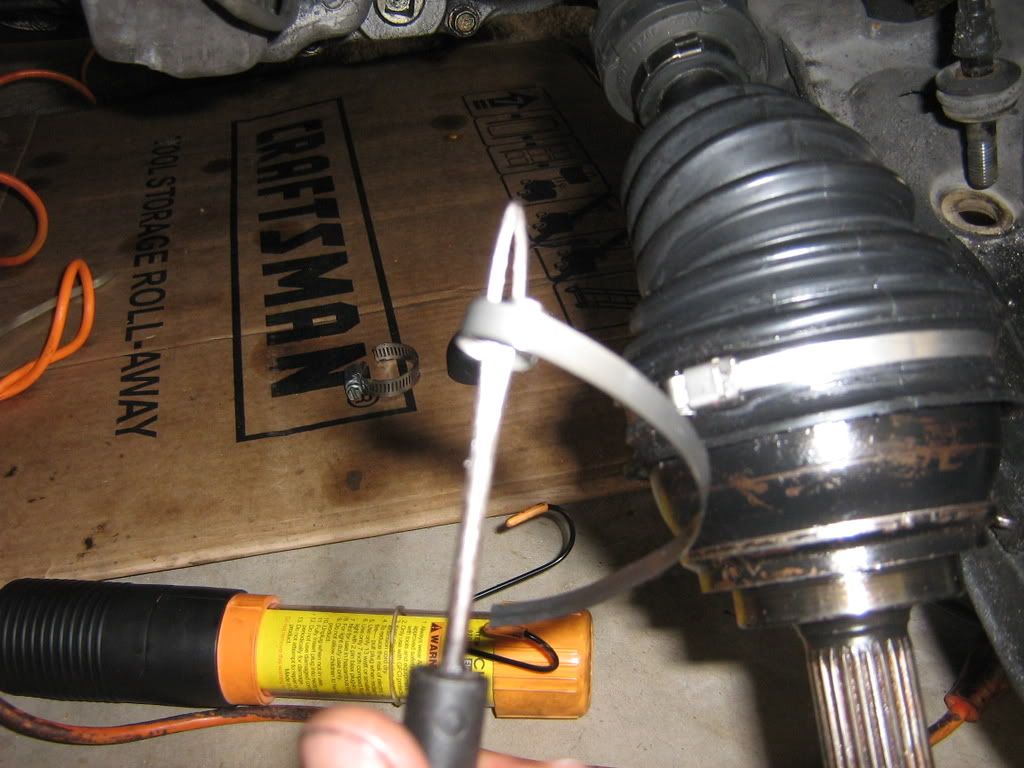
It should be nice & tight with no freeplay/sliding of the boot.

After you do that you can now reinstall the cv joint onto the shaft....( Note: you will have to hammer in the cv joint, so now would be a good time to temporarily install the 32 MM axle nut.)
A few brisk taps from your hammer should do the trick. Don't worry about the C-clip on the end of the shaft, it will slide in, be patient as the cv joint tends to swivel around when you hammer it back. Try and hold it straight and firm in place as you hammer the cv joint back in.
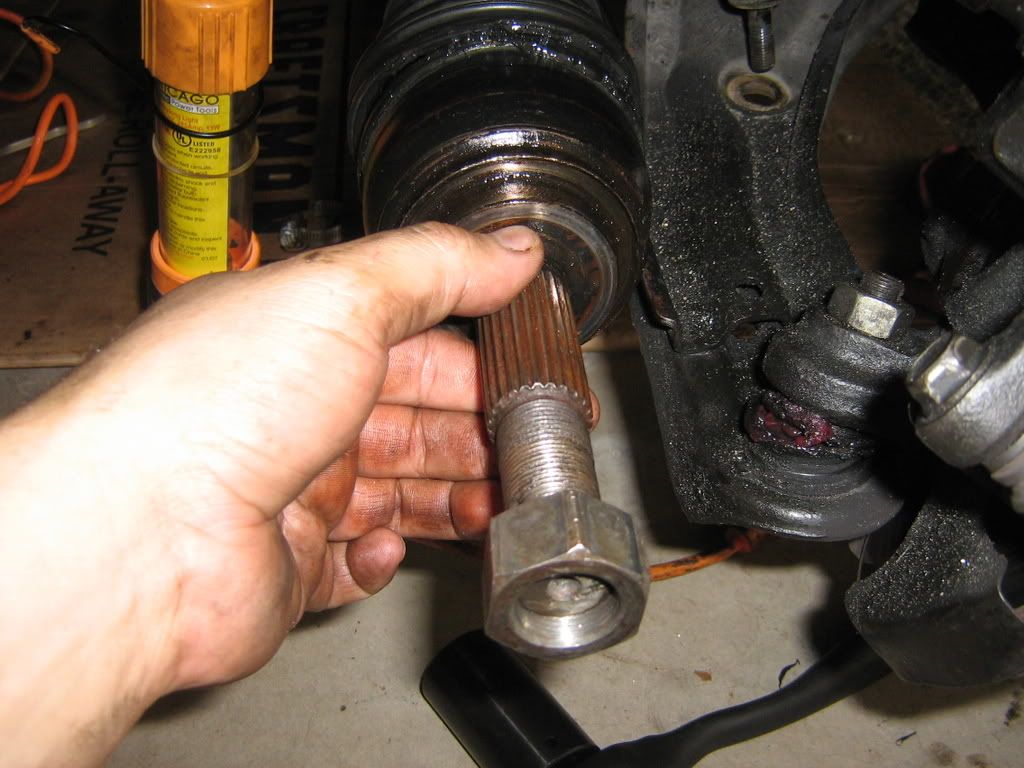
When you go to reinstall the cv joint you should aready have the boot on. "Fold" it backwards as so not to interfere with the grease install.....This may get messy so if you have rags close then use 'em now.
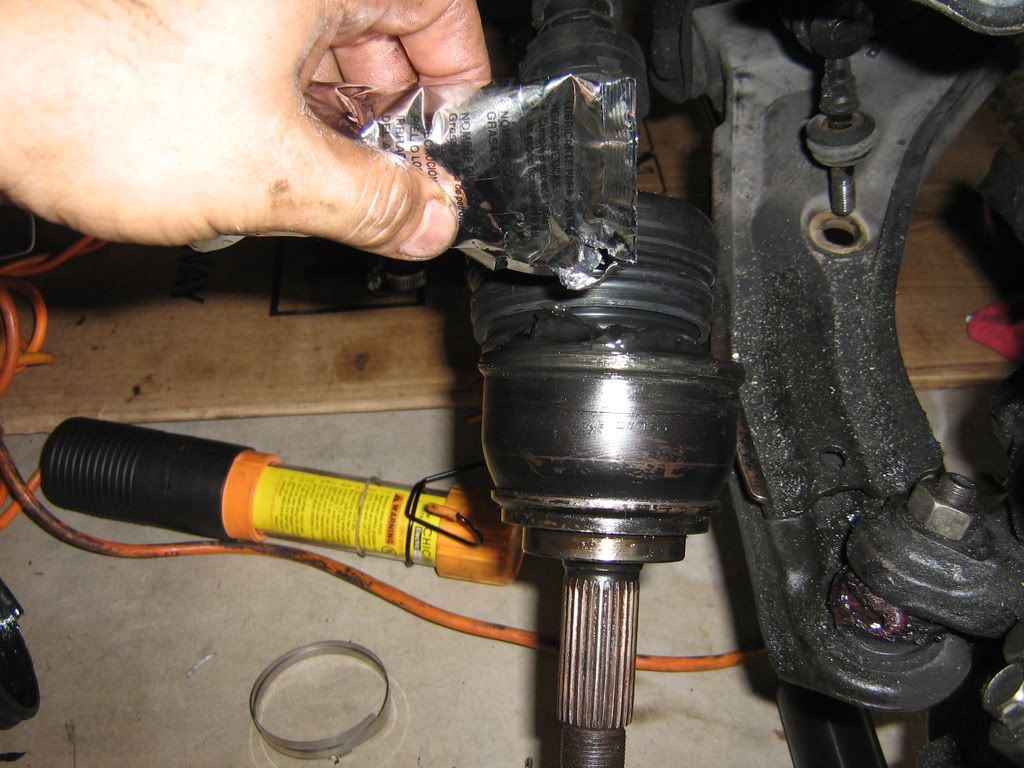
After installing the grease you can now take the boot and " unfold " it and slide it over the cv joint. You don't have to spread the grease around as the centrifugal ( sp? )
motion of the rotating wheels will work the grease into the joint.
Do the same for the outer band as you did with the inner band. It should look like this....
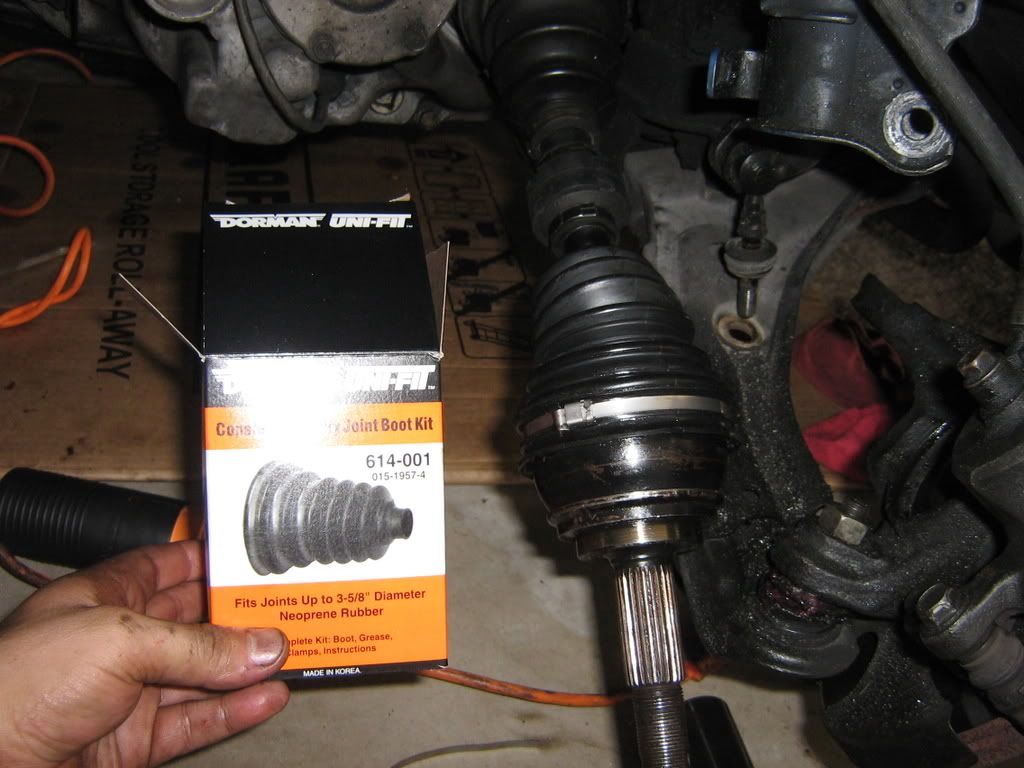
update: I picked up these boot clamp pliers for $20 at Advance Auto Parts, it makes the boot clamps tight as fack, very durable too, also the EMPI kit uses the ear type
I opted to go with a universal boot kit from AZ since they have them readily available. Not the best quality but it's better to have a low quality boot then no boot at all. When i replace my clutch in Feb. i'll be replacing it with an OEM quality boot kit from here. http://www.autopartswarehouse.com/details/QQNissanQQSentraQQEMPIQQCV_Boot_KitQQ19911994QQW0133-1637087.html?apwcid=P1135867996W43b3f85c7ab9e&gan=1
Now to install the axle........" Installation is the reverse of removal " LOL
Now go grab a beer or 8 ......It should only take you about 2-3 hrs if you've never done one. around 1-2 hrs if you're mechanically inclined , and maybe less than an hour if you have access to air tools ......
Merry Christmas SR20-forum!
This is for a 1991 B13, i have also done this on a 2000 P11, although some of the bolts and procedures are different , the steps are pretty much the same.
Things that are needed:
-Jack & jack stands ( optional )
-32MM deep socket
-17MM socket, 17 MM box wrench
-19MM deep , 14 MM socket.
-Air impact gun ( optional ) , 1/2" drive breaker bar.
-needle nose pliers, cutters, axle band pliers ( optional )
Ok so jack up the car, remove the wheel , in my case i removed the driver side wheel ......

To make things easier i cracked loose the 32 MM axle nut at work with my air impact gun ( believe me it makes life easier if you can crack free the axle nut using an impact gun ) , i'm guessing a breaker bar ( quality one ) will also crack loose that nut, if it's super tight & doesn't want to budge, soak it in PB blaster for a few minutes, but i have not myself done it since i have acess to an air compressor. I tightened it back but not too tight so when i got home it would be easier to remove. Anyway.
Remove cotter pin & axle hold down bracket.

Next , take off the 32 MM axle nut.

At this time you can take off the caliper & bracket if you want but it's not a vital step, if you want you can remove it and hang it off the spring with a ghetto rigged wire clothes hanger, i did it before but found out later it wasn't neccessary. You will need to remove the 2 camber bolts on the strut, before you do this you may want to etch the outline of the strut using either a pick, or a small flathead screwdriver. Again i have access to an alignment machine at work so i skipped this step. Also, the camber on our cars is not adjustable.
Use a 17 MM deep socket on the nut side , and a 17 MM box wrench on the bolt side ..

After that i removed the 14 MM nut on the sway bar end link so i can later swing the spindle out of the way when removing the axle.

So then, i removed the 19 MM nut on the outer tie rod....

.....And banged the hell out of the spindle arm that holds the tie rod in...

PLEASE DO NO HIT HERE!!! You will " spread " the threaded part of the tie rod and won't be able to get the nut back on , thus having to replace the whole thing. Please resist the temptation, just bang the crap out of the spindle arm, the outer tie rod WILL come loose...


Then, you can hammer out the camber bolts.....

Next the axle should be ready to come loose. If the axle has never been removed , or if it's been a long time it may take alot of muscle to get it out.
If you have to bang on the axle please install the 32 MM axle nut back on before banging on it. A good thing to do also is to put a block of wood in front of the nut and bang on the outside of the wood. In my case the axle has already been out a few times before so it wasn't stuck or frozen in.

After you get the axle out, you can proceed to remove the old boot & clamps , if the old boot isn't there then you can probably just remove the bands ( NOTE: If your cv joint is clicking , better off getting a whole axle , or rebuild it, in my case my cv joint wasn't clicking . ) .

After the old boot & bands are off you can proceed to hammer out the cv joint. A few brisk bangs should get the cv joint out.

Here is what you should have at this point.

You can proceed to clean off old grease from the shaft side ....

And/or remove old grease from cv joint...

If you are going to rebuild the cv joint , now would be the time, ( there'll be a future writeup on rebuilding your cv joint. ) ,in my case my joint wasn't clicking so i just removed as much grease from the cv joint.
After cleaning off old grease from axle shaft, you want to install the new boot on the shaft & install the clamp here.....

I didn't have a axle boot band clamp tool so i had to ghetto rig it. What i did was i shortened the band by cutting some off and i had a tire plug set that i used to twist the band like so....

It should be nice & tight with no freeplay/sliding of the boot.

After you do that you can now reinstall the cv joint onto the shaft....( Note: you will have to hammer in the cv joint, so now would be a good time to temporarily install the 32 MM axle nut.)
A few brisk taps from your hammer should do the trick. Don't worry about the C-clip on the end of the shaft, it will slide in, be patient as the cv joint tends to swivel around when you hammer it back. Try and hold it straight and firm in place as you hammer the cv joint back in.

When you go to reinstall the cv joint you should aready have the boot on. "Fold" it backwards as so not to interfere with the grease install.....This may get messy so if you have rags close then use 'em now.

After installing the grease you can now take the boot and " unfold " it and slide it over the cv joint. You don't have to spread the grease around as the centrifugal ( sp? )
motion of the rotating wheels will work the grease into the joint.
Do the same for the outer band as you did with the inner band. It should look like this....

update: I picked up these boot clamp pliers for $20 at Advance Auto Parts, it makes the boot clamps tight as fack, very durable too, also the EMPI kit uses the ear type

I opted to go with a universal boot kit from AZ since they have them readily available. Not the best quality but it's better to have a low quality boot then no boot at all. When i replace my clutch in Feb. i'll be replacing it with an OEM quality boot kit from here. http://www.autopartswarehouse.com/details/QQNissanQQSentraQQEMPIQQCV_Boot_KitQQ19911994QQW0133-1637087.html?apwcid=P1135867996W43b3f85c7ab9e&gan=1
Now to install the axle........" Installation is the reverse of removal " LOL
Now go grab a beer or 8 ......It should only take you about 2-3 hrs if you've never done one. around 1-2 hrs if you're mechanically inclined , and maybe less than an hour if you have access to air tools ......
Merry Christmas SR20-forum!


 Be the first to like this post.


 Back to top
