


This is a pretty simple and pretty ghetto way to make clear headlight lenses or whatever from clear acyclic or polycarb sheet.
Keep in mind that you are going to have to find the best temperature from your own project through trial and error as different thicknesses and material will change heating time needed.
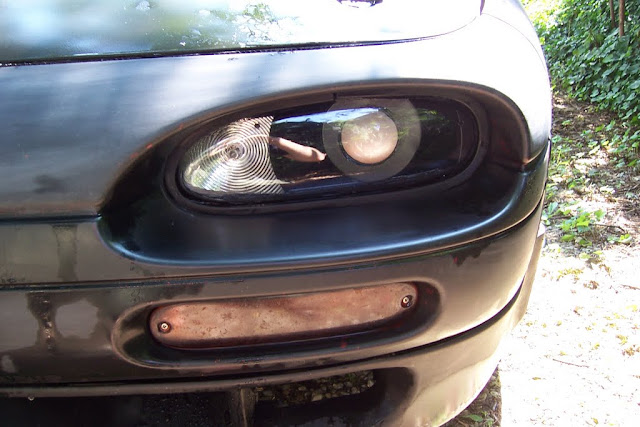
1 Find what you want to copy a shape from. You can make this out of wood or whatever you want. I used the stock headlight glass to start with

When I said whatever I meant whatever this is some cement I bought at Home Depot for $3. (In hindsight plaster of paris might have been a better option for glass.) This is the start of the male mold.

I let the cement set for about a week or so and carefully broke the glass off the cement casting. Next I coated the the cement male with bondo and sanded to smooth out the fluted surface that was left from the inside of the headlight.

When the male casting was finished I made the female. That sorry piece of green scrapwood ( It used to be part of my front porch before my drunk roommate stomped a hole in it with his hardcore dancing) Just trace the male onto the female cut it out and sand the inside smooth. Make the inside large enough to account for the thickness of the plastic you are using so the female doesn't get stuck on the male while you are in the pressing stage.

This is the test plastic I used it was cheap. The plastic is sitting on half of the frame I made to hold the plastic while in the oven.

Here is another shot of the frame with both halves of the wood frame bolted together. Both frames are again just scrapwood nothing fancy. If you are doing multiple runs you might go with some hardwood you will get more uses out of it. The frames sandwich the plastic sheet.

Next things may take some trial and error. Pre heat your oven to 300*-315*. With the acrylic I heated it for about 3 minutes 30 seconds until it gets nice and soft. If it bubbles that is too long and that plastic is junk if you needed it to be clear. (With Lexan you might want to dry it for about an hour in the frame at around 150*-200* so it won't bubble as quickly. Also this is just my experience with the stuff from Home Depot there is more than likely some kind of better stuff out there if you really get into this)
Once the plastic is ready, quickly with put it over the male mold, and use the female to press the plastic over the male's shape. If you dilly dally the plastic will harden and will be junk and you will have to start with a new piece of plastic. If it works just wait for the plastic to cool don't touch the clear part before then you will leave fingerprints.

If everything went well you should have something like this once the molds are pulled off.


You can cut that out with a dremel cut off disc or router bit just take your time with it. (Those white edges are from the female mold not being smooth. They polish out with a buffer and some fine grit sand paper.)
Everything back in the car with a projector added instead of the almost as bright as a hallway night light halogen bulb.
Hope this helps someone good luck!
Keep in mind that you are going to have to find the best temperature from your own project through trial and error as different thicknesses and material will change heating time needed.
1 Find what you want to copy a shape from. You can make this out of wood or whatever you want. I used the stock headlight glass to start with
When I said whatever I meant whatever this is some cement I bought at Home Depot for $3. (In hindsight plaster of paris might have been a better option for glass.) This is the start of the male mold.
I let the cement set for about a week or so and carefully broke the glass off the cement casting. Next I coated the the cement male with bondo and sanded to smooth out the fluted surface that was left from the inside of the headlight.
When the male casting was finished I made the female. That sorry piece of green scrapwood ( It used to be part of my front porch before my drunk roommate stomped a hole in it with his hardcore dancing) Just trace the male onto the female cut it out and sand the inside smooth. Make the inside large enough to account for the thickness of the plastic you are using so the female doesn't get stuck on the male while you are in the pressing stage.
This is the test plastic I used it was cheap. The plastic is sitting on half of the frame I made to hold the plastic while in the oven.
Here is another shot of the frame with both halves of the wood frame bolted together. Both frames are again just scrapwood nothing fancy. If you are doing multiple runs you might go with some hardwood you will get more uses out of it. The frames sandwich the plastic sheet.
Next things may take some trial and error. Pre heat your oven to 300*-315*. With the acrylic I heated it for about 3 minutes 30 seconds until it gets nice and soft. If it bubbles that is too long and that plastic is junk if you needed it to be clear. (With Lexan you might want to dry it for about an hour in the frame at around 150*-200* so it won't bubble as quickly. Also this is just my experience with the stuff from Home Depot there is more than likely some kind of better stuff out there if you really get into this)
Once the plastic is ready, quickly with put it over the male mold, and use the female to press the plastic over the male's shape. If you dilly dally the plastic will harden and will be junk and you will have to start with a new piece of plastic. If it works just wait for the plastic to cool don't touch the clear part before then you will leave fingerprints.
If everything went well you should have something like this once the molds are pulled off.
You can cut that out with a dremel cut off disc or router bit just take your time with it. (Those white edges are from the female mold not being smooth. They polish out with a buffer and some fine grit sand paper.)
Everything back in the car with a projector added instead of the almost as bright as a hallway night light halogen bulb.
Hope this helps someone good luck!
 Be the first to like this post.


") Good stuff!
Good stuff!

