Welcome to the SR20 Community Forum - The Dash.
Register
SR20 forum logo

Thread: installing a bushing kit

+ Reply To Thread
Posts: 31-37 of 37
2011-08-11 02:18:02
#31
Originally Posted by richardwbb
Hmm. Well, I'll try my luck with 'DIY' garage' overhere. I'm sure they will have a press for wheel bearings and see what they can come up with.


Now I'll look in to getting way more stronger then 4.8 rod bearing w/o ordering over internet for kicks, but all I would like to be able to do, is to do this on my own in my shed


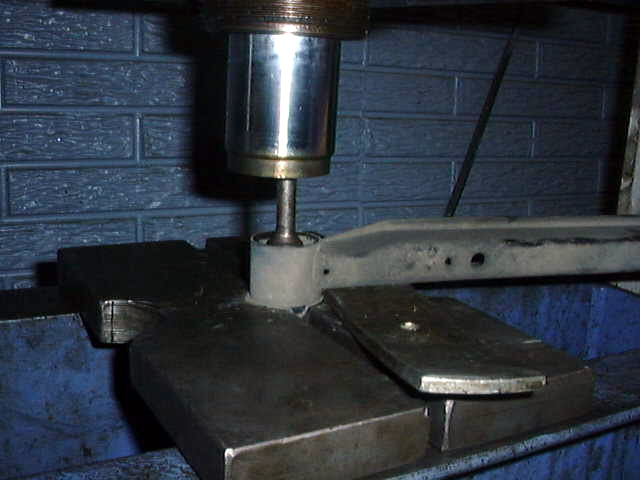
its that sleeve thats making it a PITA thats why I burn mine out! I use a scroll saw with a nice blade to make it even more easier LOL! if it take more then 15 mins ill give my address and you can come punch me in my face! there its a win win!
2011-08-11 04:08:42
#32
Well I used the 5/16 (8mm) inch threaded rod and couplings, with a few different sized fender washers. It all worked out perfect, except for the front A-frame bushings. They were just way to tight. Once you get the tool set up on the bushing it only takes about 30 seconds to ratchet it out. It didn't look like you used any lubricants on the tool, and bushing though? Remember I first mentioned that in my explanation of how this tool works. You need to thoroughly spray the bushing to be removed with penetrating lubricant, like WD-40, PB Blaster, Etc., and use axle grease on the rod, couplings, and contact surfaces of the washers. If you don't it would be like running an engine without oil, and all of that unlubricated friction would cause massive heat buildup on the friction surfaces. It would seize up and break. I stripped out rod and couplings, then used lubricant, and grease without any issue after.
2011-08-11 04:16:06
#33
Oh, and the sleeves can stay in. There is no need to remove them using this tool. If you can just find a piece of metal pipe that's the right size, then a short piece of bar stock could be used instead of a cap. It doesn't have to be fixed to the pipe to work. Just drill your hole in the center of the bar stock for your rod to go through, and use that instead of a cap.
2011-08-12 02:43:07
#34
Ah. Point taken on the lubrication. lol.

I'll repeat this with WD-40 and grease, see whot happens. lol.

Oh, I went to the DIY garage, they had a press and 0 bars and tools and molds that would fit...

I'll keep in mind it is best to remove the bushings sleeve and rubber at once.

Any tips on removing the front A frame bushings? Those are this parts right?


I know a small garage able to do this for me but the owner is on holliday and the dude replacing him started nagging on everything I asked him. His 2 dogs of em kept barking too.
2011-08-12 03:34:33
#35
Well, I'm sure it'll work out for you. It took me a few tries to get the hang of it as well. Just make sure the washers you use are just a little bit smaller than the bushing, but not too much smaller.

As for that bushing, you will need to take the A frame completely off of course, lol. It's not the hard one I was referring to though. The PITA one is up front, that's the rear bushing. I actually cheated a little, and didn't remove the spindle. I was able to remove the cotter pin from the ball joint, and take the nut off with a wrench. There's a big bolt to remove on the front bushing, and then 2 on the rear. That big block of a bushing is held in by a sort of cap that bolts upward into the subframe. I used a little muscle, and a 3 foot breaker bar to get the bolts out. An impact gun would be nice if you have access to one. Also, you will need to remove the nut off the sway bar end link, then your A frame is out.

That big rear bushing can be removed by twisting it back and forth, and pulling it (You may need some WD-40 on this one too.). The smaller front bushing I never removed, as it was solid as hell. If you wanted to though, you could burn it out, or drill the rubber out with a suitable sized drill bit until you can tap it out.
2011-08-17 23:36:15
#36
Well, I tried my same setup today with the grease and WD-40 and some copper grease too.

The old bushing didn't want to move at all and again the threaded rod broke kind of like it was a cheese rod instead of steal. So no go there.

The press I have found but it lacks all the accesories as shown in the picture, which means if I try to press with that, I'll brake something.

I'll try some friends, one has also a bushingkit and I gave him some stuff to test with on the press at his work.

Installing a bushingkit isn't the problem, getting all set makes me go aaargh.
2011-08-18 02:27:46
#37
Mine had 143k on them when removed, but I understand some are worse than others. You may just have to drill or burn them out after all if the press fails. Sorry to hear the bad luck man.
+ Reply To Thread
  • [Type to search users.]
  • Quick Reply
    Thread Information
    There are currently ? users browsing this thread. (? members & ? guests)
    StubUserName

    Back to top