Car: ’98 B14 200sx
Suspension Modifications: ST Front & Rear stabilizer bars
Tools: 13mm Socket, 13mm wrench, drill, 19/64 drill bit, & your handy dermal
First thing you need to do is take out the rear seat and plastic coverings. Once all that is out of the way the real fun starts; these bars are originally made for the b13 so a little moding needs to be done to make it fit in our cars. There are no factory holes for this bar to mount too so we need to drill our own. Also to make it fit flush, some minor cutting and bending needs to be done for a flush fit.
There is one lower set of holes that match up to the brace, but this puts it to high, so the first thing we need to do is drill new holes below these stock ones; about 1.3” lower makes for a perfect fit. Drill your new holes for the four top bolts.

Once drilled, line up the bar and loosely bolt it in. It’s now time to mark the holes for the top four bolts. I also too the time to mark these sections of the lip so I can cut them and bend it down for a more flush fit.

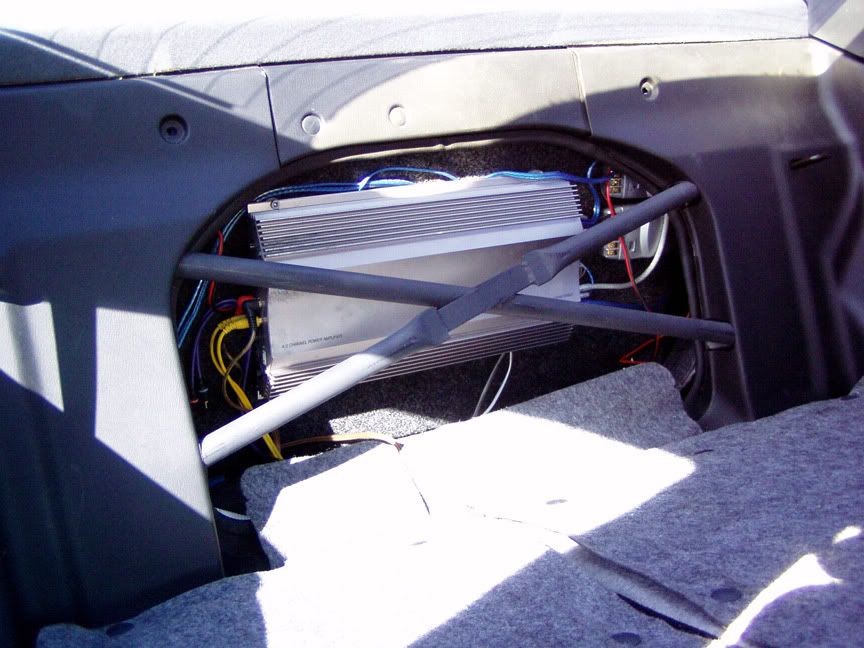
Once all done you should be ready to go: loosely attach the x-brace to all six holes. Once done then go around tightening them all. This will torque down on the bar and set everything slowly for a good fit (thanks diabolic hippo for the advice). Your x-brace is now installed and you are good to go.

All that is left to do is custom cut your plastic pieces so if fits all nice and snug and then put your seats back in. Once in you should notice a large reduction in rear body flex. I don’t have a RSTB so I noticed a huge increase in stability. For the price it is a very nice deal and great product. I highly recommend it. Shawn B. should add this to the “Braces” section of his suspension write up. It’s a good alternative to the IKEA brace, IMO.


Suspension Modifications: ST Front & Rear stabilizer bars
Tools: 13mm Socket, 13mm wrench, drill, 19/64 drill bit, & your handy dermal
First thing you need to do is take out the rear seat and plastic coverings. Once all that is out of the way the real fun starts; these bars are originally made for the b13 so a little moding needs to be done to make it fit in our cars. There are no factory holes for this bar to mount too so we need to drill our own. Also to make it fit flush, some minor cutting and bending needs to be done for a flush fit.
There is one lower set of holes that match up to the brace, but this puts it to high, so the first thing we need to do is drill new holes below these stock ones; about 1.3” lower makes for a perfect fit. Drill your new holes for the four top bolts.

Once drilled, line up the bar and loosely bolt it in. It’s now time to mark the holes for the top four bolts. I also too the time to mark these sections of the lip so I can cut them and bend it down for a more flush fit.

Once all done you should be ready to go: loosely attach the x-brace to all six holes. Once done then go around tightening them all. This will torque down on the bar and set everything slowly for a good fit (thanks diabolic hippo for the advice). Your x-brace is now installed and you are good to go.

All that is left to do is custom cut your plastic pieces so if fits all nice and snug and then put your seats back in. Once in you should notice a large reduction in rear body flex. I don’t have a RSTB so I noticed a huge increase in stability. For the price it is a very nice deal and great product. I highly recommend it. Shawn B. should add this to the “Braces” section of his suspension write up. It’s a good alternative to the IKEA brace, IMO.


 Be the first to like this post.

 Back to top
